
Image optimisation is an important part of web development because it can increase website performance and user experience dramatically. Converting photos to the new WebP format, which delivers high compression and quality, is one of the most efficient ways to optimise them.
We’ll walk you through the process of converting photos to WebP format in Laravel 10, the most recent version of the popular PHP framework.
By the end of this lesson, you’ll be able to convert photos to the WebP format within your Laravel 10 project, allowing you to improve website performance and user experience.
Read More: Laravel 10 How To Use Multiple Database Connection
Let’s get started.
Laravel Installation
Open terminal and run this command to create a laravel project.
composer create-project laravel/laravel myblogIt will create a project folder with name myblog inside your local system.
To start the development server of laravel –
php artisan serveURL: http://127.0.0.1:8000
Assuming laravel already installed inside your system.
Install Laravel “intervention/image” Composer Package
Open project terminal and run this command,
composer require intervention/imagePackage will be responsible to provide functions and methods for conversion an image to formats in laravel.
Once you will install,

Setup Image Controller
Open project terminal and run this command,
php artisan make:controller ImageControllerIt will create a ImageController.php file inside /app/Http/Controllers folder.
Read More: Laravel 10 retry() Helper Function Example Tutorial
Open file and write this code into it,
<?php

namespace App\Http\Controllers;

use Illuminate\Http\Request;
use Illuminate\View\View;
use Illuminate\Http\RedirectResponse;
use Intervention\Image\ImageManagerStatic;
use Illuminate\Support\Str;

class ImageController extends Controller
{
    public function index(): View
    {
        return view('image-upload');
    }

    public function store(Request $request): RedirectResponse
    {
        $this->validate($request, [
            'image' => ['required',
                        'image',
                        'mimes:jpg,png,jpeg,gif,svg',
                        'max:2048'],
        ]);

        $input = $request->all();
        $image  = ImageManagerStatic::make($request->file('image'))->encode('webp');

        $imageName = Str::random().'.webp';

        $image->save(public_path('images/'. $imageName));
        $input['image_name'] = $imageName;

        return back()
            ->with('success', 'Image converted and saved successfully!')
            ->with('imageName', $imageName);
    }
}
Create Blade Template
Go to /resources/views folder and create a file with name image-upload.blade.php
Open file and write this complete code into it,
<!DOCTYPE html>
<html lang="en">

<head>
    <title>How To Convert an Image to Webp in Laravel 10?</title>
    <meta charset="utf-8">
    <meta name="viewport" content="width=device-width, initial-scale=1">
    <link rel="stylesheet" href="https://maxcdn.bootstrapcdn.com/bootstrap/3.4.1/css/bootstrap.min.css">
    <script src="https://ajax.googleapis.com/ajax/libs/jquery/3.6.4/jquery.min.js"></script>
    <script src="https://maxcdn.bootstrapcdn.com/bootstrap/3.4.1/js/bootstrap.min.js"></script>
</head>

<body>

    <div class="container">
        <div class="row">
            <div class="col-sm-8">
                <h3>How To Convert an Image to Webp in Laravel 10</h3>
                <div class="panel panel-primary">
                    <div class="panel-heading">Image to Webp Conversion</div>
                    <div class="panel-body">

                        @if (count($errors) > 0)
                        <div class="alert alert-danger">
                            <strong>Whoops!</strong> There were some problems with your input.<br><br>
                            <ul>
                                @foreach ($errors->all() as $error)
                                <li>{{ $error }}</li>
                                @endforeach
                            </ul>
                        </div>
                        @endif

                        @if ($message = Session::get('success'))
                        <div class="alert alert-success">
                            <strong>{{ $message }}</strong>
                        </div>

                        <div class="row">
                            <div class="col-md-4">
                                <strong>Original Image:</strong>
                                <br />
                                <img src="/images/{{ Session::get('imageName') }}" width="300px" />
                            </div>
                        </div>
                        @endif

                        <form class="form-horizontal" action="{{ route('image.store') }}" method="post"
                            enctype="multipart/form-data">
                            @csrf
                            <div class="form-group">
                                <label class="control-label col-sm-3" for="image">Upload Image:</label>
                                <div class="col-sm-9">
                                    <input type="file" class="form-control" id="image" name="image">
                                </div>
                            </div>

                            <div class="form-group">
                                <div class="col-sm-offset-2 col-sm-10">
                                    <button type="submit" class="btn btn-success">Submit</button>
                                </div>
                            </div>
                        </form>
                    </div>
                </div>
            </div>
        </div>
    </div>

</body>

</html>
Add Route
Open web.php file from /routes folder. Add this route into it.
//...
use App\Http\Controllers\ImageController;

Route::controller(ImageController::class)->group(function(){
    Route::get('image-upload', 'index');
    Route::post('image-upload', 'store')->name('image.store');
});

//...
Application Testing
Run this command into project terminal to start development server,
php artisan serveURL: http://127.0.0.1:8000/image-upload
Read More: Laravel 10 How To Encrypt Decrypt Values in Database
Open form, upload an image and click on Submit.
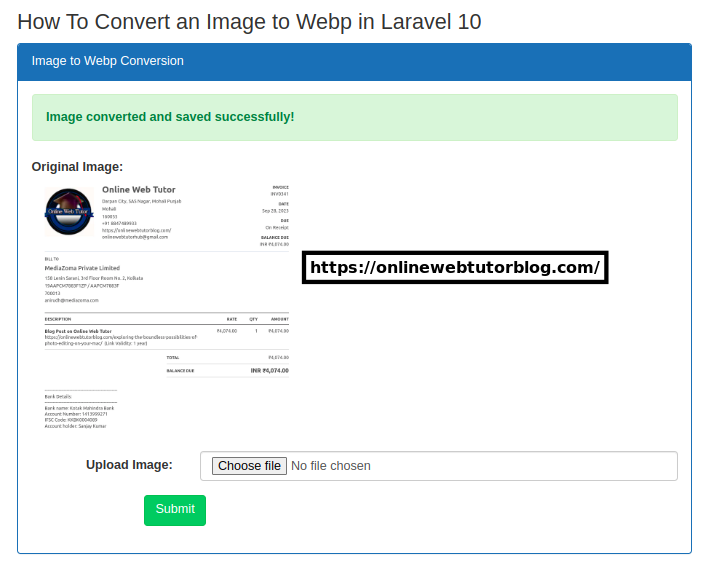
That’s it.
We hope this article helped you to learn about How To Convert an Image to Webp in Laravel 10 Tutorial in a very detailed way.
If you liked this article, then please subscribe to our YouTube Channel for PHP & it’s framework, WordPress, Node Js video tutorials. You can also find us on Twitter and Facebook.
Read more