Inside this article we will see the concept i.e Laravel 9 Image Upload with Tailwind CSS Tutorial. Article contains the classified information about Image upload in laravel with the layout build in tailwind css.
Tailwind CSS is basically a utility-first CSS framework for rapidly building custom user interfaces. It is a highly customizable, low-level CSS framework that gives you all of the building blocks you need to build bespoke designs without any annoying opinionated styles you have to fight to override.
Learn More –
- Laravel 9 How To Use Ternary Operator in Blade Templates
- Laravel 9 How to Select Specific Columns in Eloquent Model
- Laravel 9 How To Get All Models From Application Tutorial
- Laravel 9 How to Make Hash Password Tutorial
Let’s get started.
Laravel Installation
Open terminal and run this command to create a laravel project.
composer create-project laravel/laravel myblogIt will create a project folder with name myblog inside your local system.
To start the development server of laravel –
php artisan serveURL: http://127.0.0.1:8000
Assuming laravel already installed inside your system.
Create Database & Connect
To create a database, either we can create via Manual tool of PhpMyadmin or by means of a mysql command.
CREATE DATABASE laravel_app;
To connect database with application, Open .env file from application root. Search for DB_ and update your details.
DB_CONNECTION=mysql
DB_HOST=127.0.0.1
DB_PORT=3306
DB_DATABASE=laravel_app
DB_USERNAME=root
DB_PASSWORD=root
Create Migration & Model
Open project into terminal and run this command. This command will create model file as well as migration file.
$ php artisan make:model Image -mcIt will create two files:
- Image.php, a model file inside /app/Http/Models folder.
- 2022_08_11_153105_create_images_table.php, a migration file inside /database/migrations folder.
Open migration file xxx_create_images_table.php and write this code into it.
<?php

use Illuminate\Database\Migrations\Migration;
use Illuminate\Database\Schema\Blueprint;
use Illuminate\Support\Facades\Schema;

return new class extends Migration
{
    /**
     * Run the migrations.
     *
     * @return void
     */
    public function up()
    {
        Schema::create('images', function (Blueprint $table) {
            $table->id();
            $table->string('image');
            $table->timestamps();
        });
    }

    /**
     * Reverse the migrations.
     *
     * @return void
     */
    public function down()
    {
        Schema::dropIfExists('images');
    }
};
Open model file Image.php and write this following code into it.
<?php

namespace App\Models;

use Illuminate\Database\Eloquent\Factories\HasFactory;
use Illuminate\Database\Eloquent\Model;

class Image extends Model
{
    use HasFactory;

    protected $fillable = [
        'image'
    ];
}
Run Migration
Open project into terminal and run this command:
$ php artisan migrateIt will create images table inside your database.
Create Controller
Next,
We need to create a controller file. Again, back to project terminal and run this command.
$ php artisan make:controller UploadImageControllerIt will create UploadImageController.php file inside /app/Http/Controllers folder.
Open UploadImageController.php and write this following code into it.
<?php
namespace App\Http\Controllers;
use Illuminate\Http\Request;
use App\Models\Image;
use Illuminate\Support\Facades\Session;
class UploadImageController extends Controller
{
/**
* Write code on Method
*
* @return response()
*/
public function index()
{
return view('image');
}
/**
* Write code on Method
*
* @return response()
*/
public function store(Request $request)
{
$this->validate($request, [
'image' => 'required|image|mimes:jpg,png,jpeg,gif,svg|max:2048',
]);
$image_path = $request->file('image')->store('image', 'public');
$data = Image::create([
'image' => $image_path,
]);
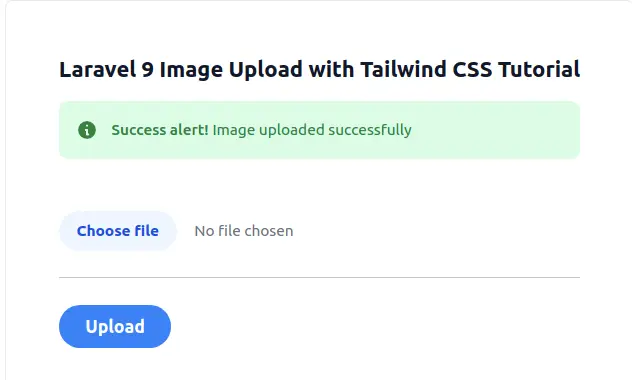
session()->flash('success', 'Image uploaded successfully');
return redirect()->route('image.index');
}
}
Create Blade Layout File
Go to /resources/views folder and create a file with name image.blade.php
Open image.blade.php and write this complete code into it.
<!DOCTYPE html>
<html>

<head>
    <title>Laravel 9 Image Upload with Tailwind CSS Tutorial</title>
    <link href="https://cdn.jsdelivr.net/npm/bootstrap@5.0.2/dist/css/bootstrap.min.css" rel="stylesheet">
    <script src="https://cdn.tailwindcss.com"></script>
</head>

<body>
    <div class="flex mt-20 justify-center">
        <div class="ring-1 ring-slate-700/10 rounded-md p-5 shadow-black/5">

            <div class="w-100 bg-white">
                <h2 class="text-xl flex-auto font-semibold text-slate-900">
                    Laravel 9 Image Upload with Tailwind CSS Tutorial
                </h2>
            </div>

            @if ($message = Session::get('success'))

                <div class="mt-3 flex p-3 mb-2 text-sm text-green-700 bg-green-100 rounded-lg dark:bg-green-200 dark:text-green-800"
                    role="alert">
                    <svg aria-hidden="true" class="inline flex-shrink-0 mr-3 w-5 h-5" fill="currentColor"
                        viewBox="0 0 20 20" xmlns="http://www.w3.org/2000/svg">
                        <path fill-rule="evenodd"
                            d="M18 10a8 8 0 11-16 0 8 8 0 0116 0zm-7-4a1 1 0 11-2 0 1 1 0 012 0zM9 9a1 1 0 000 2v3a1 1 0 001 1h1a1 1 0 100-2v-3a1 1 0 00-1-1H9z"
                            clip-rule="evenodd"></path>
                    </svg>
                    <span class="sr-only">Info</span>
                    <div>
                        <span class="font-medium">Success alert! </span>{{ $message }}
                    </div>
                </div>

            @endif

            <form action="{{ route('image.store') }}" method="POST" enctype="multipart/form-data" class="mt-5">
                @csrf

                <span class="sr-only">Choose File</span>

                <input type="file" name="image" id="inputImage"
                    class="@error('image') is-invalid @enderror block w-full text-sm text-gray-500 file:mr-4 file:py-2 file:px-4 file:rounded-full file:border-0 file:text-sm file:font-semibold file:bg-blue-50 file:text-blue-700 hover:file:bg-blue-100" />

                @error('image')
                    <span class="text-danger">{{ $message }}</span>
                @enderror
                <hr class="my-4">

                <button type="submit"
                    class="px-4 py-2 bg-blue-500 hover:bg-blue-700 text-white font-bold py-2 px-4 rounded-full">Upload</button>

            </form>
        </div>
    </div>
</body>

</html>
Create Image Storage Path
We will generate a storage path to save upload images into application.
Run this command to create storage path:
$ php artisan storage:linkIt will create /storage/app/public folder into root of the application. Images will be upload and saved into image folder inside it.
Add Route
Open web.php from /routes folder and add these route into it.
//...
use App\Http\Controllers\UploadImageController;

//...

Route::controller(UploadImageController::class)->group(function () {
    Route::get('image-upload', 'index')->name('image.index');
    Route::post('image-upload', 'store')->name('image.store');
});
Application Testing
Run this command into project terminal to start development server,
php artisan serveURL: http://127.0.0.1:8000/image-upload
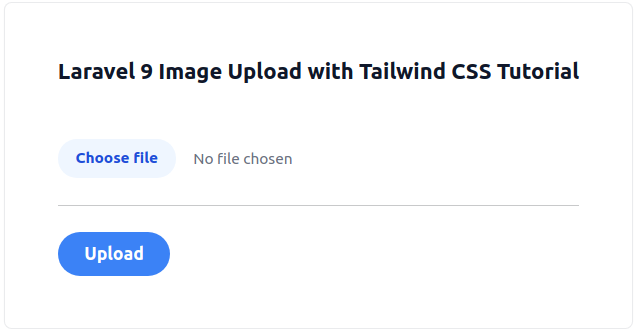
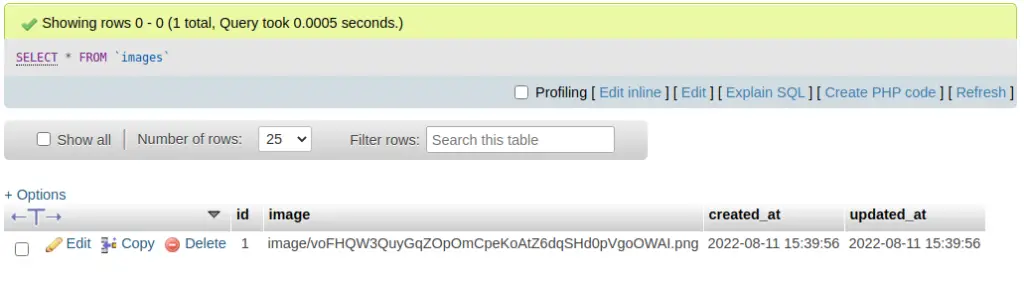
Once you select an image and upload. It will save uploaded image into storage folder and save into database table.
Database table view of images table:
We hope this article helped you to Learn Laravel 9 Image Upload with Tailwind CSS Tutorial in a very detailed way.
If you liked this article, then please subscribe to our YouTube Channel for PHP & it’s framework, WordPress, Node Js video tutorials. You can also find us on Twitter and Facebook.
Read more