Inside this article we will see the concept i.e PHP MySQLi File Upload with Progress Bar Using jQuery Ajax. Tutorial contains the classified information about uploading image in PHP. We will use mysqli connection for database connectivity and operations.
If you are looking for an article to understand the image upload process with progress bar using ajax then this article will be super easy to understand. This will give you the complete idea about form submission with image file in PHP MySQLi.
Upload process with progress bar is very creative to user. It updates the status of uploaded file.
Learn More –
- PHP MySQLi Select2 Ajax Autocomplete Search Tutorial
- How To Send PHP cURL POST Request with JSON Parameters
- PHP MySQLi jQuery Ajax File Upload with Type Validation
- PHP MySQLi How To Use Select2 for Multiple Select Tutorial
Let’s get started.
Create Database & Table
To create a database, either we can create via Manual tool of PhpMyadmin or by means of a mysql command.
CREATE DATABASE php_applications;Inside this database, we need to create a table.
Table we need – images
CREATE TABLE `images` (
 `id` int(11) NOT NULL AUTO_INCREMENT,
 `image_name` varchar(220) NOT NULL,
 `status` int(5) NOT NULL DEFAULT '1',
 `uploaded_on` timestamp NOT NULL DEFAULT CURRENT_TIMESTAMP,
 PRIMARY KEY (`id`)
) ENGINE=InnoDB DEFAULT CHARSET=latin1
Application Folder Structure
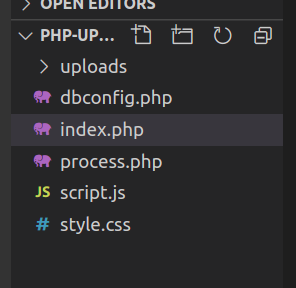
You need to create a folder structure to develop this application in PHP and MySQLi. Have a look the files and folders inside this application –
Create a folder with name php-upload-with-progress and create these 5 files into it. And also create a uploads/ folder. This is to store images. Make sure this folder should have sufficient permission to read and write files into it.
Database Configuration
Open dbconfig.php file from folder. Add these lines of code into it.
<?php
/*
 @Author: Sanjay Kumar
 @Project: PHP MySQLi File Upload with Progress Bar Using jQuery Ajax
 @Email: onlinewebtutorhub@gmail.com
 @Website: https://onlinewebtutorblog.com/
*/

// Database configuration
$host   = "localhost";
$dbuser = "admin";
$dbpass = "Admin@123";
$dbname = "php_applications";

// Create database connection
$conn = new mysqli($host, $dbuser, $dbpass, $dbname);

// Check connection
if ($conn->connect_error) {
    die("Connection failed: " . $conn->connect_error);
}
Application Programming
Open index.php file and write this following code into it. This file contains all about the layout and linking of style.css, script.js and plugin files.
<?php
/*
 @Author: Sanjay Kumar
 @Project: PHP MySQLi File Upload with Progress Bar Using jQuery Ajax
 @Email: onlinewebtutorhub@gmail.com
 @Website: https://onlinewebtutorblog.com/
*/
?>

<!DOCTYPE html>
<html>

<head>
    <meta charset="utf-8">
    <meta name="viewport" content="width=device-width, initial-scale=1">
    <title>PHP MySQLi File Upload with Progress Bar Using jQuery Ajax</title>
    <link rel="stylesheet" href="https://cdn.jsdelivr.net/npm/bootstrap@4.6.1/dist/css/bootstrap.min.css" />
    <link rel="stylesheet" href="style.css" />
</head>

<body>
    <div class="container mt-5">
        <div class="row">
            <div class="col-md-12">
                <div class="card w-75 m-auto">
                    <div class="card-header text-center bg-primary text-white">
                        <h4>PHP MySQLi File Upload with Progress Bar Using jQuery Ajax</h4>
                    </div>
                    <div class="card-body">
                        <div class='progress' id="progressDivId">
                            <div class='progress-bar' id='progressBar'></div>
                            <div class='percent' id='percent'>0%</div>
                        </div>
                        <div id='outputImage'></div>
                        <div id='error'></div>
                        <form action="javascript:void(0)" id="uploadForm" name="frmupload" method="post" enctype="multipart/form-data">
                            <div class="form-group">
                                <label><strong>Select Image : </strong><span class="text-danger"> *</span></label>
                                <input type="file" id="uploadImage" name="uploadImage" class="form-control">
                            </div>
                            <br>
                            <div class="d-flex">
                                <input id="submitButton" type="submit" name='btnSubmit' value="Upload" class="btn btn-success">
                            </div>
                        </form>
                    </div>
                </div>
            </div>
        </div>
    </div>

    <script src="https://code.jquery.com/jquery-3.3.1.min.js" type="text/javascript"></script>
    <script type="text/javascript" src="https://cdnjs.cloudflare.com/ajax/libs/jquery.form/4.3.0/jquery.form.min.js"></script>
    <script type="text/javascript" src="script.js"></script>

</body>

</html>
Manage Application Styling
Open style.css file from folder and write this code into it. This file contains the design part of progress bar.
/*
 @Author: Sanjay Kumar
 @Project: PHP MySQLi File Upload with Progress Bar Using jQuery Ajax
 @Email: onlinewebtutorhub@gmail.com
 @Website: https://onlinewebtutorblog.com/
*/

.progress {
    display: none;
    position: relative;
    height: 25px;
    background-color: #ddd;
    border-radius: 15px;
}

.progress-bar {
    background-color: green;
    width: 0%;
    height: 30px;
    border-radius: 4px;
}

.percent {
    position: absolute;
    display: inline-block;
    color: #fff;
    font-weight: bold;
    top: 87%;
    left: 50%;
    margin-top: -9px;
    margin-left: -20px;
}

#outputImage {
    display: none;
    margin-top: 10px;
}

#outputImage img {
    max-width: 300px;
}
Manage Application Scripting
Open script.js from folder and write this code into it. This is all about for the functions of ajax based upload. It displays progress bar when image file uploads.
/*
 @Author: Sanjay Kumar
 @Project: PHP MySQLi File Upload with Progress Bar Using jQuery Ajax
 @Email: onlinewebtutorhub@gmail.com
 @Website: https://onlinewebtutorblog.com/
*/

$(document).ready(function() {

    $('#submitButton').click(function() {
        $('#uploadForm').ajaxForm({
            target: '#outputImage',
            url: 'process.php',
            beforeSubmit: function() {
                $("#outputImage").hide();
                if ($("#uploadImage").val() == "") {
                    $("#outputImage").show();
                    $("#outputImage").html("<div class='alert alert-danger'>Choose a file to upload.</div>");
                    return false;
                }

                $("#progressDivId").css("display", "block");

                var percentValue = '0%';

                $('#progressBar').width(percentValue);
                $('#percent').html(percentValue);

            },

            uploadProgress: function(event, position, total, percentComplete) {

                var percentValue = percentComplete + '%';
                $("#progressBar").animate({
                    width: '' + percentValue + ''
                }, {
                    duration: 5000,
                    easing: "linear",
                    step: function(x) {
                        percentText = Math.round(x * 100 / percentComplete);
                        $("#percent").text(percentText + "%");
                        if (percentText == "100") {
                            $("#outputImage").show();
                            $("#error").html("<div class='alert alert-success mt-2'>Image Successfully Uploaded.</div>");

                        }
                    }
                });
            },
            error: function(response, status, e) {
                alert('Oops something went.');
            },

            complete: function(xhr) {
                if (xhr.responseText && xhr.responseText != "error") {
                    $("#outputImage").html(xhr.responseText);
                } else {
                    $("#outputImage").show();
                    $("#outputImage").html("<div class='alert alert-danger'>Problem in uploading file.</div>");
                    $("#progressBar").stop();
                }
            }
        });
    });
});
Ajax Handler – Form Submit
Open process.php file from folder and write this code into it. This file will process ajax request and save image file into uploads/ folder and also save into database table.
<?php
/*
 @Author: Sanjay Kumar
 @Project: PHP MySQLi File Upload with Progress Bar Using jQuery Ajax
 @Email: onlinewebtutorhub@gmail.com
 @Website: https://onlinewebtutorblog.com/
*/
// Include the database configuration file
require 'dbconfig.php';

if (isset($_POST['btnSubmit'])) {

    if (preg_match("/\S+/", $_FILES["uploadImage"]["tmp_name"]) === 0) {
        echo "*The image field is required.";
        exit();
    }

    $uploadfile = $_FILES["uploadImage"]["tmp_name"];
    $folderPath = "uploads/";

    if (!is_writable($folderPath) || !is_dir($folderPath)) {
        echo "Please check folder permission";
        exit();
    }
    if (move_uploaded_file($_FILES["uploadImage"]["tmp_name"], $folderPath . $_FILES["uploadImage"]["name"])) {

        $stmt = $conn->prepare("INSERT INTO images (image_name) VALUES (?)");
        $stmt->bind_param("s", $filename);
        $filename = $folderPath . $_FILES["uploadImage"]["name"];

        $stmt->execute();

        echo '<img src="' . $folderPath . "" . $_FILES["uploadImage"]["name"] . '">';
        exit();
    }
}
Application Testing
Now,
URL: http://localhost/php-upload-with-progress/index.php
Upload Image Form
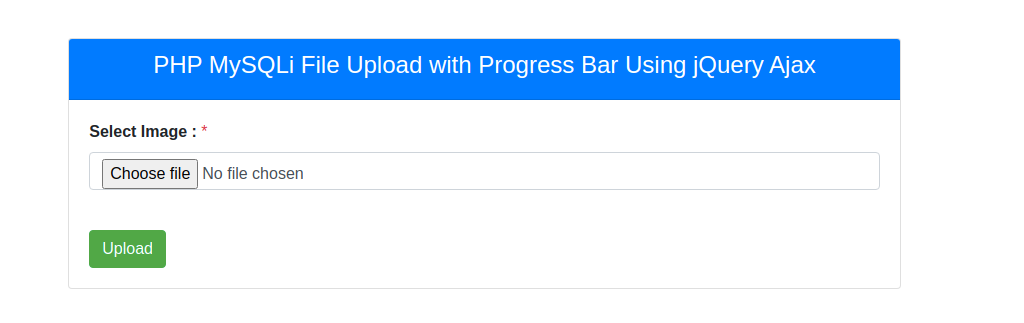
When you select any image file and when uploads, it shows progress bar.
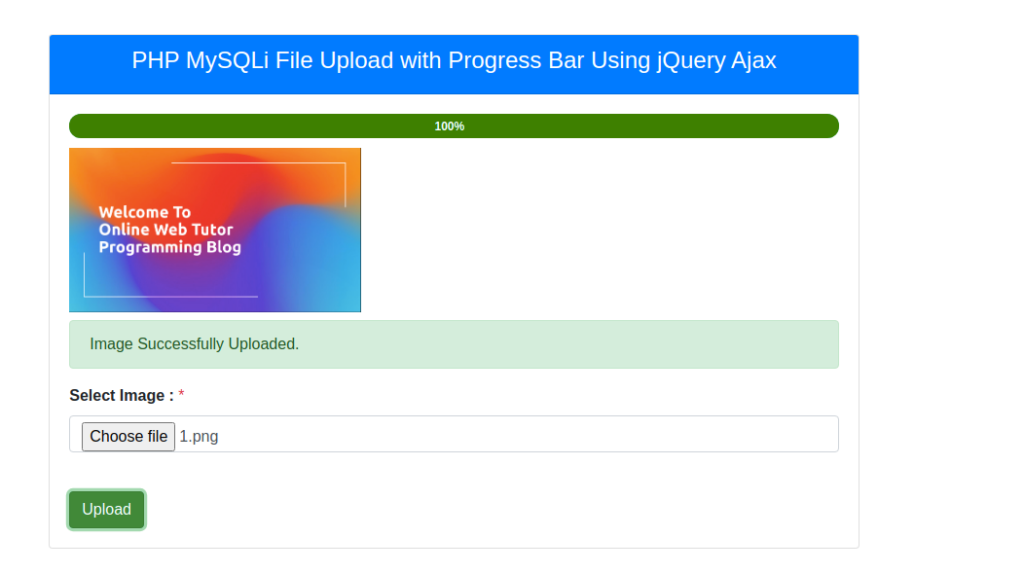
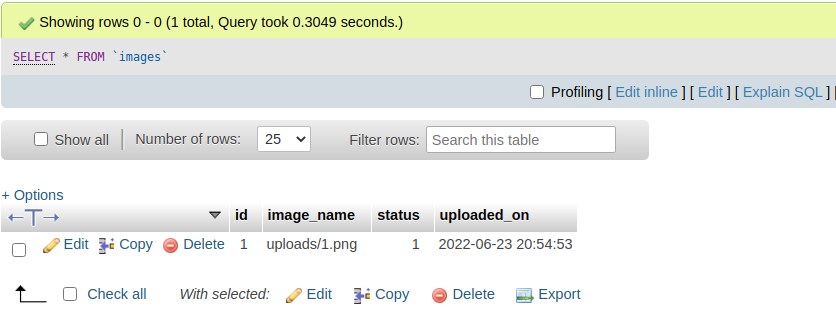
Uploaded image will be saved into uploads/ folder and also save inside database.
Download Complete Source Code
We hope this article helped you to learn PHP MySQLi File Upload with Progress Bar Using jQuery Ajax Tutorial in a very detailed way.
If you liked this article, then please subscribe to our YouTube Channel for PHP & it’s framework, WordPress, Node Js video tutorials. You can also find us on Twitter and Facebook.
Read more