Inside this article we will see the concept i.e Step by Step To Build Your Own Chrome Extension Tutorial. Article contains the classified information i.e How to Build a Chrome Extension – Basics of Chrome extension development.
Chrome extensions are small software programs that can modify or enhance the functionality of the Google Chrome web browser. They can add new features, customize the user interface, or automate repetitive tasks, among other things.
Some common examples of popular Chrome extensions include ad blockers, password managers, grammar checkers, and social media tools, etc.
Read More: How To Disable Right Click and F12 Key Using JavaScript
Let’s get started.
What is a Chrome Extension?
A Chrome Extension is a piece of software created to improve or alter the features of the Google Chrome web browser. Users can download and install Chrome extensions from the Chrome Web Store, and they can offer a variety of features and functionalities.
Ad blockers, password managers, grammar checkers, social media tools, and productivity programmes are a few typical examples of Chrome extensions. Chrome extensions can give the browser new functionality, alter the user interface, carry out repetitive activities automatically, or offer fresh ways to engage with websites and online content.
Web standards like HTML, CSS, and JavaScript are generally used to create Chrome extensions, which can communicate with web pages and other browser components in a variety of ways.
What Can Chrome Extensions Do?
Depending on their unique characteristics and capabilities, Chrome extensions can do a variety of tasks. Some examples of what Chrome extensions can achieve are as follows:
Enhance browsing experience
Improving the browsing experience Chrome extensions can alter the look and feel of websites, add additional menus and buttons to the browser’s interface, and give users easy access to frequently used tools or features.
Automate repetitive tasks
Chrome extensions may make clicking buttons, filling out forms, and scrolling through pages automatically.
Read More: Do You Know Types of Programming Errors of PHP?
Improve productivity
Chrome extensions might offer resources for task management, note-taking, bookmark management, or blocking distracting websites.
Enhance security and privacy
Extensions for Chrome can block adverts, stop tracking, and check for malware or phishing attempts, which can improve security and privacy.
Overall, Chrome extensions can provide users a variety of advantages, from boosting productivity and security to making browsing more pleasurable and practical.
Why Should I Create a Chrome Extension?
There are several reasons why you might want to create a Chrome extension:
- Solve a specific problem: If you have a specific problem that you encounter when using the web, a Chrome extension can help solve that problem. By creating your own extension, you can tailor it to meet your specific needs.
- Enhance a website or web app: If you have a website or web app, you can create a Chrome extension that enhances its functionality or provides new features.
- Showcase your skills: Creating a Chrome extension can be a great way to showcase your programming skills and add a project to your portfolio.
- Create a business opportunity: If you create a useful Chrome extension that solves a problem for a large number of people, you may be able to monetize it and turn it into a business opportunity.
- Make a contribution to the open-source community: If you create a Chrome extension and release it as open-source software, you can make a contribution to the community and help others to build on your work.
Overall, creating a Chrome extension can be a rewarding experience, whether you are doing it for personal or professional reasons. With the right idea and skills, you can create a valuable tool that makes a difference for yourself or others.
Read More: PHP Security Best Practices: Keeping Your Web Application Safe
Step-by-Step Guide to Creating a Chrome Extension
Now it’s time to build your Chrome extension.
Define your idea
The first step in creating a Chrome extension is to define your idea. Think about the problem you want to solve, the functionality you want to add, or the features you want to enhance.
Set up your development environment
To create a Chrome extension, you will need a text editor or integrated development environment (IDE) to write your code. You will also need the Chrome browser and a basic understanding of HTML, CSS, and JavaScript.
Create a folder with name “chrome-ext“. Inside this folder create these files:
- manifest.json
- index.html
- icon.png
- script.js

Extension: Configuration File
Open manifest.json and write this code into it.
{
    "manifest_version": 3,
    "name": "My Chrome Extension",
    "description": "This is a Basic Chrome Extension",
    "version": "1.0",
    "action": {
        "default_popup": "index.html",
        "default_icon": "icon.png"
    }
}
This code sets the manifest version, name, version, description, and specifies the icon for the extension. It also includes a browser “action” section that specifies the default icon and popup HTML file.
Extension: HTML, CSS & JS
Open index.html and write this code into it.
<!DOCTYPE html>
<html>

<head>
    <title>Basic Extension Popup</title>
    <script src="script.js"></script>
</head>

<body>
    <h3>Hello, world!</h3>
    <p>This is a Basic Chrome extension.</p>
</body>

</html>
This file will contain the HTML for the extension’s popup. This code creates a basic HTML page with a title, a script file, and a heading and paragraph.
Open script.js and write this code into it.
console.log('Hello, Online Web Tutor!');
This file will contain the script that adds functionality to the extension’s popup. Here, we have a simple console. But you can add even more javascript functions here.
Read More: How To Extract Email Addresses From a String in PHP
Extension: Icon
Add the icon image referenced in your “manifest.json” file. Add icon.png to the folder. This is your extension icon.
Test your Chrome Extension
Load the extension in Chrome by opening the Extensions page (chrome://extensions/) and clicking the “Load unpacked” button.

Select the folder for your extension “chrome-ext“.
Next,
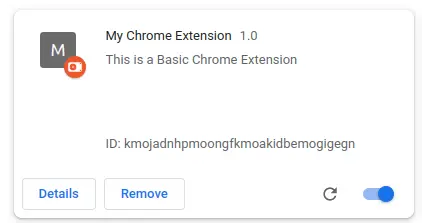
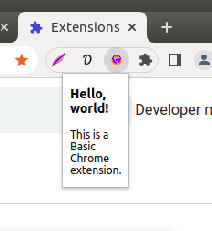
You will found your extension into Chrome Extensions list. Click to Pin / Unpin into chrome tabs.
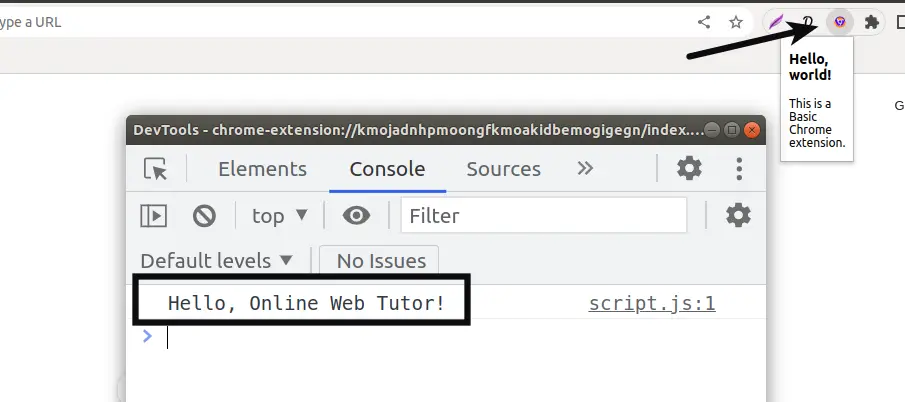
Also, if you check extension’s console by Right click and on Inspect.
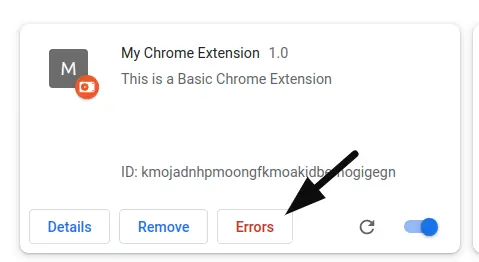
Suppose, in case if you have any error. Then you will see:
We hope this article helped you to learn Step by Step To Build Your Own Chrome Extension Tutorial in a very detailed way.
If you liked this article, then please subscribe to our YouTube Channel for PHP & it’s framework, WordPress, Node Js video tutorials. You can also find us on Twitter and Facebook.
Read more