CodeIgniter 4 is an open source framework of PHP. There are several libraries available in codeigniter 4 which makes application development very easy.
Inside this article we will see the concept of Using Basic Auth REST API development in CodeIgniter 4. Additionally we will cover the API data validations and their outputs. Article is very interesting to learn and super easy to implement.
HTTP Basic Access Authentication involves adding a header that contains your username and password. That auth values will be check at server side, if valid details will process next else access denied.
Learn more –
- CodeIgniter 4 RESTful APIs with JWT Authentication, Click here.
- CodeIgniter 4 CRUD REST APIs Development (without validation), Click here.
- REST API Development with Validation in CodeIgniter 4, Click here.
- Upload Image by REST API in CodeIgniter 4 Tutorial, Click here.
Let’s get started.
CodeIgniter 4 Installation
To create a CodeIgniter 4 setup run this given command into your shell or terminal. Please make sure composer should be installed.
composer create-project codeigniter4/appstarter codeigniter-4Assuming you have successfully installed application into your local system.
Environment (.env) Setup
When we install CodeIgniter 4, we will have env file at root. To use the environment variables means using variables at global scope we need to do env to .env
Either we can do via renaming file as simple as that. Also we can do by terminal command.
Open project in terminal
cp env .envAbove command will create a copy of env file to .env file. Now we are ready to use environment variables.
Enable Development Mode
CodeIgniter starts up in production mode by default. You need to make it in development mode to see any error if you are working with application.
Open .env file from root.
# CI_ENVIRONMENT = production

 // Do it to

CI_ENVIRONMENT = development
Now application is in development mode.
Create Database
To create a database, either we can create via Manual tool of PhpMyadmin or by means of a mysql command.
We will use MySQL command to create database. Run this command into Sql tab of PhpMyAdmin.
CREATE DATABASE codeigniter4_app;Successfully, we have created a database.
Create Database Table
Next, we need a table. That table will be responsible to store data.
Let’s create table with some columns.
CREATE TABLE `employees` (
 `id` int(11) NOT NULL AUTO_INCREMENT,
 `name` varchar(120) DEFAULT NULL,
 `email` varchar(120) DEFAULT NULL,
 `phone_no` varchar(45) DEFAULT NULL,
 PRIMARY KEY (`id`)
) ENGINE=InnoDB DEFAULT CHARSET=latin1;
Successfully, we have created a table.
Database Connection
Open .env file from project root.
Search for DATABASE. You should see the connection environment variables into it. Put your updated details of database connection string values.
#--------------------------------------------------------------------
# DATABASE
#--------------------------------------------------------------------

database.default.hostname = localhost
database.default.database = codeigniter4_app
database.default.username = admin
database.default.password = admin
database.default.DBDriver = MySQLi
database.default.DBPrefix =
database.default.port = 3306
Now, database successfully connected with the application.
How HTTP Basic Access Authentication works?
HTTP Basic Access Authentication is one of the very simple authentication available to process request. This involves adding a header that contains your username and password. The proper format for the header –
Authorization: Basic XXXXXXWhere XXXXXX is your credentials in the form of username:password with base64 encoding.
PHP automatically decodes and splits the username and password into special named constants:
PHP_AUTH_USERwith the username as a plain-text string, access like – $_SERVER[‘PHP_AUTH_USER’]PHP_AUTH_PWwith the password as a plain-text string, access like – $_SERVER[‘PHP_AUTH_PW’]
Create Filter
Open terminal and run this spark command to create filter.
$ php spark make:filter Basicauth --suffixIt will creates a file with name BasicauthFilter.php at /app/Filters folder.
Open BasicauthFilter.php and write this code into it.
<?php

namespace App\Filters;

use CodeIgniter\Filters\FilterInterface;
use CodeIgniter\HTTP\RequestInterface;
use CodeIgniter\HTTP\ResponseInterface;

class BasicauthFilter implements FilterInterface
{
	public function before(RequestInterface $request, $arguments = null)
	{
		//print_r($_SERVER);
		$username = isset($_SERVER['PHP_AUTH_USER']) ? $_SERVER['PHP_AUTH_USER'] : "";
		$password = isset($_SERVER['PHP_AUTH_PW']) ? $_SERVER['PHP_AUTH_PW'] : "";

		if($username != "onlinewebtutor" || $password != "admin123"){

			header("Content-type: application/json");

			echo json_encode(array(
				"status" => false,
				"message" => "Invalid credentials"
			));
			die;
		}
	}

	public function after(RequestInterface $request, ResponseInterface $response, $arguments = null)
	{
		//
	}
}
Get header Authorization data and check here –
$username = isset($_SERVER['PHP_AUTH_USER']) ? $_SERVER['PHP_AUTH_USER'] : "";
$password = isset($_SERVER['PHP_AUTH_PW']) ? $_SERVER['PHP_AUTH_PW'] : "";
Register Filter To Application
Open Filters.php from /app/Config. Search for $aliases.
Add this line to header
use App\Filters\BasicauthFilter;Add into $aliases
public $aliases = [

         //...

        "basicauth" => BasicauthFilter::class
];
Create Model
Open project into terminal and run this spark command.
$ php spark make:model Employee --suffixIt will create EmployeeModel.php file inside /app/Models folder.
Open EmployeeModel.php and write this complete code into it.
<?php

namespace App\Models;

use CodeIgniter\Model;

class EmployeeModel extends Model
{
	protected $DBGroup              = 'default';
	protected $table                = 'employees';
	protected $primaryKey           = 'id';
	protected $useAutoIncrement     = true;
	protected $insertID             = 0;
	protected $returnType           = 'array';
	protected $useSoftDelete        = false;
	protected $protectFields        = true;
	protected $allowedFields        = [
		'name',
		'email',
		'phone_no'
	];

	// Dates
	protected $useTimestamps        = false;
	protected $dateFormat           = 'datetime';
	protected $createdField         = 'created_at';
	protected $updatedField         = 'updated_at';
	protected $deletedField         = 'deleted_at';

	// Validation
	protected $validationRules      = [];
	protected $validationMessages   = [];
	protected $skipValidation       = false;
	protected $cleanValidationRules = true;

	// Callbacks
	protected $allowCallbacks       = true;
	protected $beforeInsert         = [];
	protected $afterInsert          = [];
	protected $beforeUpdate         = [];
	protected $afterUpdate          = [];
	protected $beforeFind           = [];
	protected $afterFind            = [];
	protected $beforeDelete         = [];
	protected $afterDelete          = [];
}
Create Controller
Open project into terminal and run this spark command.
$ php spark make:controller Api/Api --suffix --restfulIt will create ApiController.php file inside /app/Controllers/Api folder. Along with controller it will also create a folder.
Open ApiController.php and write this complete code into it.
<?php

namespace App\Controllers\Api;

use CodeIgniter\RESTful\ResourceController;
use App\Models\EmployeeModel;

class ApiController extends ResourceController
{
	public function addEmployee()
	{
		$rules = [
			"name" => "required",
			"email" => "required|valid_email|is_unique[employees.email]|min_length[6]",
			"phone_no" => "required",
		];

		$messages = [
			"name" => [
				"required" => "Name is required"
			],
			"email" => [
				"required" => "Email required",
				"valid_email" => "Email address is not in format",
				"is_unique" => "Email address already exists"
			],
			"phone_no" => [
				"required" => "Phone Number is required"
			],
		];

		if (!$this->validate($rules, $messages)) {

			$response = [
				'status' => 500,
				'error' => true,
				'message' => $this->validator->getErrors(),
				'data' => []
			];
		} else {

			$emp = new EmployeeModel();

			$data['name'] = $this->request->getVar("name");
			$data['email'] = $this->request->getVar("email");
			$data['phone_no'] = $this->request->getVar("phone_no");

			$emp->save($data);

			$response = [
				'status' => 200,
				'error' => false,
				'message' => 'Employee added successfully',
				'data' => []
			];
		}

		return $this->respondCreated($response);
	}

	public function listEmployee()
	{
		$emp = new EmployeeModel();

		$response = [
			'status' => 200,
			"error" => false,
			'messages' => 'Employee list',
			'data' => $emp->findAll()
		];

		return $this->respondCreated($response);
	}

    //...
}
We have added few methods like for add, list. You can add all methods for a CRUD application.
Add Routes
Open Routes.php file from /app/Config folder. Add these routes into it.
//...

 $routes->group("api", ["namespace" => "App\Controllers\Api", "filter" => "basicauth"] , function($routes){

	 $routes->get("list-employee", "ApiController::listEmployee");
     $routes->post("add-employee", "ApiController::addEmployee");
});

//...
Application Testing
Open project terminal and start development server via command:
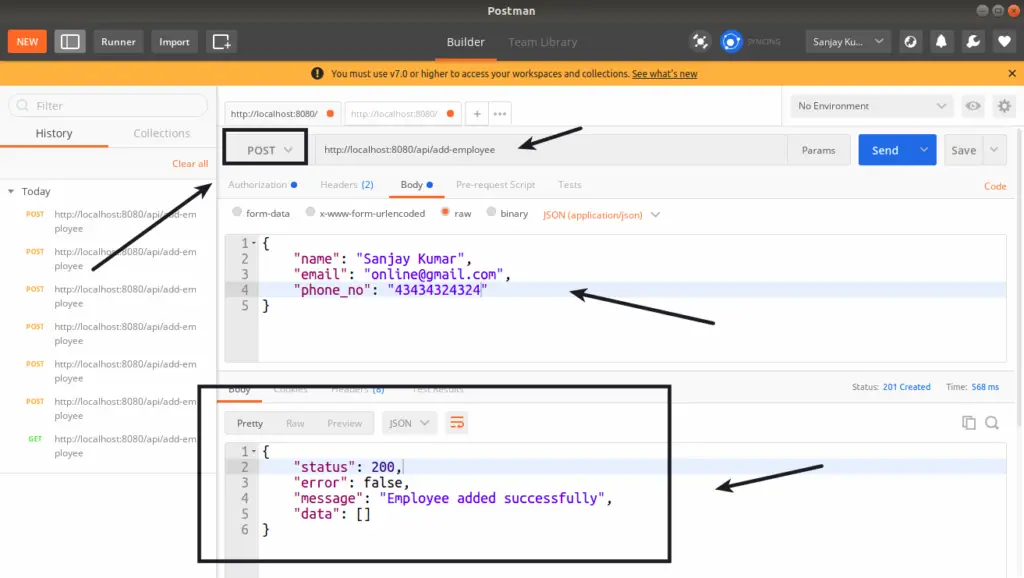
php spark serveCREATE EMPLOYEE API
URL: http://localhost:8080/api/add-employee
METHOD: POST
Basic Auth Settings:
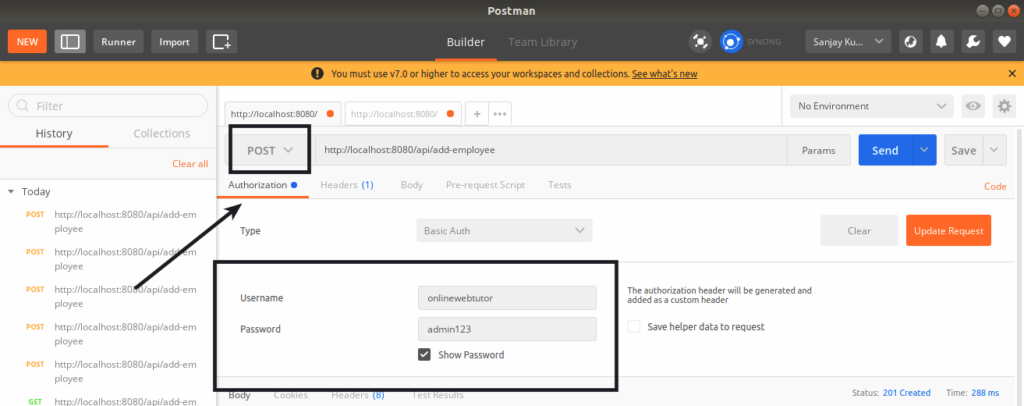
When you do this, automatically it will create a new header called Authorization into headers. It contains the value in the format of Basic b25saW5ld2VidHV0b3I6YWRtaW4xMjM=
HEADERS:
Content-Type:application/json
Accept:application/json
Authorization:Basic b25saW5ld2VidHV0b3I6YWRtaW4xMjM=
HANDLER: \App\Controllers\Api\ApiController::addEmployee
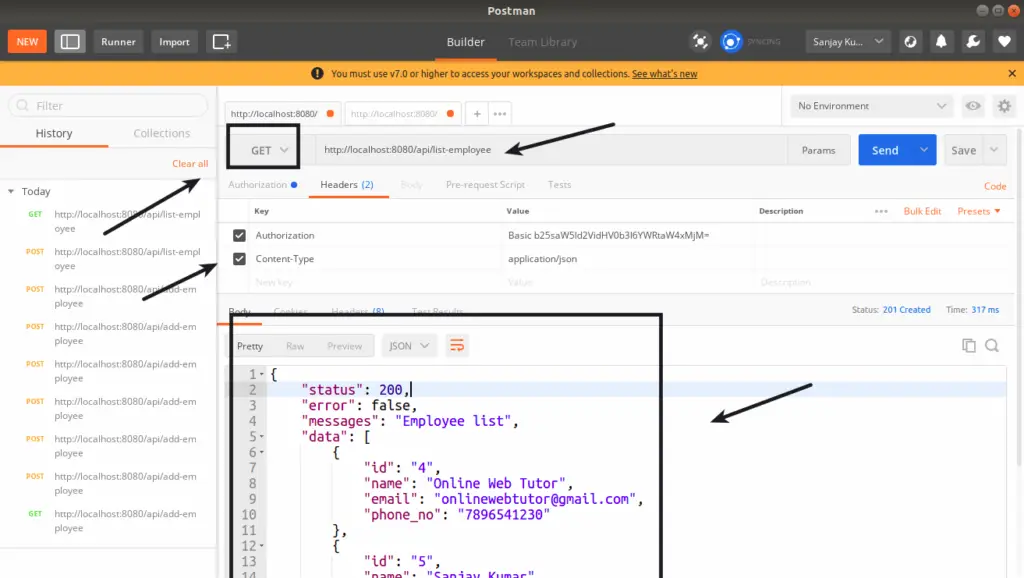
LIST EMPLOYEE API
URL: http://localhost:8080/api/list-employee
METHOD: GET
HEADERS:
Content-Type:application/json
Accept:application/json
Authorization:Basic b25saW5ld2VidHV0b3I6YWRtaW4xMjM=
HANDLER: \App\Controllers\Api\ApiController::listEmployee
We hope this article helped you to learn Basic Auth REST API Development in CodeIgniter 4 in a very detailed way.
If you liked this article, then please subscribe to our YouTube Channel for PHP & it’s framework, WordPress, Node Js video tutorials. You can also find us on Twitter and Facebook.
Read more