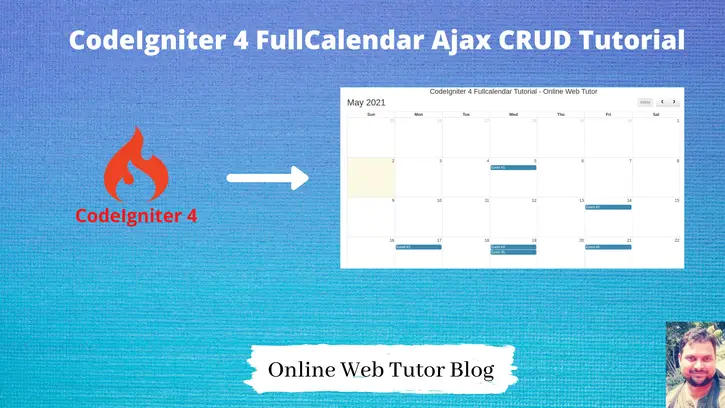
In most applications we need sometime a schedule calendar so that we can add our tasks, events, functions. Those scheduled tasks act like a reminder to the calendar. This feature is very interesting to implement if you are providing adding events to your clients, users, etc.
Inside this article we will see the complete concept of CodeIgniter 4 fullcalendar ajax crud tutorial. This article is super easy to learn and implement in your code as well.
FullCalendar is a jquery plugin by the help of which we can display a calendar to webpage. Even we can create events, appointments etc on a specific date, update existing data, delete data etc. All CRUD operations we can easily manage from it’s interface.
This is not CodeIgniter 4 specific feature, you can use it in any version of CodeIgniter.
Learn More –
- Working with MySQL Inner Join in CodeIgniter 4
- Working with MySQL Joins in CodeIgniter 4
- Working with MySQL Left Join in CodeIgniter 4
- Working with MySQL Right Join in CodeIgniter 4
Let’s get started.
CodeIgniter 4 Installation
To create a CodeIgniter 4 setup run this given command into your shell or terminal. Please make sure composer should be installed.
composer create-project codeigniter4/appstarter codeigniter-4Assuming you have successfully installed application into your local system.
Environment (.env) Setup
When we install CodeIgniter 4, we will have env file at root. To use the environment variables means using variables at global scope we need to do env to .env
Either we can do via renaming file as simple as that. Also we can do by terminal command.
Open project in terminal
cp env .envAbove command will create a copy of env file to .env file. Now we are ready to use environment variables.
Enable Development Mode
CodeIgniter starts up in production mode by default. You need to make it in development mode to see any error if you are working with application.
Open .env file from root.
# CI_ENVIRONMENT = production

 // Do it to

CI_ENVIRONMENT = development
Now application is in development mode.
Create Database
To create a database, either we can create via Manual tool of PhpMyadmin or by means of a mysql command.
We will use MySQL command to create database. Run this command into Sql tab of PhpMyAdmin.
CREATE DATABASE codeigniter4_app;Successfully, we have created a database.
Create Database Tables
Next, we need to create a table inside database.
CREATE TABLE events (
  id bigint(20) unsigned NOT NULL AUTO_INCREMENT,
  title varchar(255) NOT NULL,
  start date NOT NULL,
  end date NOT NULL,
  PRIMARY KEY (id)
 ) ENGINE=InnoDB DEFAULT CHARSET=utf8mb4;
Database Connection
Open .env file from project root.
Search for DATABASE. You should see the connection environment variables into it. Put your updated details of database connection string values.
#--------------------------------------------------------------------
# DATABASE
#--------------------------------------------------------------------

database.default.hostname = localhost
database.default.database = codeigniter4_app
database.default.username = admin
database.default.password = admin
database.default.DBDriver = MySQLi
database.default.DBPrefix =
database.default.port = 3306
Now, database successfully connected with the application.
Create Model
We need very first a Model.
Open project into terminal and run this spark command.
$ php spark make:model Event --suffixIt will create a model i.e EventModel.php at /app/Models folder.
Open EventModel.php and write this complete code into it.
<?php

namespace App\Models;

use CodeIgniter\Model;

class EventModel extends Model
{
	protected $DBGroup              = 'default';
	protected $table                = 'events';
	protected $primaryKey           = 'id';
	protected $useAutoIncrement     = true;
	protected $insertID             = 0;
	protected $returnType           = 'array';
	protected $useSoftDelete        = false;
	protected $protectFields        = true;
	protected $allowedFields        = [
		'title',
		'start',
		'end'
	];

	// Dates
	protected $useTimestamps        = false;
	protected $dateFormat           = 'datetime';
	protected $createdField         = 'created_at';
	protected $updatedField         = 'updated_at';
	protected $deletedField         = 'deleted_at';

	// Validation
	protected $validationRules      = [];
	protected $validationMessages   = [];
	protected $skipValidation       = false;
	protected $cleanValidationRules = true;

	// Callbacks
	protected $allowCallbacks       = true;
	protected $beforeInsert         = [];
	protected $afterInsert          = [];
	protected $beforeUpdate         = [];
	protected $afterUpdate          = [];
	protected $beforeFind           = [];
	protected $afterFind            = [];
	protected $beforeDelete         = [];
	protected $afterDelete          = [];
}
Create Controller
We need now a controller file. Back to terminal and run this spark command to create.
$ php spark make:controller Fullcalendar --suffixThis will creates a file FullcalendarController.php at /app/Controllers folder.
Open FullcalendarController.php and write this complete code into it,
<?php

namespace App\Controllers;

use App\Controllers\BaseController;
use App\Models\EventModel;

class FullcalendarController extends BaseController
{
	public function __construct()
	{
		helper(["html"]);
	}
	public function index()
	{
		return view('fullcalendar');
	}

	public function loadData()
	{
		$event = new EventModel();
		// on page load this ajax code block will be run
		$data = $event->where([
			'start >=' => $this->request->getVar('start'),
			'end <='=> $this->request->getVar('end')
		])->findAll();

		return json_encode($data);
	}

	public function ajax()
	{
		$event = new EventModel();

		switch ($this->request->getVar('type')) {

				// For add EventModel
			case 'add':
				$data = [
					'title' => $this->request->getVar('title'),
					'start' => $this->request->getVar('start'),
					'end' => $this->request->getVar('end'),
				];
				$event->insert($data);
				return json_encode($event);
				break;

				// For update EventModel
			case 'update':
				$data = [
					'title' => $this->request->getVar('title'),
					'start' => $this->request->getVar('start'),
					'end' => $this->request->getVar('end'),
				];

				$event_id = $this->request->getVar('id');

				$event->update($event_id, $data);

				return json_encode($event);
				break;

				// For delete EventModel
			case 'delete':

				$event_id = $this->request->getVar('id');

				$event->delete($event_id);

				return json_encode($event);
				break;

			default:
				break;
		}
	}
}
Create Layout File
Next, create a layout file with the name fullcalendar.php inside /app/Views folder.
Open fullcalendar.php and write this complete code into it.
<!DOCTYPE html>
<html>
<head>
    <title>CodeIgniter 4 Fullcalender Tutorial - Online Web Tutor</title>

    <link rel="stylesheet" href="https://maxcdn.bootstrapcdn.com/bootstrap/3.4.1/css/bootstrap.min.css" />
    <script src="https://cdnjs.cloudflare.com/ajax/libs/jquery/3.1.1/jquery.min.js"></script>

    <!--fullcalendar plugin files -->
    <link rel="stylesheet" href="https://cdnjs.cloudflare.com/ajax/libs/fullcalendar/3.9.0/fullcalendar.css" />
    <script src="https://cdnjs.cloudflare.com/ajax/libs/moment.js/2.24.0/moment.min.js"></script>
    <script src="https://cdnjs.cloudflare.com/ajax/libs/fullcalendar/3.9.0/fullcalendar.js"></script>

    <!-- for plugin notification -->
    <link rel="stylesheet" href="https://cdnjs.cloudflare.com/ajax/libs/toastr.js/latest/toastr.min.css" />
    <script src="https://cdnjs.cloudflare.com/ajax/libs/toastr.js/latest/toastr.min.js"></script>
</head>
<body>

<div class="container">
    <h3 style="text-align: center">CodeIgniter 4 Fullcalendar Tutorial - Online Web Tutor</h3>
    <div id="calendar"></div>
</div>

<script>
  var site_url = "<?= site_url() ?>";
</script>

<?= script_tag('script.js') ?>

</body>
</html>- script_tag(‘script.js’) Add script.js file from /public folder.
- var site_url = “”; Declare site url to use it in script.js file.
Create Javascript File – to Handle Ajax request
Create a file script.js inside /public folder. This file will contain all ajax handling code.
Open script.js file and write this complete code into it.
$(document).ready(function() {

    var calendar = $('#calendar').fullCalendar({
        editable: true,
        events: site_url + "/event",
        displayEventTime: false,
        editable: true,
        eventRender: function(event, element, view) {
            if (event.allDay === 'true') {
                event.allDay = true;
            } else {
                event.allDay = false;
            }
        },
        selectable: true,
        selectHelper: true,
        select: function(start, end, allDay) {

            var title = prompt('Event Title:');

            if (title) {
                var start = $.fullCalendar.formatDate(start, "Y-MM-DD");
                var end = $.fullCalendar.formatDate(end, "Y-MM-DD");
                $.ajax({
                    url: site_url + "/eventAjax",
                    data: {
                        title: title,
                        start: start,
                        end: end,
                        type: 'add'
                    },
                    type: "POST",
                    success: function(data) {
                        displayMessage("Event Created Successfully");

                        calendar.fullCalendar('renderEvent', {
                            id: data.id,
                            title: title,
                            start: start,
                            end: end,
                            allDay: allDay
                        }, true);

                        calendar.fullCalendar('unselect');
                    }
                });
            }
        },

        eventDrop: function(event, delta) {
            var start = $.fullCalendar.formatDate(event.start, "Y-MM-DD");
            var end = $.fullCalendar.formatDate(event.end, "Y-MM-DD");

            $.ajax({
                url: site_url + '/eventAjax',
                data: {
                    title: event.title,
                    start: start,
                    end: end,
                    id: event.id,
                    type: 'update'
                },
                type: "POST",
                success: function(response) {

                    displayMessage("Event Updated Successfully");
                }
            });
        },
        eventClick: function(event) {
            var deleteMsg = confirm("Do you really want to delete?");
            if (deleteMsg) {
                $.ajax({
                    type: "POST",
                    url: site_url + '/eventAjax',
                    data: {
                        id: event.id,
                        type: 'delete'
                    },
                    success: function(response) {

                        calendar.fullCalendar('removeEvents', event.id);
                        displayMessage("Event Deleted Successfully");
                    }
                });
            }
        }

    });

});

function displayMessage(message) {
    toastr.success(message, 'Event');
}
Create Routes
Add these routes into Routes.php at /app/Config folder.
Open Routes.php and add these routes into it.
//...

$routes->get("fullcalendar", "FullcalendarController::index");
$routes->get("event", "FullcalendarController::loadData");
$routes->post("eventAjax", "FullcalendarController::ajax");

//...
Application Testing
Open project terminal and start development server via command:
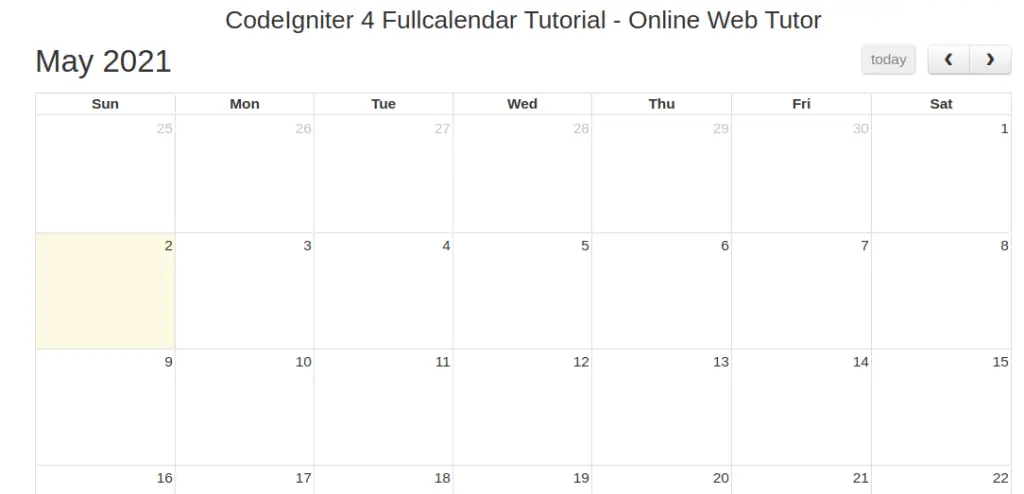
php spark serveURL – http://localhost:8080/fullcalendar
Before adding any event by the fullcalendar.
Add Event
To add event, simply click on any specific date and add your event via javascript popup box. when you fill Event title and hit Ok button. By ajax it will save data into database table.
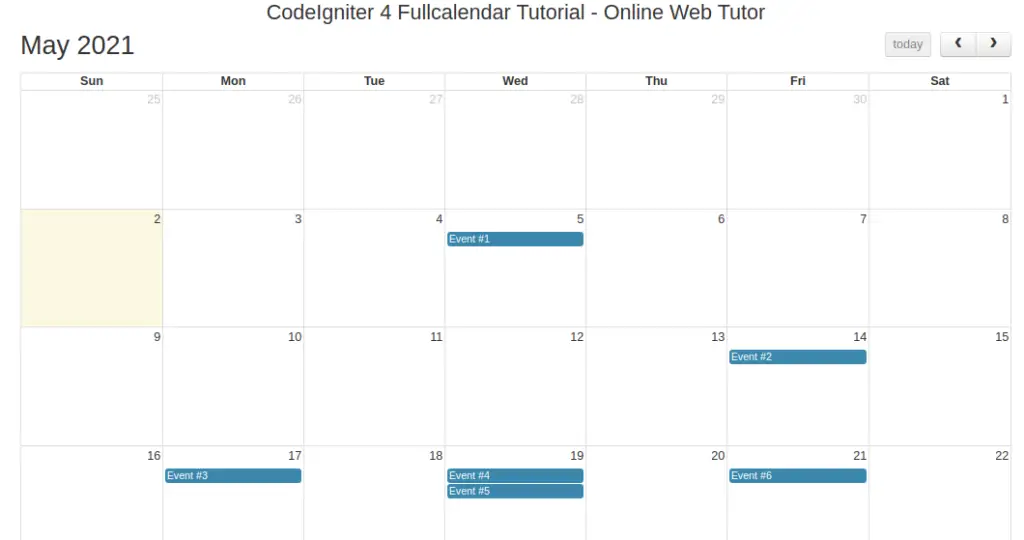
Update event
Simply drag and drop your events here and there inside calendar. It will update the event where you drop by ajax handler.
Delete Event
When you click on any event of calendar, it will open a javascript confirmation box, if Yes then it will delete that event by ajax handler.
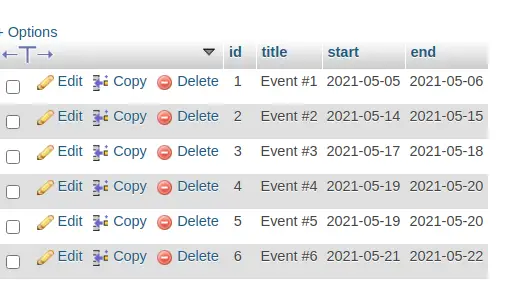
Events inside database
We hope this article helped you to learn about CodeIgniter 4 FullCalendar Ajax CRUD Tutorial Example in a very detailed way.
If you liked this article, then please subscribe to our YouTube Channel for PHP & it’s framework, WordPress, Node Js video tutorials. You can also find us on Twitter and Facebook.
Read more