In general, a Push notifications are the messages / Notifications that we receive in devices. This really makes the customers/subscribers engage with the client’s content and their updates on digital platforms.
Inside this article, we will see the concept of CodeIgniter 4 Firebase Push Notification to Android. Step by step guide to implement and use it.
Learn to send Push Notification To IOS using Firebase in CodeIgniter 4, Click here.
Learn More –
- CodeIgniter 4 Scaffolding Generator Tutorial with Example
- CodeIgniter 4 Send Email with SMTP Tutorial
- CodeIgniter 4 Send Push Notification to IOS Using Firebase
- CodeIgniter 4 Server Side DataTable Tutorial
This article assuming you have the concept of little bit of firebase and it’s console.
Let’s get started.
CodeIgniter 4 Installation
To create a CodeIgniter 4 setup run this given command into your shell or terminal. Please make sure composer should be installed.
composer create-project codeigniter4/appstarter codeigniter-4Assuming you have successfully installed application into your local system.
Environment (.env) Setup
When we install CodeIgniter 4, we will have env file at root. To use the environment variables means using variables at global scope we need to do env to .env
Either we can do via renaming file as simple as that. Also we can do by terminal command.
Open project in terminal
cp env .envAbove command will create a copy of env file to .env file. Now we are ready to use environment variables.
Enable Development Mode
CodeIgniter starts up in production mode by default. You need to make it in development mode to see any error if you are working with application.
Open .env file from root.
# CI_ENVIRONMENT = production

 // Do it to

CI_ENVIRONMENT = development
Now application is in development mode.
Create Firebase Project and App
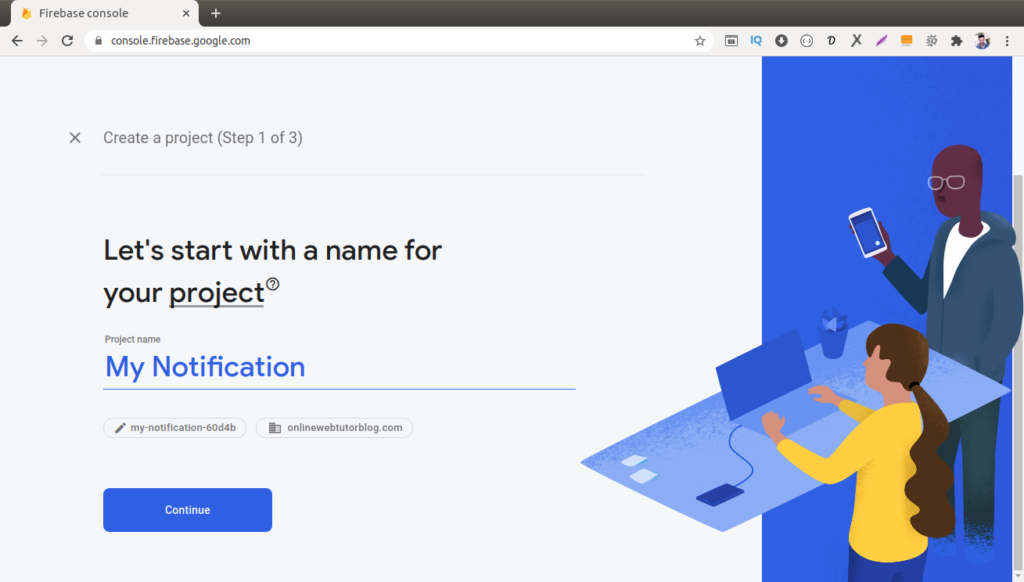
First we need to create a project in Firebase console for web application notification. To create project Click here to go to console.
Creating a Firebase Project at Firebase console.
Step #1
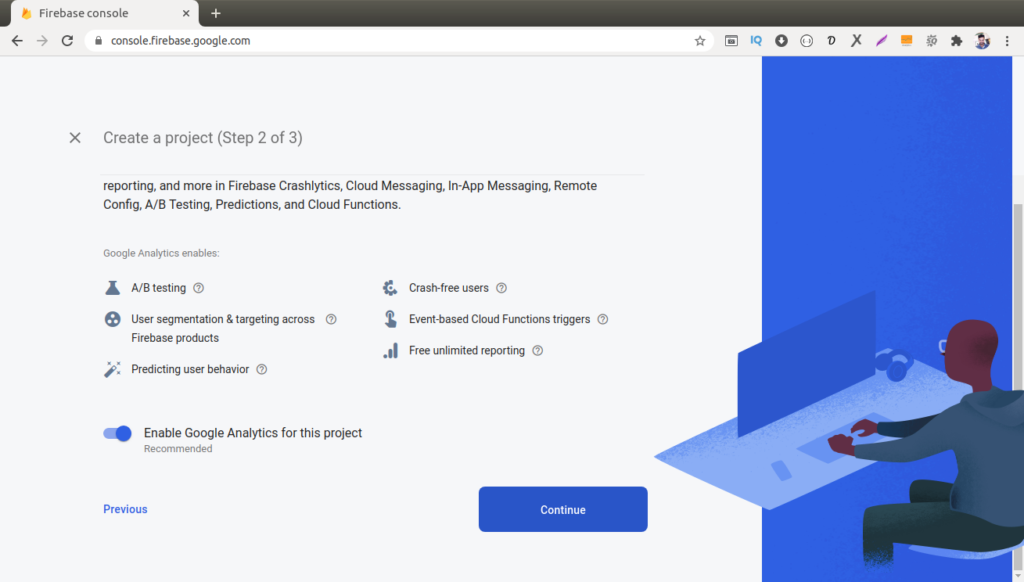
Step #2
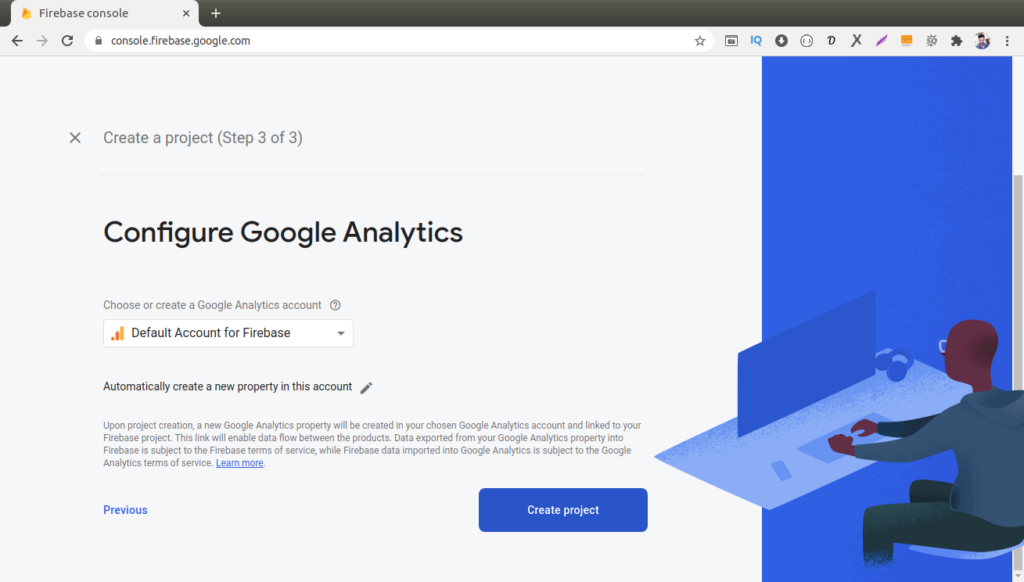
Step #3
Step #4
Back to Firebase Console dashboard panel. We can see we will have a setup icon for android as you can see in this given image. Simply click on that Icon and then the process of Setting up the registration of App will start.
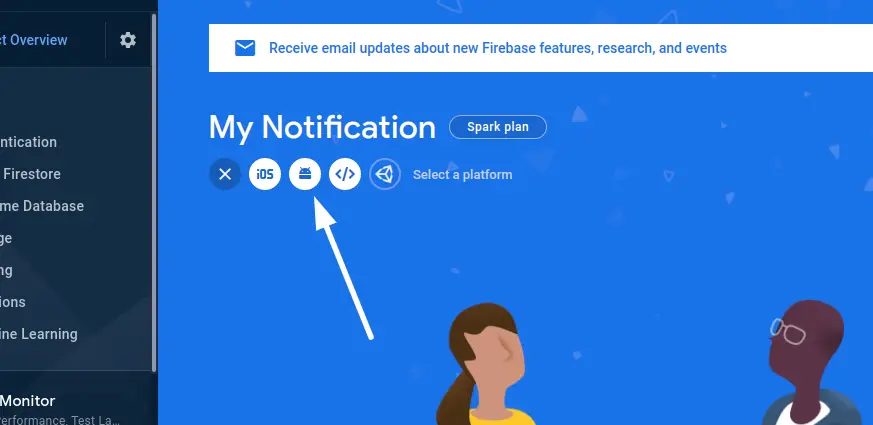
Register a Android App into Firebase Project.

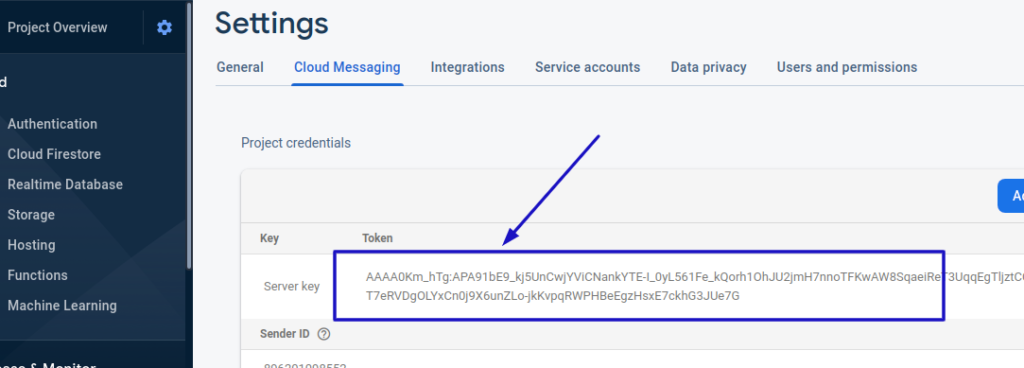
After creating App from here, back to firebase console. Go to App settings by click on gear icon and Click on Cloud messaging tab. You will find the Server key, we need that.
So copy server key.
Successfully, we have now completed the whole process of Creating Firebase Project > Register Android App > Copy & Paste Server API Key.
Create API Route
We need to create a POST request api route which will be hit by Android device. Open up the file Routes.php from /app/Config and copy the given code into and paste it.
//...

$routes->post('send-notification', 'NotificationController::send');

//...
Create Controller & Add Method
Open project into terminal and run this spark command to create.
$ php spark make:controller Notification --suffixIt will create NotificationController.php file at /app/Controllers folder.
Open NotificationController.php and write this code.
<?php

namespace App\Controllers;

use App\Controllers\BaseController;

class NotificationController extends BaseController
{
	public function send()
	{
		$device_token = $this->request->getVar("device_token");

		return $this->sendNotification($device_token, array(
			"title" => "Sample Message",
			"body" => "This is Test message body"
		));
	}

	public function sendNotification($device_token, $message)
    {
        $SERVER_API_KEY = '<YOUR-SERVER-API-KEY>';

        // payload data, it will vary according to requirement
        $data = [
            "to" => $device_token, // for single device id
            "data" => $message
        ];
        $dataString = json_encode($data);

        $headers = [
            'Authorization: key=' . $SERVER_API_KEY,
            'Content-Type: application/json',
        ];

        $ch = curl_init();

        curl_setopt($ch, CURLOPT_URL, 'https://fcm.googleapis.com/fcm/send');
        curl_setopt($ch, CURLOPT_POST, true);
        curl_setopt($ch, CURLOPT_HTTPHEADER, $headers);
        curl_setopt($ch, CURLOPT_SSL_VERIFYPEER, false);
        curl_setopt($ch, CURLOPT_RETURNTRANSFER, true);
        curl_setopt($ch, CURLOPT_POSTFIELDS, $dataString);

        $response = curl_exec($ch);

        curl_close($ch);

        return $response;
    }
}
The above code will send notification to a single device ID which we will pass into request.
Let’s say that we want to send notifications to multiple devices.
So how will we send?
<?php

namespace App\Controllers;

use App\Controllers\BaseController;

class NotificationController extends BaseController
{
	public function send()
	{
		$device_token1 = $this->request->getVar("device_token1");
		$device_token2 = $this->request->getVar("device_token2");
		$device_token3 = $this->request->getVar("device_token3");

		return $this->sendNotification(array(
			$device_token1,
			$device_token2,
			$device_token3
		), array(
			"title" => "Sample Message",
			"body" => "This is Test message body"
		));
	}

	public function sendNotification($device_tokens, $message)
    {
        $SERVER_API_KEY = '<YOUR-SERVER-API-KEY>';

        // payload data, it will vary according to requirement
        $data = [
            "registration_ids" => $device_tokens, // for multiple device ids
            "data" => $message
        ];
        $dataString = json_encode($data);

        $headers = [
            'Authorization: key=' . $SERVER_API_KEY,
            'Content-Type: application/json',
        ];

        $ch = curl_init();

        curl_setopt($ch, CURLOPT_URL, 'https://fcm.googleapis.com/fcm/send');
        curl_setopt($ch, CURLOPT_POST, true);
        curl_setopt($ch, CURLOPT_HTTPHEADER, $headers);
        curl_setopt($ch, CURLOPT_SSL_VERIFYPEER, false);
        curl_setopt($ch, CURLOPT_RETURNTRANSFER, true);
        curl_setopt($ch, CURLOPT_POSTFIELDS, $dataString);

        $response = curl_exec($ch);

        curl_close($ch);

        return $response;
    }
}
When we send for a single device, we need to use
$data = [
    "to" => $device_token, // for single device id
    "data" => $message
];
And for multiple devices, we have the key as registration_ids. If we want use this registration_ids to send only to a single device, it also works. Only we need to pass a single device token.
$data = [
    "registration_ids" => $device_tokens, // for multiple device ids
    "data" => $message
];
We hope this article helped you to learn about CodeIgniter 4 Send Push Notification to Android Using Firebase in a very detailed way.
If you liked this article, then please subscribe to our YouTube Channel for PHP & it’s framework, WordPress, Node Js video tutorials. You can also find us on Twitter and Facebook.
Read more