Website development can seem difficult, especially without help. Fortunately, there are development tools like CodeIgniter. It is a PHP framework maintained by the British Columbia Institute of Technology that provides a simple and effective toolkit for developing web applications.
This CodeIgniter tutorial walks you through installing and configuring the CodeIgniter framework on shared hosting and VPS and shows you how to create a simple web application.
Read More: How To Work with External API in Laravel 9 Tutorial
Let’s get started.
Learn More About CodeIgniter
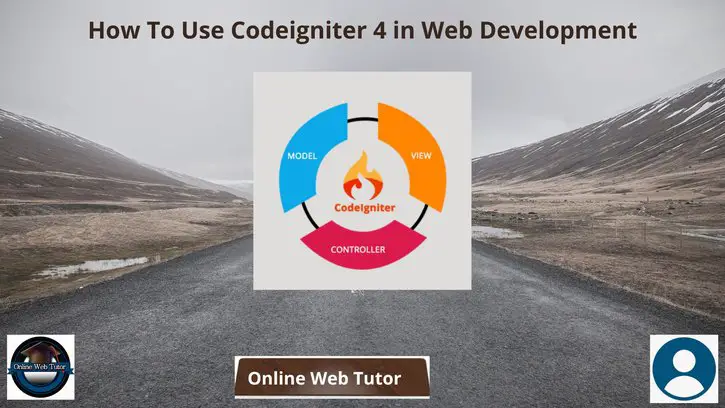
Before moving on to the CodeIgniter tutorial to learn how to build an application using the framework, you should understand the basics of the Model-View-Controller (MVC) pattern.
Simply put, MVC is a web development architecture paradigm. It is said that the business logic of any application should be separated from the presentation.
- Models – manipulating databases, performing calculations, etc. That is, where the business logic resides.
- Views – form the presentation layer of the application and contain model data.
- Controller – routes user requests to the appropriate model. When the model completes its work, the controller loads the associated view.
This architectural pattern gives developers the ability to reuse code across multiple views. For example, you can implement the same navigation bar for all web pages in your application. Additionally, views and models are completely independent, allowing front-end developers to work in parallel with back-end teams to speed up the development process.
How does CodeIgniter work?
CodeIgniter is an MVC framework. MVC stands for Model View Controller. When a user requests a resource, the controller responds first. The controller understands the user’s request and requests the necessary data when needed.
For example, if you get a customer with id=3, the controller receives the request and asks the CodeIgniter model to get record ID 3. The CodeIgniter model returns a record to the controller. The controller sends the result to the view and formats it into a human-readable format. Results are returned to the user from the browser.
Understand CodeIgniter with Building an Application
Create a simple application using CodeIgniter
At this point in the CodeIgniter tutorial, you should have a running CodeIgniter distribution and understand how models, views, and controller’s work. Now create a simple CodeIgniter web application.
Read More: jQuery Cross Browser Scroll To Top with Animation Tutorial
All use this pattern to get the proxy names from the database and display them sorted using a view. Controllers are used to route requests between models and views.
By understanding the basic processes of CodeIgniter, you can build complete web applications.
How to install and use CodeIgniter 4?
For the codeIgniter 4 installation and setup we need to follow the below steps
Step 1 – Download CodeIgniter 4 30 source code (zip) and expand the zip.
Step 2 – Expand the zip at the root of your project folder. Says D:\Dev
Step 3 – Rename the Framework-4.0.4 folder with your project name. Example: my project
Step 4 – Go to the MyProject folder, open app\Config\App.PHP in a text editor, and replace $baseUrl with your domain (or subdomain) with slashes.Step 5 – CodeIgniter 4 requires you to “point” the server to a public folder. To do this, create a .htaccess file at the root of your project. Add the following to MyProject.
Step 1. Create a phpMyAdmin table
This section describes how to create tables with phpMyAdmin via CPanel. This table is essential because it forms the basis of the application.
- Log in to your hosting account. Go to the Databases section and select phpMyAdmin.
- Locate the database synced with CodeIgniter and click Enter phpMyAdmin.
- So select the SQL section, paste this query and press Go.
Step 2. Create a Template
When the database tables are created, the business logic starts. To do this, create a model that retrieves values from the database.
Access file manager
Models are placed in the public_html/app/Models directory, so they don’t interfere with your app’s directory structure. Go to the Models directory and create a new PHP file called AgencyModel.php.
Step 3. Create Controller
Then use the controller to create the route. This way, whenever the user makes a request, the model information is provided to the view.
To create a new controller, go to the app/Controllers directory and create a file named Agencies.php. CodeIgniter’s controller must have the same name as the class it contains.
Step 4. Create a View
Finally, we create a view that displays a list of proxies.
Go to the app/Views folder and create a new file called agency.php. The name of this file must correspond to the viewer asking the controller to load, indicated in the last line of the view() method.
The view displays the information passed from the controller to the $data array. The result isn’t great because I didn’t add any styling to the view. However, you can later add inline styles or reference CSS style sheets in the view.
FAQs
1. Is CodeIgniter still in use?
CodeIgniter still exists, but the framework name is synonymous with a shoddy solution. So I recommend Laravel as a better choice. Both Laravel and CodeIgniter are open-source PHP frameworks.
Read More: How To Integrate AdminLTE 3 in Laravel 9 Tutorial
2. Should I use CodeIgniter 3 or 4?
CodeIgniter 4 has a more efficient autoload process. One of the factors that help with this is the use of namespaces. In CodeIgniter 3, you have to manually set most of the files to load.
3. Does CodeIgniter have an IDE?
This comprehensive PHP CodeIgniter IDE includes an excellent set of features for installing applications on a variety of servers, including cloud servers.
That’s it.
If you liked this article, then please subscribe to our YouTube Channel for PHP & it’s framework, WordPress, Node Js video tutorials. You can also find us on Twitter and Facebook.
Read more