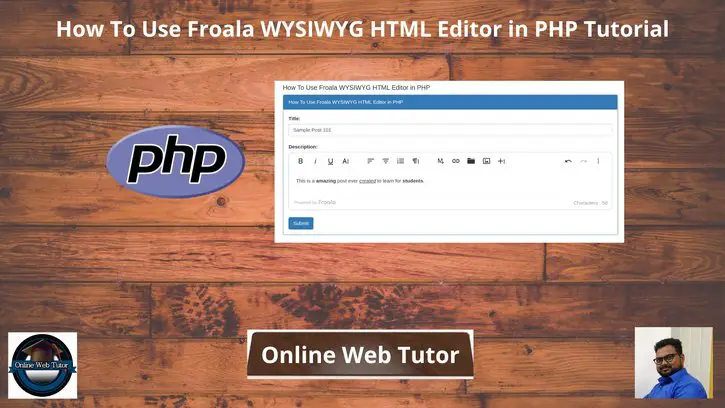
Inside this article we will see the concept i.e How To Use Froala WYSIWYG HTML Editor in PHP Tutorial. Article contains the classified information about use of Froala WYSIWYG HTML Editor.
If you are looking for a solution i.e How to integrate Froala WYSIWYG Editor then this article will help you a lot for this. Tutorial is super easy to understand and implement it in your code as well.
Froala Editor is one of the most powerful Javascript rich text editors in every single aspect. It is designed with performance in mind and will withstand the most rigorous tests.
Learn More –
- How To Convert Number To Words in PHP
- How To Get The Last Character of a String in JavaScript
- Laravel 9 How To Convert Number To Words Tutorial
- CodeIgniter 4 How To Convert Number To Words Tutorial
Let’s get started.
Application Programming
Next,
Create a folder with name html-editor.
Let’s create a files in it in your localhost directory – index.php
Open index.php file and write this code into it.
<!DOCTYPE html>
<html>

<head>
    <meta charset="utf-8">
    <meta name="viewport" content="width=device-width, initial-scale=1">
    <title>How To Use Froala WYSIWYG HTML Editor in PHP</title>
    <link rel="stylesheet" href="https://maxcdn.bootstrapcdn.com/bootstrap/3.4.1/css/bootstrap.min.css">
    <link rel="stylesheet" href="https://cdnjs.cloudflare.com/ajax/libs/froala-editor/4.0.13/css/froala_editor.pkgd.min.css">
</head>

<body>
    <div class="container">

        <?php

        // Form Submit
        if (isset($_POST['submit'])) {
            print_r($_POST);
        }

        ?>
        <h4>How To Use Froala WYSIWYG HTML Editor in PHP</h4>

        <div class="panel panel-primary">
            <div class="panel-heading">How To Use Froala WYSIWYG HTML Editor in PHP</div>
            <div class="panel-body">
                <form action="<?php echo $_SERVER['PHP_SELF']; ?>" method="POST">
                    <div class="mt-3">
                        <label>Title:</label>
                        <input type="text" name="title" class="form-control" placeholder="Title">
                    </div>
                    <br />
                    <div class="mt-3">
                        <label>Description:</label>
                        <textarea id="description" name="description" class="form-control" rows="3" placeholder="description" required></textarea>
                    </div>
                    <br />
                    <button type="submit" name="submit" class="btn btn-primary">Submit</button>
                </form>
            </div>
        </div>
    </div>
</body>
<script src="https://cdn.jsdelivr.net/npm/bootstrap@5.0.2/dist/js/bootstrap.min.js"></script>
<script src="https://cdnjs.cloudflare.com/ajax/libs/jquery/3.6.0/jquery.min.js"></script>
<script src="https://cdnjs.cloudflare.com/ajax/libs/froala-editor/4.0.13/js/froala_editor.pkgd.min.js"></script>
<script>
    $(document).ready(function() {
        var editor = new FroalaEditor('#description');
    });
</script>

</html>
Application Testing
Now,
Open project into browser and type this URL into it.
URL: http://localhost/html-editor/index.php
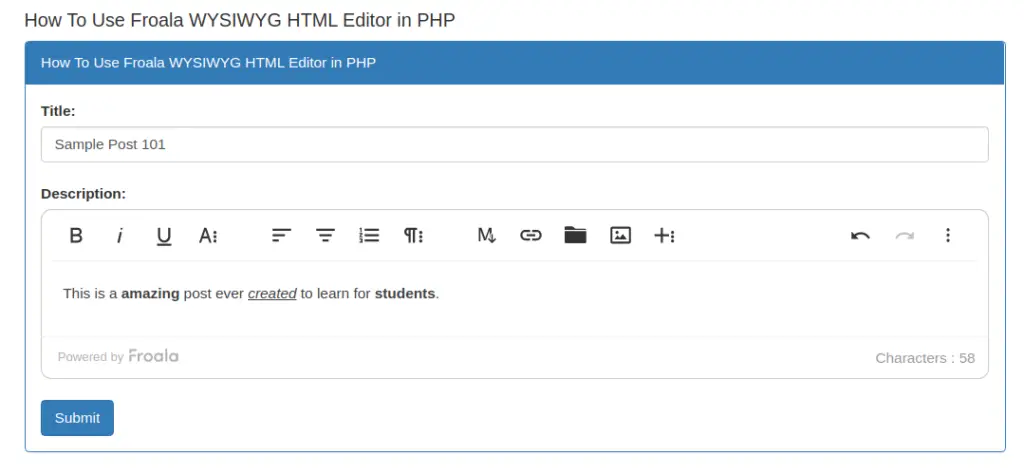
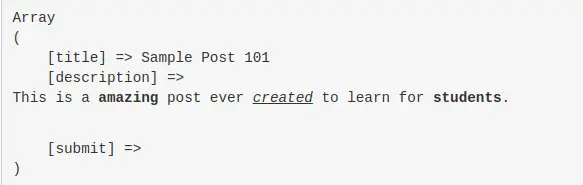
When you submit data with this, you will get all data of Froala editor into the name attribute of input element where you bound –
We hope this article helped you to learn How To Use Froala WYSIWYG HTML Editor in PHP Tutorial in a very detailed way.
If you liked this article, then please subscribe to our YouTube Channel for PHP & it’s framework, WordPress, Node Js video tutorials. You can also find us on Twitter and Facebook.
Read more