Inside this article we will see the concept i.e How To Use Trait in Laravel 10 Tutorial. Article contains the classified information i.e What is Trait & How to work with it in Laravel 10 application.
Using traits, developers can avoid the limitations of single inheritance in PHP and share functionality among classes that are not related by inheritance. Traits are similar to interfaces, but they also contain method implementations, unlike interfaces that only define the method signature.
Read More: How To Work with Route Middleware in Laravel 10 Tutorial
Let’s get started.
Laravel Installation
Open terminal and run this command to create a laravel project.
composer create-project laravel/laravel myblogIt will create a project folder with name myblog inside your local system.
To start the development server of laravel –
php artisan serveURL: http://127.0.0.1:8000
Assuming laravel already installed inside your system.
Create Database & Connect
To create a database, either we can create via Manual tool of PhpMyadmin or by means of a mysql command.
CREATE DATABASE laravel_app;
To connect database with application, Open .env file from application root. Search for DB_ and update your details.
DB_CONNECTION=mysql
DB_HOST=127.0.0.1
DB_PORT=3306
DB_DATABASE=laravel_app
DB_USERNAME=root
DB_PASSWORD=root
What is Trait in PHP?
In PHP, a trait is a language construct that allows developers to reuse code in multiple classes, without the need for inheritance. It is a set of methods that can be imported into a class, providing additional functionality and improving code reusability.
To create a trait in PHP, you use the <strong>trait</strong> keyword followed by the name of the trait and the trait body enclosed in curly braces.
Here’s the basic syntax for creating a trait:
trait MyTrait {
    // Trait body with method declarations and implementations
    public function myMethod() {
        // Method implementation
    }
    // ...
}
Read More: How To Work with Group Middleware in Laravel 10 Tutorial
Create Laravel Migrations
We will create products & blogs table using migrations and then we seed test data inside it.
Open project into terminal and run these commands to create migration files.
$ php artisan make:migration create_products_table

$ php artisan make:migration create_blogs_table
It will create 2023_03_17_031027_create_products_table.php & 2023_03_17_031047_create_blogs_table.php files inside /database/migrations folder.
Open migration file xxx_create_products_table.php and write this following code into it.
The code is all about for the schema of products table.
<?php

use Illuminate\Database\Migrations\Migration;
use Illuminate\Database\Schema\Blueprint;
use Illuminate\Support\Facades\Schema;

return new class extends Migration
{
    /**
     * Run the migrations.
     *
     * @return void
     */
    public function up()
    {
        Schema::create('products', function (Blueprint $table) {
            $table->id();
            $table->string("name", 70);
            $table->string("slug", 100);
            $table->text("description");
        });
    }

    /**
     * Reverse the migrations.
     *
     * @return void
     */
    public function down()
    {
        Schema::dropIfExists('products');
    }
};
Open migration file xxx_create_blogs_table.php and write this following code into it.
The code is all about for the schema of blogs table.
<?php

use Illuminate\Database\Migrations\Migration;
use Illuminate\Database\Schema\Blueprint;
use Illuminate\Support\Facades\Schema;

return new class extends Migration
{
    /**
     * Run the migrations.
     *
     * @return void
     */
    public function up()
    {
        Schema::create('blogs', function (Blueprint $table) {
            $table->id();
            $table->string("title", 60);
            $table->text("description");
        });
    }

    /**
     * Reverse the migrations.
     *
     * @return void
     */
    public function down()
    {
        Schema::dropIfExists('blogs');
    }
};
Run Migration
Back to terminal and run this command.
$ php artisan migrateIt will create products and blogs tables inside database.
Setup Application Model
Back to project terminal and run these commands to create models.
$ php artisan make:model Product

$ php artisan make:model Blog
It will create Product.php & Blog.php files inside /app/Models folder. This file will help when we generate data using factory and insert into table.
Open Product.php and write this code into it.
<?php

namespace App\Models;

use Illuminate\Database\Eloquent\Factories\HasFactory;
use Illuminate\Database\Eloquent\Model;

class Product extends Model
{
    use HasFactory;

    public $timestamps = false;
}
Open Blog.php and write this code into it.
<?php

namespace App\Models;

use Illuminate\Database\Eloquent\Factories\HasFactory;
use Illuminate\Database\Eloquent\Model;

class Blog extends Model
{
    use HasFactory;

    public $timestamps = false;
}
Next,
Create Data Factory To Seed Test Data
Copy these commands and run into terminal to create factory files.
$ php artisan make:factory ProductFactory

$ php artisan make:factory BlogFactory
It will create files ProductFactory.php and BlogFactory.php inside /database/factories folder.
Open ProductFactory.php file and write this following code into it.
<?php

namespace Database\Factories;

use Illuminate\Database\Eloquent\Factories\Factory;
use Illuminate\Support\Str;

/**
 * @extends \Illuminate\Database\Eloquent\Factories\Factory<\App\Models\Product>
 */
class ProductFactory extends Factory
{
    /**
     * Define the model's default state.
     *
     * @return array<string, mixed>
     */
    public function definition()
    {
        return [
            'name' => $this->faker->name,
            'slug' => Str::slug($this->faker->name),
            'description' => $this->faker->text,
        ];
    }
}
Open BlogFactory.php file and write this following code into it.
<?php

namespace Database\Factories;

use Illuminate\Database\Eloquent\Factories\Factory;

/**
 * @extends \Illuminate\Database\Eloquent\Factories\Factory<\App\Models\Blog>
 */
class BlogFactory extends Factory
{
    /**
     * Define the model's default state.
     *
     * @return array<string, mixed>
     */
    public function definition()
    {
        return [
            'title' => $this->faker->name,
            'description' => $this->faker->text,
        ];
    }
}
Read More: How To Work with Global Middleware in Laravel 10 Tutorial
Call Model Factory
Open DatabaseSeeder.php from /database/seeders folder.
Load models and factories.
<?php

namespace Database\Seeders;

use Illuminate\Database\Console\Seeds\WithoutModelEvents;
use Illuminate\Database\Seeder;

class DatabaseSeeder extends Seeder
{
    /**
     * Seed the application's database.
     *
     * @return void
     */
    public function run()
    {
         \App\Models\Product::factory(100)->create();

         \App\Models\Blog::factory(100)->create();
    }
}
Concept
\App\Models\Product::factory(100)->create();

\App\Models\Blog::factory(100)->create();
It will generate 100 fake rows for products and blogs table.
Run Data Seeder
Back to project terminal and run this command to run factory to seed fake data.
$ php artisan db:seedIt will generate and save fake data into products and blogs table.
Table: products
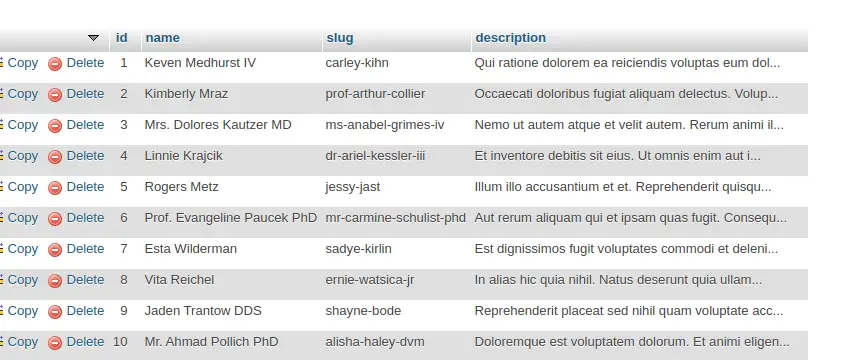
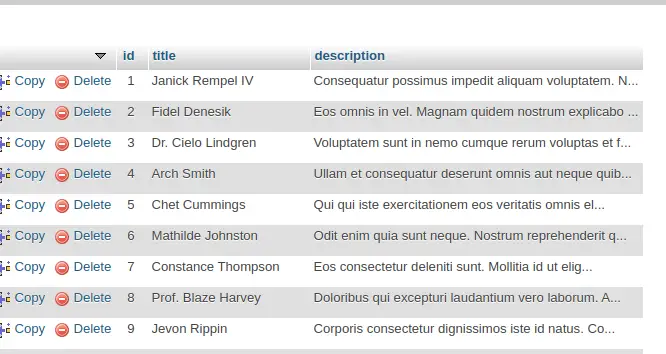
Table: blogs
Create Trait in Laravel
As there is no specific folder location to setup Traits. So, Create Traits folder inside /app/Http folder.
Next,
Create DataTrait.php file inside /app/Http/Traits folder.
Open DataTrait.php and write this code into it.
<?php

namespace App\Http\Traits;

trait DataTrait
{
    public function getData($model)
    {
        // Fetch all the data according to model
        return $model::all();
    }
}
Here, we have created a simple trait method. This method returns all data on the basis of model what we will pass into it.
Create Controller & Call Trait
Open project into terminal and run this command into it.
$ php artisan make:controller DataControllerIt will create DataController.php file inside /app/Http/Controllers folder.
Open controller file and write this code into it.
<?php

namespace App\Http\Controllers;

use App\Http\Traits\DataTrait;
use Illuminate\Http\Request;
use App\Models\Product;
use App\Models\Blog;

class DataController extends Controller
{
    use DataTrait;

    public function listProducts()
    {
        // Get data using Trait method
        $products = $this->getData(new Product());

        echo "<pre>";
        print_r($products);
    }

    public function listBlogs()
    {
        // Get data using Trait method
        $blogs = $this->getData(new Blog());

        echo "<pre>";
        print_r($blogs);
    }
}
As we can see, Single Trait method is usable in all methods.
Add Routes
Open web.php file from /routes folder. Add these routes into it.
//...

use App\Http\Controllers\DataController;

// Route to get all products
Route::get("list-products", [DataController::class, "listProducts"]);
// Route to get all blogs
Route::get("list-blogs", [DataController::class, "listBlogs"]);
Application Testing
Run this command into project terminal to start development server,
php artisan serveProduct URL – http://127.0.0.1:8000/list-products
Blog URL – http://127.0.0.1:8000/list-blogs
Here, we are only displaying all data into raw format. If you want then you can show it into view file as well.
Read More: Laravel 10 Scout How To Add Full Text Search in Table
We hope this article helped you to learn about How To Use Trait in Laravel 10 Example Tutorial in a very detailed way.
If you liked this article, then please subscribe to our YouTube Channel for PHP & it’s framework, WordPress, Node Js video tutorials. You can also find us on Twitter and Facebook.
Read more