In web application, form must have validation rules. Validation rules can be from any end. Form validation using Client side library. Form validations handled by server side. Means we have several options to do this. The main reason is to protect input fields from invalid entries and restrict user.
Inside this article we will see the concept of ajax form validation in laravel 9. This will be very interesting to see and learn.
We will implement form validation using server side. Form data we will post via Ajax. In the request from client side, we will do request to server and validate form from server.
Learn More –
- Laravel 9 SweetAlert2 jQuery Notification Plugin Tutorial
- Laravel 9 Working with MySQL Inner Join Tutorial
- Laravel 9 YajraBox Server Side Datatable Tutorial
- Migrate Specific Migration File in Laravel 9 Tutorial
Let’s get started.
Laravel Installation
Open terminal and run this command to create a laravel project.
composer create-project laravel/laravel myblogIt will create a project folder with name myblog inside your local system.
To start the development server of laravel –
php artisan serveURL: http://127.0.0.1:8000
Assuming laravel already installed inside your system.
Create Controller
Open project into terminal and type these artisan command into it to create controllers.
$ php artisan make:controller HomeController

$ php artisan make:controller AjaxController
These commands will create HomeController.php and AjaxController.php files inside /app/Http/Controllers folder.
HomeController will render frontend form and AjaxController will process ajax request.
Open HomeController.php and write this code into it.
<?php

namespace App\Http\Controllers;

use Illuminate\Http\Request;

class HomeController extends Controller
{
    public function addForm()
    {
        return view('add-form');
    }
}
Open AjaxController.php and write this code into it.
<?php

namespace App\Http\Controllers;

use Illuminate\Http\Request;
use Validator;

class AjaxController extends Controller
{
    public function submitForm(Request $request)
    {
        $validator = Validator::make($request->all(), [
            'first_name' => 'required',
            'last_name' => 'required',
            'email' => 'required|email'
        ]);

        if ($validator->passes()) {
            return response()->json(['success' => 'Added new records.']);
        }

        return response()->json(['error' => $validator->errors()->all()]);
    }
}
Next,
Let’s create blade template file.
Create Template File with Ajax Code
Create a file with name add-form.blade.php inside /resources/views folder.
Open template file and write this code into it.
<!DOCTYPE html>
<html>
<head>
    <title>Laravel 9 Ajax Validation Tutorial - Online Web Tutor</title>
    <link rel="stylesheet" href="https://cdnjs.cloudflare.com/ajax/libs/twitter-bootstrap/3.3.7/css/bootstrap.min.css" />
    <script src="https://cdnjs.cloudflare.com/ajax/libs/jquery/3.2.1/jquery.js"></script>
</head>
<body>

<div class="container">
    <h3 style="text-align: center;">Laravel 9 Ajax Validation Tutorial - Online Web Tutor</h3>

    <div class="alert alert-danger print-error-msg" style="display:none">
        <ul></ul>
    </div>

    <form method="post" action="javascript:void(0);">

        {{ csrf_field() }}

        <div class="form-group">
            <label>First Name:</label>
            <input type="text" name="first_name" class="form-control" placeholder="First Name">
        </div>

        <div class="form-group">
            <label>Last Name:</label>
            <input type="text" name="last_name" class="form-control" placeholder="Last Name">
        </div>

        <div class="form-group">
            <strong>Email:</strong>
            <input type="text" name="email" class="form-control" placeholder="Email">
        </div>

        <div class="form-group">
            <button class="btn btn-success btn-submit">Submit</button>
        </div>
    </form>
</div>

<script type="text/javascript">

    $(document).ready(function() {

        $(".btn-submit").click(function(e){

            e.preventDefault();

            // prepare form data
            var _token = $("input[name='_token']").val();
            var first_name = $("input[name='first_name']").val();
            var last_name = $("input[name='last_name']").val();
            var email = $("input[name='email']").val();

            // ajax request
            $.ajax({
                url: "{{ route('add.form') }}",
                type:'POST',
                data: {_token:_token, first_name:first_name, last_name:last_name, email:email},
                success: function(data) {
                    if($.isEmptyObject(data.error)){
                        alert(data.success);
                        $(".print-error-msg").css({
                            display:"none"
                        });
                    }else{
                        printErrorMsg(data.error);
                    }
                }
            });

        });

        function printErrorMsg (msg) {
            $(".print-error-msg").find("ul").html('');
            $(".print-error-msg").css('display','block');
            $.each( msg, function( key, value ) {
                $(".print-error-msg").find("ul").append('<li>'+value+'</li>');
            });
        }
    });


</script>


</body>
</html>
Add Routes
Open web.php from /routes folder and add these routes into it.
//...
use App\Http\Controllers\AjaxController;
use App\Http\Controllers\HomeController;

Route::get('add-form', [HomeController::class, 'addForm']);
Route::post('submit-form', [AjaxController::class, 'submitForm'])->name('add.form');
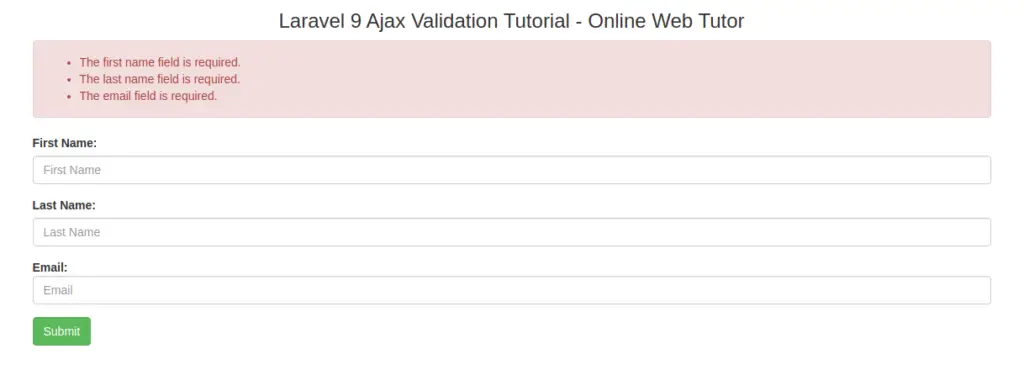
Application Testing
Run this command into project terminal to start development server,
php artisan serveURL – http://127.0.0.1:8000/add-form
We hope this article helped you to learn about jQuery Ajax Form Validation in Laravel 9 Tutorial in a very detailed way.
If you liked this article, then please subscribe to our YouTube Channel for PHP & it’s framework, WordPress, Node Js video tutorials. You can also find us on Twitter and Facebook.
Read more