Inside this article we will see the concept i.e Laravel 9 How To Set Default Values in Model For Columns Tutorial. Article contains the classified information about Settings of default column data values in Laravel model.
If you are looking for a solution i.e How to set default row values in laravel model then this article will help you a lot for this. Tutorial is super easy to understand and implement it in your code as well.
Read More: Laravel 9 How To Get Request Headers Example Tutorial
Sometimes we need to set default values for table columns whenever use doesn’t submit any input value for it then this article will help to get that concept.
Let’s get started.
Laravel Installation
Open terminal and run this command to create a laravel project.
composer create-project laravel/laravel myblogIt will create a project folder with name myblog inside your local system.
To start the development server of laravel –
php artisan serveURL: http://127.0.0.1:8000
Assuming laravel already installed inside your system.
Create Database & Connect
To create a database, either we can create via Manual tool of PhpMyadmin or by means of a mysql command.
CREATE DATABASE laravel_app;
To connect database with application, Open .env file from application root. Search for DB_ and update your details.
DB_CONNECTION=mysql
DB_HOST=127.0.0.1
DB_PORT=3306
DB_DATABASE=laravel_app
DB_USERNAME=root
DB_PASSWORD=root
Create Migration
Open project into terminal and run this command to create a migration file.
$ php artisan make:migration create_posts_tableAbove command will create 2022_09_29_212520_create_posts_table.php file inside /database/migrations folder.
Read More: Laravel 9 How To Get Database Name Example Tutorial
Open xxx_create_posts_table.php file and write this code into it.
<?php
use Illuminate\Database\Migrations\Migration;
use Illuminate\Database\Schema\Blueprint;
use Illuminate\Support\Facades\Schema;
return new class extends Migration
{
/**
* Run the migrations.
*
* @return void
*/
public function up()
{
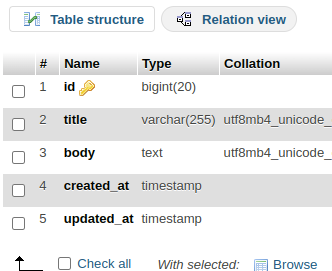
Schema::create('posts', function (Blueprint $table) {
$table->id();
$table->string('title');
$table->text('body');
$table->timestamps();
});
}
/**
* Reverse the migrations.
*
* @return void
*/
public function down()
{
Schema::dropIfExists('posts');
}
};
Run Migration
Back to terminal and run this command for migrations.
$ php artisan migrateIt will create posts table into your database.
Create Model
Back to terminal and run this command to create model.
$ php artisan make:model PostIt will create a model file Post.php inside /app/Models folder.
Read More: Laravel 9 How To Check Database Connection Tutorial
Open Post.php and write this following code into it.
<?php

namespace App\Models;

use Illuminate\Database\Eloquent\Factories\HasFactory;
use Illuminate\Database\Eloquent\Model;

class Post extends Model
{
    use HasFactory;

    protected $fillable = [
        'title', 'body'
    ];

    /**
     * The model's default values for attributes.
     *
     * @var array
     */
    protected $attributes = [
        'title' => 'Default Title',
    ];
}
Concept
To set default values for columns:
protected $attributes = [
   'title' => 'Default Title',
];
Create Controller
Back to project terminal and run this command to create a controller file.
$ php artisan make:controller PostControllerAbove command will create a file i.e PostController.php inside /app/Http/Controllers folder.
<?php

namespace App\Http\Controllers;

use Illuminate\Http\Request;
use App\Models\Post;

class PostController extends Controller
{
    public function index()
    {
        // Post creates with default title
        Post::create([
            'body' => 'Post Body Added'
        ]);

        // Post created with user values
        Post::create([
            'title' => 'My Custom Title',
            'body' => 'Post Body Added'
        ]);

        //...
    }
}
Add Route
Open web.php from /routes folder. Add this route into it.
//...

use App\Http\Controllers\PostController;

Route::get('posts', [PostController::class, 'index']);
//...
Application Testing
Run this command into project terminal to start development server,
php artisan serveURL: http://127.0.0.1:8000/posts
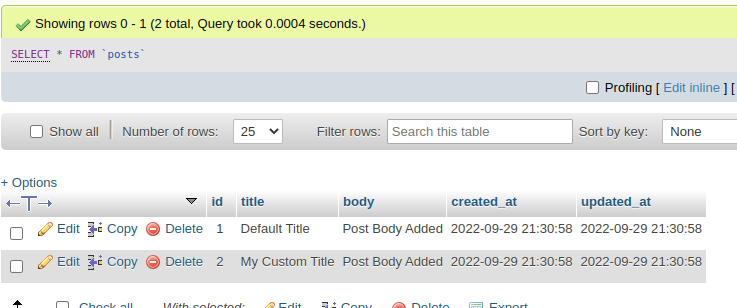
It will create and save data into database table posts.
Read More: Laravel 9 Call Artisan Command From Closure Routes
You can see for first row, you should have the default value of title column whereas in second row you have user defined values.
We hope this article helped you to learn Laravel 9 How To Set Default Values in Model For Columns Example Tutorial in a very detailed way.
If you liked this article, then please subscribe to our YouTube Channel for PHP & it’s framework, WordPress, Node Js video tutorials. You can also find us on Twitter and Facebook.
Read more