Integrating Laravel, a robust PHP framework, with WordPress, a popular content management system, through Corcel provides a unique synergy for developing web applications. Building a user login system in Laravel Corcel involves leveraging Laravel’s authentication while tapping into WordPress’s user management capabilities.
In this tutorial, we’ll see the comprehensive process of creating a user login system for WordPress using Laravel Corcel. This functionality allows developers to harness Laravel’s authentication mechanisms within a WordPress environment, providing users with a seamless login experience.
Read More: Laravel with Gupshup API Send WhatsApp Message
Let’s get started.
What is Laravel Corcel Package?
Laravel Corcel is a package that allows you to integrate WordPress into Laravel applications seamlessly. It provides an eloquent-like interface to interact with your WordPress database using Laravel’s Eloquent ORM.
Here are the list of what Laravel Corcel offers:
- WordPress Database Integration
- Eloquent-Like Models
- Seamless Integration: By using Corcel, you can seamlessly use WordPress data within your Laravel application without having to switch between different database connections or frameworks.
- WordPress Content Management: You can leverage Laravel’s capabilities to create custom functionalities, manage WordPress content, and integrate WordPress data into your Laravel views or controllers.
Laravel Installation
Open terminal and run this command to create a laravel project.
composer create-project laravel/laravel myblogIt will create a project folder with name myblog inside your local system.
To start the development server of laravel –
php artisan serveURL: http://127.0.0.1:8000
Assuming laravel already installed inside your system.
Create Database & Connect
To create a database, either we can create via Manual tool of PhpMyadmin or by means of a mysql command.
CREATE DATABASE laravel_app;
To connect database with application, Open .env file from application root. Search for DB_ and update your details.
DB_CONNECTION=mysql
DB_HOST=127.0.0.1
DB_PORT=3306
DB_DATABASE=laravel_app
DB_USERNAME=root
DB_PASSWORD=root
Read More: How To Convert Array to Query String in Laravel 10?
Laravel UI Installation
We are using here Laravel UI to setup authentication system for login, registration, etc.
Steps To Install Laravel UI
Open project terminal and run the given command.
composer require laravel/uiNext,
We need to generate Login, Registration, etc auth front-end pages.
Generate Authentication Scaffold Using Bootstrap
php artisan ui bootstrap --authNow,
Successfully, you have installed a scaffolding setup to your laravel application. Next, you need to install NPM dependencies.
Install NPM dependencies
Run this following command to install node dependency and compile CSS and js files:
npm install && npm run devRun Migration
Next, we need to run migration command to generate tables in database. Open terminal and run this artisan command.
It will run all pending migrations of your application.
php artisan migrateThe Process of Settings of Laravel UI completed.
Installation of Laravel Corcel Package
Open project terminal and run this command,
composer require jgrossi/corcelProvider Setup
Open config/app.php, Add this line of code into ‘providers’ array,
'providers' => ServiceProvider::defaultProviders()->merge([
    //...
    App\Providers\RouteServiceProvider::class,

    <strong>Corcel\Laravel\CorcelServiceProvider::class,</strong> // Add this
])->toArray(),
Publishing the Configuration file
Open project terminal and run this command,
php artisan vendor:publish --provider="Corcel\Laravel\CorcelServiceProvider"Now you have a <strong>config/corcel.php</strong> config file.
Read More: How To Install and Use jQuery in Laravel Example
Changes in DB Connection,
Open database.php file from config folder.
Search for connections, Add this wordpress connect array with details. This is your wordpress setup database connection details
'connections' => [

//...

    'wordpress' => [ // for WordPress database (used by Corcel)
        'driver'    => 'mysql',
        'host'      => 'localhost',
        'database'  => 'wp_site',
        'username'  => 'admin',
        'password'  => 'secret',
        'charset'   => 'utf8',
        'collation' => 'utf8_unicode_ci',
        'prefix'    => 'wp_',
        'strict'    => false,
        'engine'    => null,
    ],

],
In this case you should want to use the <strong>wordpress</strong> connection for Corcel, so just set it into the Corcel config file <strong>config/corcel.php</strong>.
Update “corcel.php”
Open corcel.php file, search for connection and update the value.
Old value,
'connection' => 'corcel',Update to,
'connection' => 'wordpress',Update “User.php” Model
Add this line to app/Models/User.php
use Corcel\Model\User as Corcel;Next, update the class syntax
class User extends CorcelClass will look like this,
<?php

namespace App\Models;

// use Illuminate\Contracts\Auth\MustVerifyEmail;

use Corcel\Model\User as Corcel;
use Illuminate\Database\Eloquent\Factories\HasFactory;
//...

class User extends Corcel
{
    use HasApiTokens, HasFactory, Notifiable;

    /**
     * The attributes that are mass assignable.
     *
     * @var array<int, string>
     */
    protected $fillable = [
        'name',
        'email',
        'password',
    ];

    //...

}
Update “auth.php”
Open config/auth.php file,
Search for “providers”, Update with this code
'providers' => [
    'users' => [
        'driver' => 'corcel',
        'model' => App\Models\User::class,
    ],

    //...
],
Create WordPress User for Login
We will create a test user to check whether the user logs in or not in laravel application,
Go to wordpress project, Click on Users and Add New User.
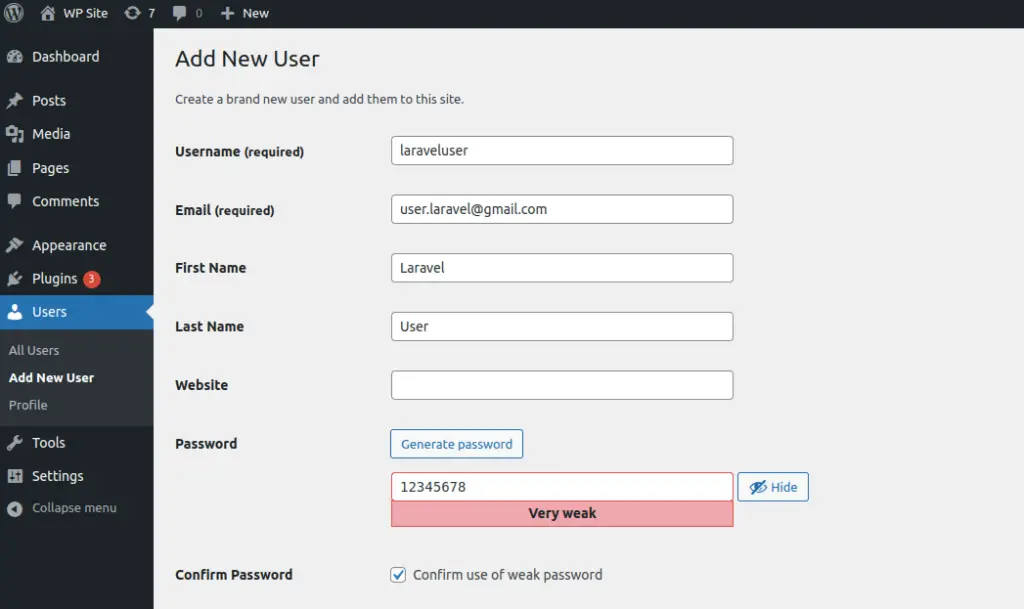
Fill this form to create a wordpress user. Any role you can select while creating it.
Application Testing
Run this command into project terminal to start development server,
php artisan serveURL: http://127.0.0.1:8000/
Click on Login link,
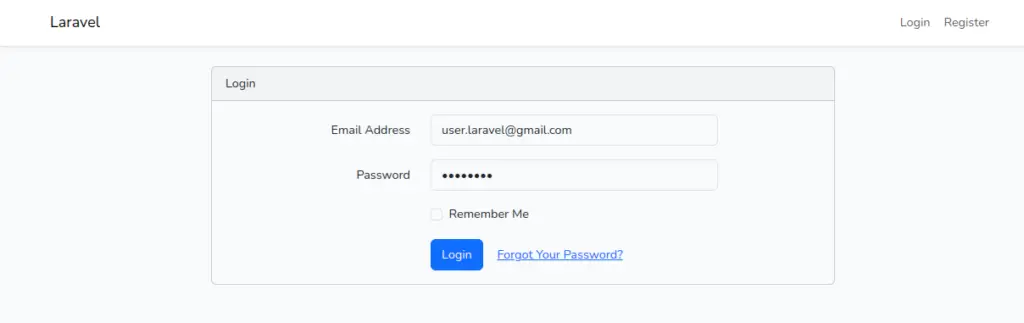
Once you will be able to login, you should see dashboard page.

Successfully, you are logged in.
This is only the demonstration so other information are missing. You can work with each details of the page.
We hope this article helped you to learn Build WordPress User Login Using Laravel Corcel Tutorial in a very detailed way.
If you liked this article, then please subscribe to our YouTube Channel for PHP & it’s framework, WordPress, Node Js video tutorials. You can also find us on Twitter and Facebook.
Read more