
Cron jobs are essential for automating repetitive processes and scheduling periodic actions in web applications. The task scheduling feature in Laravel 10 streamlines the management and execution of cron jobs, allowing you to construct and handle scheduled activities with ease.
In this lesson, we will look at Laravel 10’s robust task scheduling capabilities, with a focus on cron jobs. We will walk you through the process of setting up and configuring cron job task scheduling in your Laravel application step by step.
Read More: Laravel 10 Collection contains() and containsStrict() Methods
Laravel’s task scheduling tool will help you run database backups, send periodic emails, or perform any other scheduled operation.
Let’s get started.
Laravel Installation
Open terminal and run this command to create a laravel project.
composer create-project laravel/laravel myblogIt will create a project folder with name myblog inside your local system.
To start the development server of laravel –
php artisan serveURL: http://127.0.0.1:8000
Assuming laravel already installed inside your system.
Step #1: Create New Command
The initial stage in this Cron scheduling activity will be to construct a Laravel custom command. This custom command will assist us in carrying out our background duties.
So, to create custom command we have an artisan command.
Example
$ php artisan make:command TestCron --command=test:cronWhen we run this command, it will create a Commands folder inside /app/Console if it doesn’t exists.
Read More: Laravel 10 Collection push() and put() Methods Tutorial
Inside this folder we will have a file with the name TestCron.php inside /app/Console/Commands folder.
Step #2: Basic Command Settings
When you open TestCron.php file, you will find few protected variables.
protected $signature = 'test:cron';

protected $description = 'This is a sample cron to log message';
In this file, most important method is handle(). This method runs when cron triggers.
Here, we have the complete code. Write this code into TestCron.php
<?php

namespace App\Console\Commands;

use Illuminate\Console\Command;
use Illuminate\Support\Facades\Log;

class TestCron extends Command
{
    /**
     * The name and signature of the console command.
     *
     * @var string
     */
    protected $signature = 'test:cron';

    /**
     * The console command description.
     *
     * @var string
     */
    protected $description = 'This is a sample cron to log message';

    /**
     * Execute the console command.
     */
    public function handle()
    {
        Log::info("Successfully, cron is running");
    }
}
Inside this handle() method, you can add any type of your job task as Sending an email, Data insert into database, taking data dumps etc.
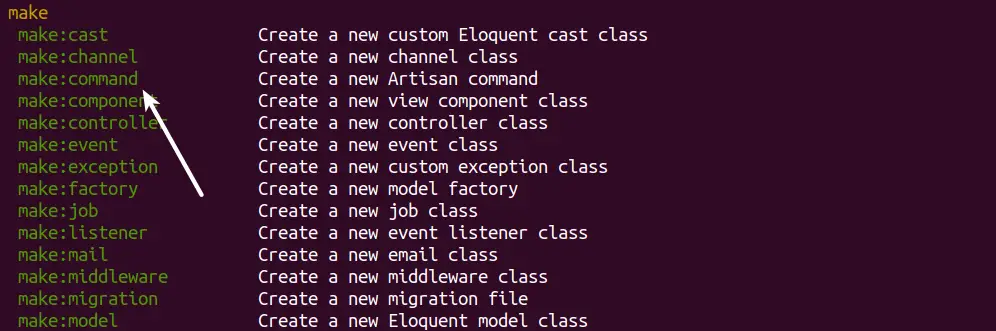
Next,
Back to terminal and see cron command inside artisan command panel.

Next,
Step #3: Register Command in Task Scheduler
To register cron jobs go to /app/Console folder and find a file called Kernel.php inside it. We need to register our created cron command here with any time when we want to trigger.
Read More: CodeIgniter 4 How to Print or Get Last Executed Query
Here, are the list of trigger time (scheduling frequencies) available for task scheduling.
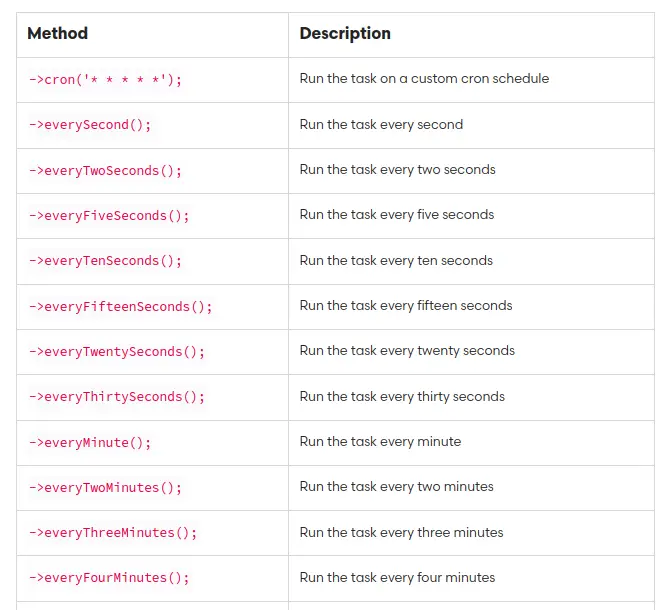
Here is the updated code of Kernel.php file,
<?php

namespace App\Console;

use Illuminate\Console\Scheduling\Schedule;
use Illuminate\Foundation\Console\Kernel as ConsoleKernel;

class Kernel extends ConsoleKernel
{
    /**
     * Define the application's command schedule.
     */
    protected function schedule(Schedule $schedule): void
    {
        // $schedule->command('inspire')->hourly();
        $schedule->command('test:cron')
                 ->everyMinute();
    }

    /**
     * Register the commands for the application.
     */
    protected function commands(): void
    {
        $this->load(__DIR__.'/Commands');

        require base_path('routes/console.php');
    }
}
Successfully, we have registered Cron command to Kernel.php.
Step #4: Test Job Scheduling Task
Open terminal and run this command
$ php artisan schedule:runWhen it executes the command will log message into the log file.
Log file laravel.log you will find inside /storage/logs/ folder. Inside this file cron will add the statement i.e “Successfully, cron is running“.
Read More: Convert Image To The Base64 String Using Javascript
Now let’s set it as on permanent basis by using crontab console command.
Step #5: Settings Cron Task inside Crontab
Open terminal and run this command,
$ crontab -lThis command will list all crons that you have added.
Now, to add new cron tasks
$ crontab -eIt will open an interface to your terminal to register or add new tasks.
Syntax
* * * * * cd /path-to-your-project && php artisan schedule:run >> /dev/null 2>&1- * * * * * is the time (every minute) when this crontab task will fire.
- cd /path-to-your-project Path of your laravel project
- php artisan schedule Command to run cron task
Example
* * * * * cd /var/www/myapp && php artisan schedule:run >> /dev/null 2>&1We hope this article helped you to learn about Cron Job Task Scheduling In Laravel 10 Example Tutorial in a very detailed way.
If you liked this article, then please subscribe to our YouTube Channel for PHP & it’s framework, WordPress, Node Js video tutorials. You can also find us on Twitter and Facebook.
Read more