Working & Download Reports in Web applications is very common when we are developing data related web applications. Exporting data into PDF, Excel, a Word Document, CSV is very common in applications.
Inside this article, we will see the concept of Exporting data into multiple formats like PDF, Excel, Copy to Clipboard, etc report in CakePHP 4 using jQuery DataTable plugin. Installation and working methods for all you can find here in detailed steps.
DataTable is a jquery plugin which helps to create a normal table with advance features like searching, sorting, pagination, etc. In this article we will see DataTable data export in CakePHP 4.
Learn More –
- CakePHP 4 Connect Custom Helper To Database Table
- CakePHP 4 Connect Models with Multiple Databases
- CakePHP 4 Create Signature Pad & Save Using jQuery
- CakePHP 4 Crop Image Before Upload Using Croppie.js
Let’s get started.
CakePHP 4 Installation
To create a CakePHP project, run this command into your shell or terminal. Make sure composer should be installed in your system.
$ composer create-project --prefer-dist cakephp/app:~4.0 mycakephp
Above command will creates a project with the name called mycakephp.
Create Database
To create a database, either we can create via Manual tool of PhpMyadmin or by means of a mysql command.
CREATE DATABASE mydatabase;Successfully, we have created a database.
Database Connection
Open app_local.php file from /config folder. Search for Datasources. Go to default array of it.
You can add your connection details here to connect with your database. It will be like this –
//...

'Datasources' => [
        'default' => [
            'host' => 'localhost',
            /*
             * CakePHP will use the default DB port based on the driver selected
             * MySQL on MAMP uses port 8889, MAMP users will want to uncomment
             * the following line and set the port accordingly
             */
            //'port' => 'non_standard_port_number',

            'username' => 'root',
            'password' => 'sample@123',

            'database' => 'mydatabase',
            /*
             * If not using the default 'public' schema with the PostgreSQL driver
             * set it here.
             */
            //'schema' => 'myapp',

            /*
             * You can use a DSN string to set the entire configuration
             */
            'url' => env('DATABASE_URL', null),
        ],

     //...

//...
You can pass host, username, password and database.
Successfully, you are now connected with the database.
Create Migration
Open project into terminal and run this command to create migration file.
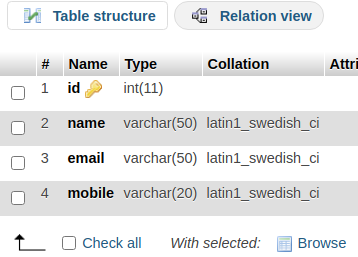
$ bin/cake bake migration CreateEmployeesIt will create 20220330143909_CreateEmployees.php file inside /config/Migrations folder. Open migration file and write this following code into it.
The code is all about for the schema of employees table.
<?php

declare(strict_types=1);

use Migrations\AbstractMigration;

class CreateEmployees extends AbstractMigration
{
    public function change()
    {
        $table = $this->table('employees');
        $table->addColumn("name", "string", [
            "limit" => 50,
            "null" => false
        ]);
        $table->addColumn("email", "string", [
            "limit" => 50,
            "null" => false
        ]);
        $table->addColumn("mobile", "string", [
            "limit" => 20,
            "null" => false
        ]);
        $table->create();
    }
}
Run Migration
Back to terminal and run this command.
$ bin/cake migrations migrateIt will create employees table inside database.
Create Test Data
Here, we have a list of fake data which you needs to be inserted into database table employees. Copy this mysql query and execute it.
Right now, we have only few rows. You can insert as many rows as you want.
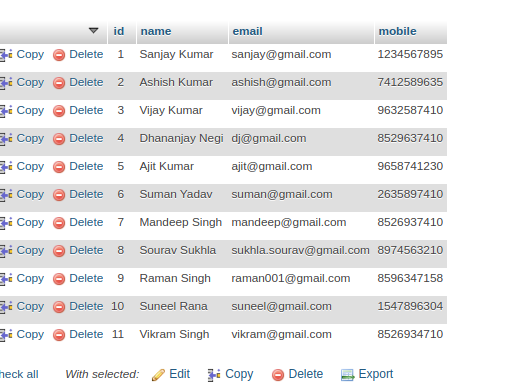
--
-- Dumping data for table `employees`
--

INSERT INTO `employees` (`id`, `name`, `email`, `mobile`) VALUES
(1, 'Sanjay Kumar', 'sanjay@gmail.com', '1234567895'),
(2, 'Ashish Kumar', 'ashish@gmail.com', '7412589635'),
(3, 'Vijay Kumar', 'vijay@gmail.com', '9632587410'),
(4, 'Dhananjay Negi', 'dj@gmail.com', '8529637410'),
(5, 'Ajit Kumar', 'ajit@gmail.com', '9658741230'),
(6, 'Suman Yadav', 'suman@gmail.com', '2635897410'),
(7, 'Mandeep Singh', 'mandeep@gmail.com', '8526937410'),
(8, 'Sourav Sukhla', 'sukhla.sourav@gmail.com', '8974563210'),
(9, 'Raman Singh', 'raman001@gmail.com', '8596347158'),
(10, 'Suneel Rana', 'suneel@gmail.com', '1547896304'),
(11, 'Vikram Singh', 'vikram@gmail.com', '8526934710');
After insertion of test data, table will look like this.
Create Model & Entity
Next,
We will create model and entity. Back to terminal and run this command.
$ bin/cake bake model Employees --no-validation --no-rulesIt will create model file EmployeesTable.php inside /src/Model/Table folder. Also we should see the entity file Employee.php inside /src/Model/Entity folder.
Create Controller
Open project into terminal and run this command into it.
$ bin/cake bake controller Site --no-actionsIt will create SiteController.php file inside /src/Controller folder. Open controller file and write this code into it.
<?php

declare(strict_types=1);

namespace App\Controller;

class SiteController extends AppController
{
    public function initialize(): void
    {
        parent::initialize();
        $this->loadModel("Employees");
    }

    public function listEmployees()
    {
        $employees = $this->Employees->find()->toList();
        $this->set(compact("employees"));
    }
}
Inside above code, we have two methods –
- initialize() method as constructor which loads model to class.
- listEmployees() method responsible to load employees data into template file list_employees.php.
Create Template
Create Site folder inside /templates folder. Next, needs to create list_employees.php file inside /templates/Site folder.
Open list_employees.php file and write this following code into it. This will give the frontend layout for datatable.
<!DOCTYPE html>
<html lang="en">

<head>
    <meta charset="utf-8">
    <meta name="viewport" content="width=device-width, initial-scale=1">
    <link rel="stylesheet" href="https://maxcdn.bootstrapcdn.com/bootstrap/3.4.1/css/bootstrap.min.css">
    <link rel="stylesheet" href="https://cdn.datatables.net/1.10.23/css/jquery.dataTables.min.css" />
    <link rel="stylesheet" href="https://cdn.datatables.net/buttons/1.6.5/css/buttons.dataTables.min.css" />
</head>

<body>

    <div class="container" style="margin-top:30px;">
        <h3 style="text-align: center;">Employees Report - DataTable Export Buttons by Online Web Tutor</h3>

        <div class="panel panel-primary">
            <div class="panel-heading">
                Employees Report
            </div>
            <div class="panel-body">
                <table class="table table-striped" id="tbl-employees">
                    <thead>
                        <tr>
                            <th>ID</th>
                            <th>Name</th>
                            <th>Email</th>
                            <th>Mobile</th>
                        </tr>
                    </thead>
                    <tbody>

                        <?php
                        if (count($employees) > 0) {

                            $count = 1;

                            foreach ($employees as $emp) {
                        ?>
                                <tr>
                                    <td><?= $count++ ?></td>
                                    <td><?= $emp['name'] ?></td>
                                    <td><?= $emp['email'] ?></td>
                                    <td><?= $emp['mobile'] ?></td>
                                </tr>
                        <?php
                            }
                        }
                        ?>
                    </tbody>
                </table>
            </div>
        </div>
    </div>

    <script src="https://ajax.googleapis.com/ajax/libs/jquery/3.5.1/jquery.min.js"></script>
    <script src="https://maxcdn.bootstrapcdn.com/bootstrap/3.4.1/js/bootstrap.min.js"></script>
    <script src="https://cdn.datatables.net/1.10.23/js/jquery.dataTables.min.js"></script>
    <script src="https://cdn.datatables.net/buttons/1.6.5/js/dataTables.buttons.min.js"></script>
    <script src="https://cdnjs.cloudflare.com/ajax/libs/jszip/3.1.3/jszip.min.js"></script>
    <script src="https://cdnjs.cloudflare.com/ajax/libs/pdfmake/0.1.53/pdfmake.min.js"></script>
    <script src="https://cdnjs.cloudflare.com/ajax/libs/pdfmake/0.1.53/vfs_fonts.js"></script>
    <script src="https://cdn.datatables.net/buttons/1.6.5/js/buttons.html5.min.js"></script>

    <script>
        $(function() {
            $("#tbl-employees").DataTable({
                dom: 'Bfrtip',
                buttons: [
                    'copyHtml5',
                    'excelHtml5',
                    'csvHtml5',
                    'pdfHtml5',
                    'pageLength'
                ]
            });
        })
    </script>

</body>

</html>
Add Route
Open routes.php file from /config folder. Add this route into it.
//...

$routes->connect(
    '/employees',
    ['controller' => 'Site', 'action' => 'listEmployees']
);

//...
Application Testing
Open terminal and run this command to start development server.
$ bin/cake serverURL: http://localhost:8765/employees
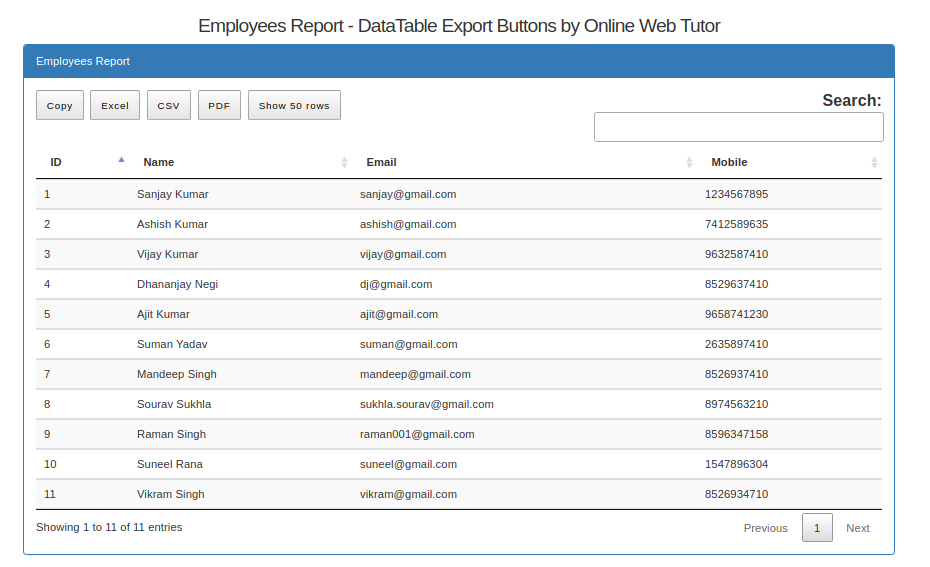
We hope this article helped you to learn about DataTable Data Export in CakePHP 4 Tutorial in a very detailed way.
If you liked this article, then please subscribe to our YouTube Channel for PHP & it’s framework, WordPress, Node Js video tutorials. You can also find us on Twitter and Facebook.
Read more