
Consider having your CodeIgniter 4 application conduct particular activities at predefined times. Cron Jobs makes it a reality rather than a pipe fantasy. We lead you through the process of setting up Cron Jobs step by step in this detailed tutorial.
Inside this conceptual article you will learn the complete idea of Step by Step How To Setup Cron Jobs in CodeIgniter 4 Tutorial.
A Cron job, often known as a Cron task in Unix-like operating systems, is a time-based scheduler. It enables you to automate and plan the execution of specified commands or scripts at predefined intervals or durations.
These scheduled tasks can be made to run at specific times and dates or at regular intervals such as every minute, hour, day, week, or month.
Read More: How To Integrate ChatGPT API in CodeIgniter 4 Tutorial
Cron jobs are often used for a variety of tasks, including system maintenance, backups, data updates, sending automatic emails, retrieving data from other sources, and executing routine scripts.
Let’s get started.
CodeIgniter 4 Installation
To create a CodeIgniter 4 setup run this given command into your shell or terminal. Please make sure composer should be installed.
composer create-project codeigniter4/appstarter codeigniter-4Assuming you have successfully installed application into your local system.
Environment (.env) Setup
When we install CodeIgniter 4, we will have env file at root. To use the environment variables means using variables at global scope we need to do env to .env
Either we can do via renaming file as simple as that. Also we can do by terminal command.
Open project in terminal
cp env .envAbove command will create a copy of env file to .env file. Now we are ready to use environment variables.
Enable Development Mode
CodeIgniter starts up in production mode by default. You need to make it in development mode to see any error if you are working with application.
Open .env file from root.
# CI_ENVIRONMENT = production

 // Do it to

CI_ENVIRONMENT = development
Now application is in development mode.
Create Database
To create a database, either we can create via Manual tool of PhpMyadmin or by means of a mysql command.
We will use MySQL command to create database. Run this command into Sql tab of PhpMyAdmin.
CREATE DATABASE codeigniter4_app;Successfully, we have created a database.
Database Connection
Open .env file from project root.
Search for DATABASE. You should see the connection environment variables into it. Put your updated details of database connection string values.
#--------------------------------------------------------------------
# DATABASE
#--------------------------------------------------------------------

database.default.hostname = localhost
database.default.database = codeigniter4_app
database.default.username = admin
database.default.password = admin
database.default.DBDriver = MySQLi
database.default.DBPrefix =
database.default.port = 3306
Now, database successfully connected with the application.
What is CodeIgniter Task Scheduler?
CodeIgniter Task Scheduler makes cronjob scheduling in your application simple, versatile, and powerful. Instead of creating several cronjobs on each server where your application runs, create a single cronjob that points to the script, and all of your tasks will be scheduled in your code.
Read More: How To Cache Database Query Using CodeIgniter Cache?
It also includes CLI tools to help you manage tasks, a Debug Toolbar collector, and other features.
Let’s see the steps to install and work with it.
Installation via Composer
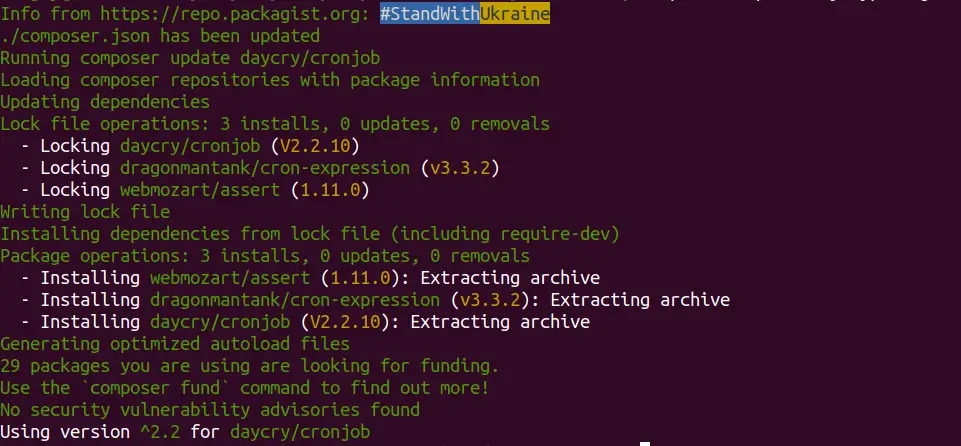
Open your project terminal and run this command.
composer require daycry/cronjobYou should see in your terminal as:
Also, this package provides manual installation as well.
Manual Installation
Download this repo and then enable it by editing app/Config/Autoload.php.
Add the Daycry\CronJob namespace to the $psr4 array. For example, if you copied it into app/ThirdParty,
$psr4 = [
    'Config'      => APPPATH . 'Config',
    APP_NAMESPACE => APPPATH,
    'App'         => APPPATH,
    'Daycry\CronJob' => APPPATH .'ThirdParty/cronjob/src',
];
Once you do the installation, you should see a command list of cron jobs inside php spark CLI.

Package Configuration to Application
Again, back to terminal and run this command.
php spark cronjob:publishOnce, you will run that. It will publish a file with name “CronJob.php” inside /app/Config folder.
Execute migration command to run pending migrations of application:
php spark migrate -allAll done with the setup.
Now, let’s create a job and scheduled it to run.
Read More: How To Connect CodeIgniter 4 with Multiple Databases?
Create a Cron Job (Remove Unverified Users and Backup it)
This is only a demonstration code. You can use your own job concept in your application as per need.
Here, we are removing unverified users from database after 24 hours and also creating a backup of those users into a different table. After all activity also we are maintaining application logs.
Open terminal and create a controller file.
php spark make:controller Background --suffixIt will create a file with name BackgroundController.php inside /app/Controllers folder.
Open controller file and write this complete code into it.
<?php

namespace App\Controllers;

use App\Controllers\BaseController;
use App\Models\LogModel;
use App\Models\RemovedUserModel;
use App\Models\UserModel;

class BackgroundController extends BaseController
{
    public function removeUnverifiedUsers()
    {
        $userObject = new UserModel();

        $userData = $userObject->where("created_at <= NOW() - INTERVAL 1 DAY")->where([
            "email_verified" => "0",
        ])->get()->getResultArray();

        if (!empty($userData)) {

            $removedUserObject = new RemovedUserModel();

            $data = array();

            foreach ($userData as $user) {

                $data[] = array(
                    "name" => $user['name'],
                    "email" => $user['email'],
                    "password" => $user['password'],
                    "email_token" => $user['email_token'],
                    "email_verified" => $user['email_verified'],
                );

                $userObject->delete($user['id']);
            }

            $logObject = new LogModel();

            if ($removedUserObject->insertBatch($data)) {

                $data = [
                    "type" => "removed_user",
                    "log_msg" => count($data) . " Users removed due to unverified emails",
                ];

            } else {

                $data = [
                    "type" => "removed_user",
                    "log_msg" => "Failed to remove users",
                ];
            }

            $logObject->insert($data);
        }
    }
}
Add Cron Route
Open Routes.php from /app/Config folder. Add this route into it.
//...

$routes->get("cron/remove-users", "BackgroundController::removeUnverifiedUsers");

//...
Now, job is ready. Next to link with task scheduler.
Add Cron Job To CodeIgniter Task Scheduler
Open CronJob.php from /app/Config folder.
You will see a lot of code inside above file. We need to work only on init method of it. Rest you can do other settings as well as per documentation.
<?php

namespace Config;

use CodeIgniter\Config\BaseConfig;
use Daycry\CronJob\Scheduler;

class CronJob extends \Daycry\CronJob\Config\CronJob
{
    //...

    //... other code stuff

    /*
    |--------------------------------------------------------------------------
    | Cronjobs
    |--------------------------------------------------------------------------
    |
    | Register any tasks within this method for the application.
    | Called by the TaskRunner.
    |
    | @param Scheduler $schedule
    */
    public function init(Scheduler $schedule)
    {
        $schedule->url(base_url('cron/remove-users'))->named("RemoveUnverfiedUsers")->daily();
    }
}
Enable CronJob For Tasks
Back to project terminal and run this command:
php spark cronjob:enableIt will enable CronJob processor.
You can also verify it by running this command:
php spark cronjob:listList of all cron jobs of your application.

Add CronJob Processor To Crontab
Back to your terminal, run this command.
crontab -eIf you run that, it will open a terminal editor (nano editor) to add your cron jobs processors.
Add your job to run every minute.
Syntax:
* * * * * cd /path-to-your-project && php spark cronjob:run >> /dev/null 2>&1Example:
* * * * * cd /var/www/html/dev/codeigniter-4 && php spark cronjob:run >> /dev/null 2>&1Note*: Task scheduler will execute every minute but cron will run at the specified time period of once in a day.
Once you add your code, just save it. Now, you have a job inside your crontab.
If everything went well, you should be able to see that your job will execute automatically every day at 00:00.
That’s it.
We hope this article helped you to learn Step by Step How To Setup Cron Jobs in CodeIgniter 4 Tutorial in a very detailed way.
If you liked this article, then please subscribe to our YouTube Channel for PHP & it’s framework, WordPress, Node Js video tutorials. You can also find us on Twitter and Facebook.
Read more