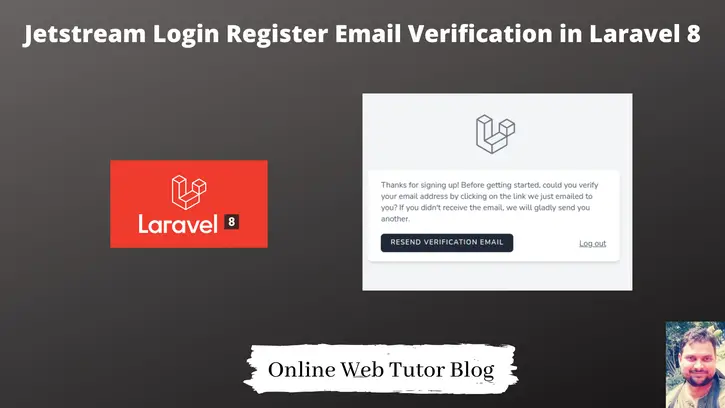
After registration sending an email to registered user is very important if we are developing a secure application. Inside this article we will see the concept of Jetstream login register email verification in laravel 8 tutorial.
Jetstream is also one of the composer package which provides authentication scaffolding in laravel either by inertia.js and by livewire. These includes Login, registration, forgot password, reset password routes.
There are few simple steps which is very easy to follow and to implement in laravel 8 application. We will see this tutorial from scratch. Email verification is laravel is very simple process to create.
Other articles on email verification of laravel 8, you will like –
- Email verification in Laravel 8 with Breeze authentication, Click here.
- Email verification in Laravel 8 with laravel/ui scaffolding, Click here.
While implementing email verification in laravel main focus is to write the routes, middleware. We will do these points –
- Create Laravel 8 application with Jetstream and Livewire scaffolding (You can use any other, no issues)
- We will see Model & Route configuration
Let’s get started.
Laravel Installation
We will create laravel project using composer. So, please make sure your system should have composer installed. If not, may be this article will help you to Install composer in system.
Here is the command to create a laravel project-
composer create-project --prefer-dist laravel/laravel blog
To start the development server of Laravel –
php artisan serve
URL: http://127.0.0.1:8000
Assuming laravel already installed inside your system.
Create Database & Connect
To create a database, either we can create via Manual tool of PhpMyadmin or by means of a mysql command.
CREATE DATABASE laravel_app;
To connect database with application, Open .env file from application root. Search for DB_ and update your details.
DB_CONNECTION=mysql
DB_HOST=127.0.0.1
DB_PORT=3306
DB_DATABASE=laravel_app
DB_USERNAME=root
DB_PASSWORD=root
Laravel 8 Authentication with Jetstream & Livewire
We are using here Jetstream with Livewire to create application authentication section like login and registration.
Install Jetstream
We will use composer command to install jetstream library. Open project to terminal and hit this command into it.
$ composer require laravel/jetstream
Create Auth with Livewire.
To install Livewire –
$ php artisan jetstream:install livewire
Next, we need to run command to install node js pacakges.
$ npm install && npm run dev
It will generate CSS and JS compiled files for authentication system.
Run Migration
Next, we need to run migration command to generate tables in database. Open terminal and run this artisan command.
$ php artisan migrate
SMTP Configuration with Laravel 8
To configure SMTP details, open up the file .env from application root. We will pass mail driver as gmail server, mail host, mail port, mail username, mail password.
MAIL_MAILER=smtp
MAIL_HOST=smtp.gmail.com
MAIL_PORT=587
MAIL_USERNAME="mygmail@gmail.com"
MAIL_PASSWORD="mypassword"
MAIL_ENCRYPTION=tls
MAIL_FROM_ADDRESS="mygmail@gmail.com"
MAIL_FROM_NAME="Online Web Tutor"
Make sure you have enabled google security setting form your gmail. go to Google account and click on “Account”. Once you are on the “Account” page, click on “Security“. Scroll down to the bottom and you will find “Less secure app access” settings. Set as ON.
Click here to learn in detail about SMTP Configuration in Laravel 8.
Model Preparation
Open User.php from /app/Models.
Before getting started, verify that your <strong>App\Models\User</strong> model implements the <strong>Illuminate\Contracts\Auth\MustVerifyEmail</strong> contract.
<?php

namespace App\Models;

use Illuminate\Contracts\Auth\MustVerifyEmail;
use Illuminate\Foundation\Auth\User as Authenticatable;
use Illuminate\Notifications\Notifiable;

class User extends Authenticatable implements MustVerifyEmail
{
    use Notifiable;

    // ...
}
Model file is not ready to catch data in email verification process steps.
Next, we need routes.
Jestream & Livewire Authentication Routes
Jestream package provides convenient built-in services for sending and verifying email verification requests.
When we install jetstream package, we get fortify.php inside /config folder.
Internally this auth.php file linked with web.php file.
Open fortify.php,
This file contains all authentication scaffolding routes.
Let’s see email verification routes. Search for features, Initial code,
'features' => [
         Features::registration(),
         Features::resetPasswords(),
         //Features::emailVerification(),
         Features::updateProfileInformation(),
         Features::updatePasswords(),
         Features::twoFactorAuthentication([
             'confirmPassword' => true,
         ]),
     ],
You need to remove comment from Features::emailVerification(), to enable email verification routes and it’s functions.
Updated code will be something like this,
'features' => [
         Features::registration(),
         Features::resetPasswords(),
         Features::emailVerification(),
         Features::updateProfileInformation(),
         Features::updatePasswords(),
         Features::twoFactorAuthentication([
             'confirmPassword' => true,
         ]),
     ],
After enabling this feature, you will see all the routes of email verification in action.
Email verification routes will be of three types –
- Route which sends email to user to verify.
- Route which changes the status when user clicks on verify email.
- Route which resend the email verification mail.
Application Testing
Run this command into project terminal to start development server,
php artisan serveURL – http://127.0.0.1:8000/
We will get Login and Register Link at landing page.

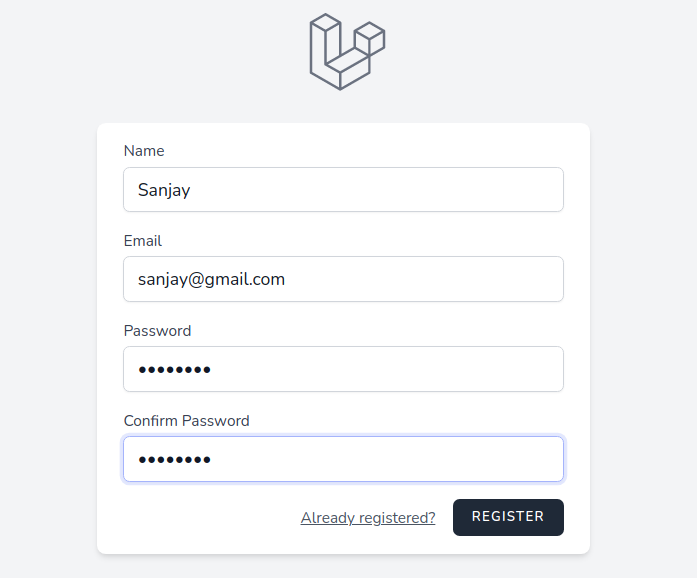
When we click on Register, we should get a register page. We need to fill information and then we hit Register. It will register user into database but verification pending.
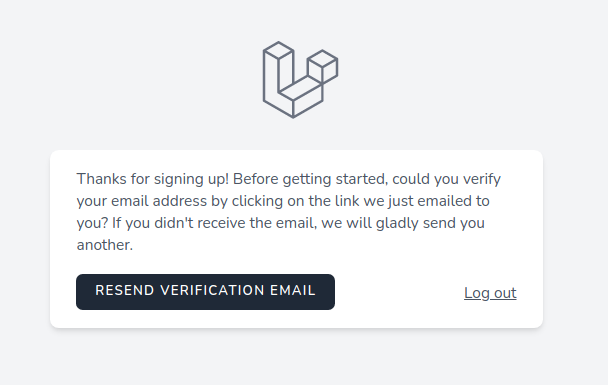
We will get an email verification page, but when we register user automatically it send an email to provided email address.
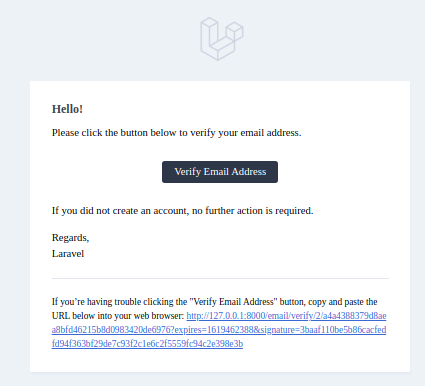
Open email address, we will get an email verification mail. Simply we need to click and verify our email.
Once user will be verified then each protected routes will be open to use. email_verified_at column will be updated inside users table.
We hope this article helped you to learn about Jetstream Login Register Email Verification in Laravel 8 in a very detailed way.
If you liked this article, then please subscribe to our YouTube Channel for PHP & it’s framework, WordPress, Node Js video tutorials. You can also find us on Twitter and Facebook.
Read more