Inside this article we will see the concept to upload the form data with a file to server using ajax and jquery. This tutorial is very interesting to learn and also easy to implement in code.
This tutorial will helps you to understand about the form submission with a file. This article is for jQuery ajax file upload with form data using PHP. There are very few simple steps to do and complete this task.
To do for the article –
- Create a Form with file upload
- Add jQuery form validation
- Integrate Ajax code to submit form data
- PHP file to receive data
Let’s get started.
Application Files Setup
Create a folder with name like ajax-form. Inside this folder create two files. Create a users folder inside project folder. In this folder we will store user images. Folder should have proper permissions for read and write.
- student-form.php [ It will contain a form with file button ]
- ajax-handler.php [ Ajax will hit this file to upload data ]
Only these two files we need for this tutorial.
Create Form, Add Form Validation & Ajax
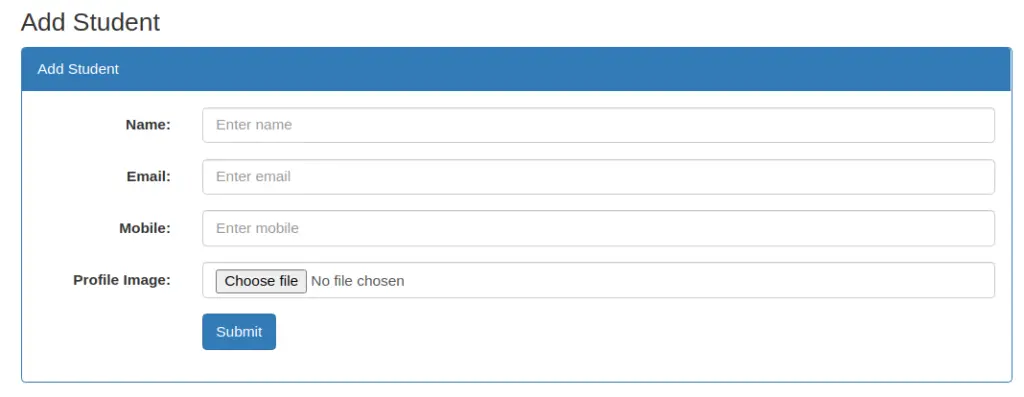
Open student-form.php and write this code into it.
<!DOCTYPE html>
<html lang="en">

<head>
    <title>jQuery Ajax File Upload with Form Data using PHP</title>
    <meta charset="utf-8">
    <meta name="viewport" content="width=device-width, initial-scale=1">
    <link rel="stylesheet" href="https://maxcdn.bootstrapcdn.com/bootstrap/3.4.1/css/bootstrap.min.css">

    <style>
        #student-form label.error {
            color: red;
        }
    </style>
</head>

<body>

    <div class="container">
        <h3>Add Student</h3>
        <div class="panel panel-primary">
            <div class="panel-heading">Add Student</div>
            <div class="panel-body">
                <form class="form-horizontal" id="student-form" action="ajax-handler.php" method="post" enctype="multipart/form-data">
                    <div class="form-group">
                        <label class="control-label col-sm-2" for="name">Name:</label>
                        <div class="col-sm-10">
                            <input type="text" required class="form-control" id="name" name="name" placeholder="Enter name">
                        </div>
                    </div>
                    <div class="form-group">
                        <label class="control-label col-sm-2" for="email">Email:</label>
                        <div class="col-sm-10">
                            <input type="email" required class="form-control" id="email" placeholder="Enter email">
                        </div>
                    </div>
                    <div class="form-group">
                        <label class="control-label col-sm-2" for="mobile">Mobile:</label>
                        <div class="col-sm-10">
                            <input type="text" required class="form-control" id="mobile" name="mobile" placeholder="Enter mobile">
                        </div>
                    </div>
                    <div class="form-group">
                        <label class="control-label col-sm-2" for="image">Profile Image:</label>
                        <div class="col-sm-10">
                            <input type="file" required class="form-control" id="image" name="image">
                        </div>
                    </div>

                    <div class="form-group">
                        <div class="col-sm-offset-2 col-sm-10">
                            <button type="submit" class="btn btn-primary">Submit</button>
                        </div>
                    </div>
                </form>
            </div>
        </div>
    </div>

    <script src="https://ajax.googleapis.com/ajax/libs/jquery/3.5.1/jquery.min.js"></script>
    <script src="https://cdnjs.cloudflare.com/ajax/libs/jquery-validate/1.19.2/jquery.validate.min.js"></script>
    <script src="https://maxcdn.bootstrapcdn.com/bootstrap/3.4.1/js/bootstrap.min.js"></script>
    <script>
        // Custom code
        $(function() {

            // Adding validation
            $("#student-form").validate();

            $(document).on("submit", "form#student-form", function(e) {

                e.preventDefault(); // prevent from default action

                var formData = new FormData(this);

                $.ajax({
                    url: $(this).attr('action'),
                    type: $(this).attr('method'),
                    cache: false,
                    data: formData,
                    processData: false,
                    contentType: false,
                    success: function(data) {

                        console.log(data);
                    }
                });
            });
        });
    </script>
</body>

</html>- jQuery validation plugin used inside above code for client side validation.
- $(“#student-form”).validate();
- var formData = new FormData(this); Get all form data
- Form will be submitted to ajax-handler.php, when ajax processes
- processData: false, contentType: false, This is very important to add. We will understand while application testing it.
Create Ajax Handler
Open ajax-handler.php and write this code into it.
Currently, inside ajax-handler file we don’t have any code like save to database, image upload to folder etc. but you can add those code too into it.
<?php

$user = $_FILES['image'];

if (isset($user)) {

    $filename = $user['name'];
    $tmp_path = $user['tmp_name'];

    if (move_uploaded_file($tmp_path, "./users/" . $filename)) {
        // You can write code to save into database
        // You can write code to upload image into folder
        echo json_encode(array(
            "status" => 1,
            "data" => $_POST,
            "files" => $_FILES
        ));
    } else {
        echo json_encode(array(
            "status" => 0,
            "message" => "Failed to upload image"
        ));
    }
}
- Accepting all input values via $_POST
- Get submitted files via $_FILES
Application Testing
Open project into browser.
URL: http://localhost/ajax-form/student-form.php
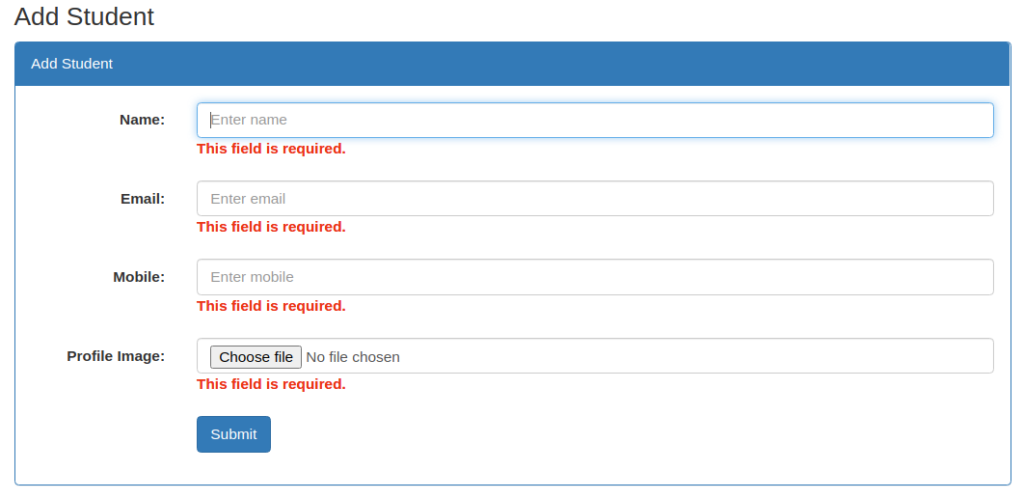
Submit form without any input values, we will get form validation error messages.
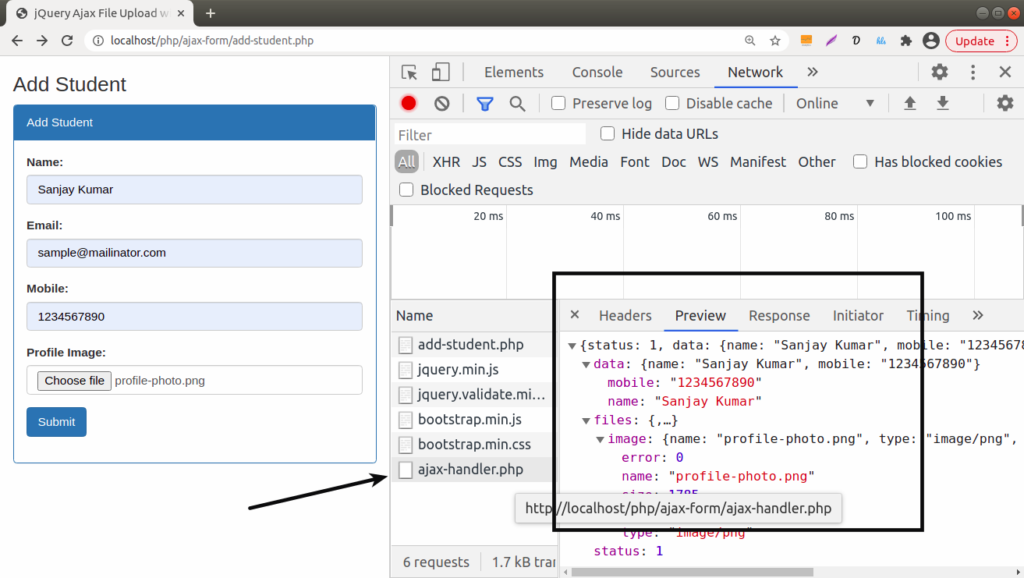
When we upload input values with a file.
Note*: If we forgot to add these properties into ajax request method of jquery, then you will get this error may be in your console. Add these.
 processData: false,
 contentType: false,

Submit form with all valid values and adding jquery method properties, Now
We hope this article helped you to learn jQuery Ajax File Upload with Form Data using PHP Tutorial in a very detailed way.
If you liked this article, then please subscribe to our YouTube Channel for PHP & it’s framework, WordPress, Node Js video tutorials. You can also find us on Twitter and Facebook.
Read more