
In online development, security is of the utmost importance, and including Google reCaptcha v3 validation into your Laravel 10 application is an excellent approach to defend against automated abuse and secure the integrity of user interactions.
This tutorial will walk you through the process of implementing Google reCaptcha v3 validation into your Laravel 10 project, hence improving the security and trustworthiness of your web application.
Throughout this lesson, we’ll look at how to integrate Google reCaptcha v3 validation into your Laravel 10 forms and API endpoints, as well as the recommended practises for doing so. We’ll go over things like setup and validation.
Read More: Laravel 10 FullCalendar Ajax CRUD Tutorial Example
Let’s get started.
What is Google reCaptcha v3 Validation?
Google reCAPTCHA v3 validation is a system that uses Google’s reCAPTCHA v3 service to check the legitimacy of user interactions with a website or online application. Unlike the old reCAPTCHA v2, which provides users with difficulties such as picture recognition or checkbox clicking, reCAPTCHA v3 runs in the background and does not require user participation.
It analyses user behaviour and assigns a “score” to each interaction in order to establish whether it was performed by a human or a bot.
Laravel Installation
Open terminal and run this command to create a laravel project.
composer create-project laravel/laravel myblogIt will create a project folder with name myblog inside your local system.
To start the development server of laravel –
php artisan serveURL: http://127.0.0.1:8000
Assuming laravel already installed inside your system.
How To Install Google reCaptcha Package in Laravel?
Open project terminal and run this composer command to install,
composer require josiasmontag/laravel-recaptchav3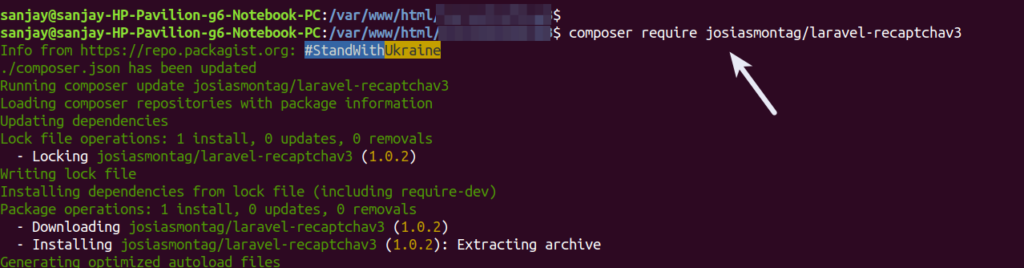
Next,
How To Publish Google reCaptcha to Setup?
You need to publish package into application,
Back to terminal and run this command to publish it.
php artisan vendor:publish --provider="Lunaweb\RecaptchaV3\Providers\RecaptchaV3ServiceProvider"How To Generate Google reCaptcha v3 Credentials?
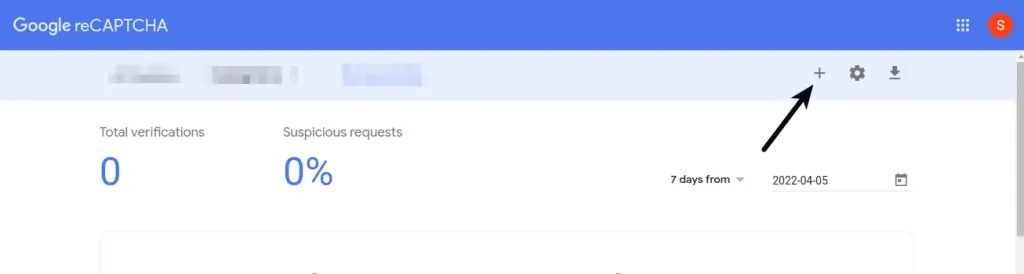
Open browser and hit this link, it will need to login via your google account. Please login to create google recaptcha credentials.
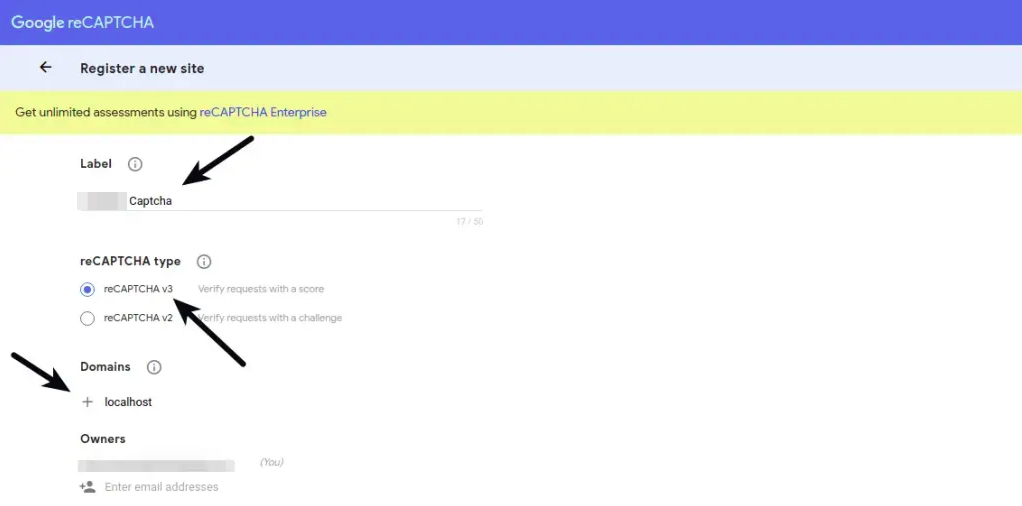
You need to do these,
- Label name
- Select reCaptcha version type
- Domain to be linked
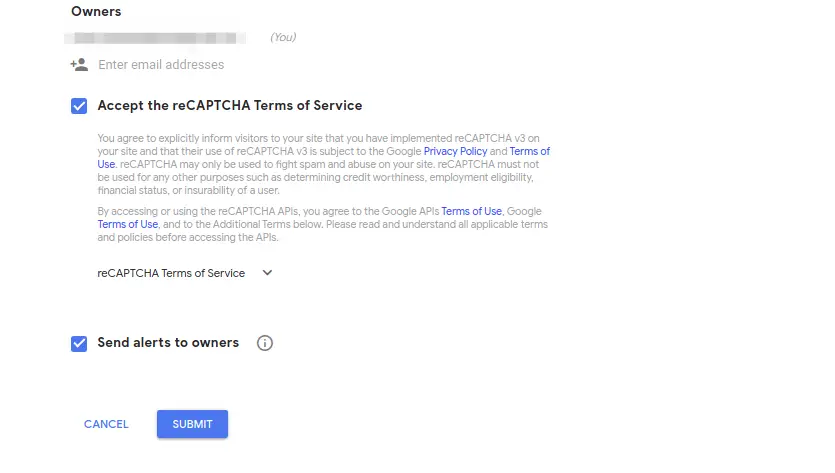
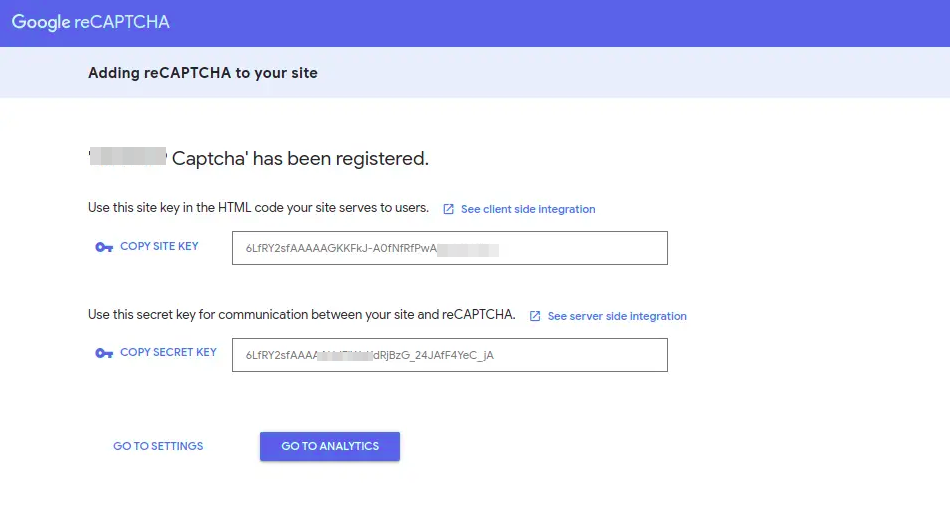
Copy your Site Key and Secret Key from here.
Read More: How To Work with Javascript Cookie For GET SET and REMOVE
Settings Environment Variables
Open .env file from application and add these keys into it.
..

RECAPTCHAV3_SITEKEY=6LfRY2sfAAA45GKKFkJ-A0fNfRfPwAgh3xILA1e4

RECAPTCHAV3_SECRET=6LfRY2sfAAA45HdFlWaKdRjBzG_24JAfF4YeC_jA

..
Setup Data Controller
Open project into terminal and run this artisan command to create controller,
php artisan make:controller RegisterControllerIt will create RegisterController.php file inside /app/Http/Controllers folder.
Open file write this complete code into it.
<?php

namespace App\Http\Controllers;

use Illuminate\Http\Request;
use Illuminate\View\View;

class RegisterController extends Controller
{
    public function index(): View
    {
        return view('register');
    }

    public function store(Request $request)
    {
        $this->validate($request, [
            'name' => 'required',
            'email' => 'required|email',
            'password' => 'required|same:password_confirmation',
            'password_confirmation' => 'required',
            'g-recaptcha-response' => 'required|recaptchav3:register,0.5'
        ]);

        dd('done');
    }
}
Next,
Setup Blade Layout Template
Create a file with name register.blade.php inside /resources/views folder.
Open file and write this code into it.
<!DOCTYPE html>
<html>
<head>
    <title>Laravel 10 How To Add Google reCaptcha v3 Validation</title>
    <link rel="stylesheet" href="https://cdnjs.cloudflare.com/ajax/libs/twitter-bootstrap/4.1.3/css/bootstrap.min.css" />
    <script src="https://cdnjs.cloudflare.com/ajax/libs/jquery/3.3.1/jquery.min.js"></script>
    <style>
        .help-block{
            color: red;
        }
    </style>
    {!! RecaptchaV3::initJs() !!}
</head>
<body>

<div class="container" style="margin-top:20px;">
    <div class="row">
        <div class="col-md-8 col-md-offset-2">
            <div class="card card-primary">
                <div class="card-header">Laravel 10 How To Add Google reCaptcha v3 Validation</div>
                <div class="card-body">
                    <form class="form-horizontal" role="form" method="POST" action="{{ url('/register') }}">
                        {!! csrf_field() !!}

                        <div class="form-group{{ $errors->has('name') ? ' has-error' : '' }}">
                            <label class="col-md-4 control-label">Name</label>
                            <div class="col-md-6">
                                <input type="text" class="form-control" name="name" value="{{ old('name') }}">
                                @if ($errors->has('name'))
                                    <span class="help-block">
                                        <strong>{{ $errors->first('name') }}</strong>
                                    </span>
                                @endif
                            </div>
                        </div>

                        <div class="form-group{{ $errors->has('email') ? ' has-error' : '' }}">
                            <label class="col-md-4 control-label">E-Mail Address</label>
                            <div class="col-md-6">
                                <input type="email" class="form-control" name="email" value="{{ old('email') }}">
                                @if ($errors->has('email'))
                                    <span class="help-block">
                                        <strong>{{ $errors->first('email') }}</strong>
                                    </span>
                                @endif
                            </div>
                        </div>

                        <div class="form-group{{ $errors->has('password') ? ' has-error' : '' }}">
                            <label class="col-md-4 control-label">Password</label>
                            <div class="col-md-6">
                                <input type="password" class="form-control" name="password">
                                @if ($errors->has('password'))
                                    <span class="help-block">
                                        <strong>{{ $errors->first('password') }}</strong>
                                    </span>
                                @endif
                            </div>
                        </div>

                        <div class="form-group{{ $errors->has('password_confirmation') ? ' has-error' : '' }}">
                            <label class="col-md-4 control-label">Confirm Password</label>
                            <div class="col-md-6">
                                <input type="password" class="form-control" name="password_confirmation">
                                @if ($errors->has('password_confirmation'))
                                    <span class="help-block">
                                        <strong>{{ $errors->first('password_confirmation') }}</strong>
                                    </span>
                                @endif
                            </div>
                        </div>

                        <div class="form-group{{ $errors->has('g-recaptcha-response') ? ' has-error' : '' }}">
                            <div class="col-md-6">
                                {!! RecaptchaV3::field('register') !!}
                                @if ($errors->has('g-recaptcha-response'))
                                    <span class="help-block">
                                        <strong>{{ $errors->first('g-recaptcha-response') }}</strong>
                                    </span>
                                @endif
                            </div>
                        </div>

                        <div class="form-group">
                            <div class="col-md-6 col-md-offset-4">
                                <br/>
                                <button type="submit" class="btn btn-primary">
                                    <i class="fa fa-btn fa-user"></i>Register
                                </button>
                            </div>
                        </div>
                    </form>
                </div>
            </div>
        </div>
    </div>
</div>

</body>
</html>
Read More: PHP Exception How To Create Your Own Exception Class
Add Route
Open web.php from /routes folder. Add these routes into it.
//...

use App\Http\Controllers\RegisterController;

Route::get('register', [RegisterController::class, 'index']);
Route::post('register', [RegisterController::class, 'store']);

//...
Application Testing
Run this command into project terminal to start development server,
php artisan serveURL – http://localhost:8000/register
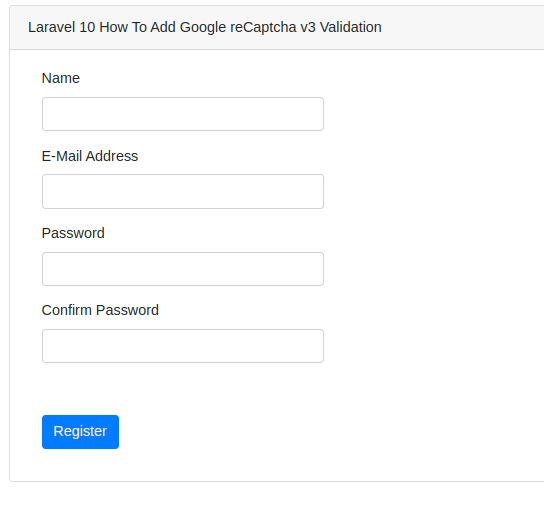
You will get Google v3 captcha at right bottom side. In case if you get any error like Localhost not supported, then you can try your production server url for this.
That’s it.
We hope this article helped you to learn about Laravel 10 How To Add Google reCaptcha v3 Validation Tutorial in a very detailed way.
If you liked this article, then please subscribe to our YouTube Channel for PHP & it’s framework, WordPress, Node Js video tutorials. You can also find us on Twitter and Facebook.
Read more