Did you know you can add an author box to the GeneratePress theme without having to install any wordpress plugin?
An author box is a valuable addition to your website, as it allows you to showcase the authors of your content, provide a brief biography, and encourage user engagement. In this tutorial, we will guide you through the process of adding an author box to the GeneratePress Premium theme, a popular and versatile WordPress theme.

So, in order to assist Bloggers, I have created a full guide on How to Add an Author Box Using the GeneratePress Theme’s Element feature.
Read More: Remove #more From URLs In GeneratePress Premium Theme
Let’s get started.
Why Do You Need an Author Box On Your Website?
An author box on your website serves several important purposes, making it a valuable addition for various types of content-driven websites.
Here’s why you might need an author box:
- Author boxes give credibility and transparency to your material. It informs readers about the author’s qualifications and subject area knowledge. This openness might help you create trust with your audience.
- Personalization humanises your material. When readers can see the author’s face and name, it builds a personal connection. When people have a human connection to the author, they are more inclined to engage with the content.
- Attribution: It ensures that the content is properly attributed. Readers may quickly see who wrote the article or message, ensuring that the author is properly credited.
- Building Authority: An author box can help both the author and the website build authority. When readers regard the author as an authority in the field, the site’s reputation improves.
- Links to the author’s social media profiles or website might act as social proof of their knowledge and reputation. This can result in more engagement and followers.
Steps to Add Author Box in GeneratePress Theme
Before you can add the author box to your Generatepress theme, you must do few basic settings of wordpress.
Note*: This technique is only available if you have the Generatepress premium plugin installed on your WordPress website.
If you don’t have premium theme so use this article to Create Custom Author Box to Free GeneratePress Theme.
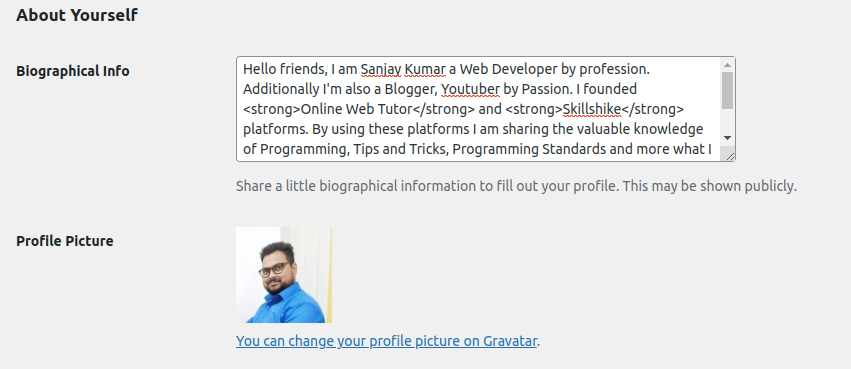
Step #1: Add a Profile photo and Author description
Go to your wordpress menu Users >> Profile
Scroll down and search for About Yourself. Fill your profile information into Biographical Info.
You can add simple text or even can add text with HTML tags.
You can also add your profile links also even pages links by following a simple trick.
<a href=”https://onlinewebtutorblog.com/about-us/”>About Us</a>By using this method you can add anchor text with links to your profile information.
For Profile Picture,
If you haven’t already done so, you can do so by clicking the link indicated below.
It will take you to the Gravatar website, where you must create an account using your WordPress email address and upload your profile image. It will download the profile image to your WordPress account instantly.
Read More: 5 Top Free WordPress Cache Plugins to Boost Site Speed
Once you put all the profile information then you have to go the settings of GeneratePress theme.
Next,
Step #2: Activate the Element module
To activate the Element module go to Appearance >> GeneratePress.
From list of modules, search for Elements and then Activate it.
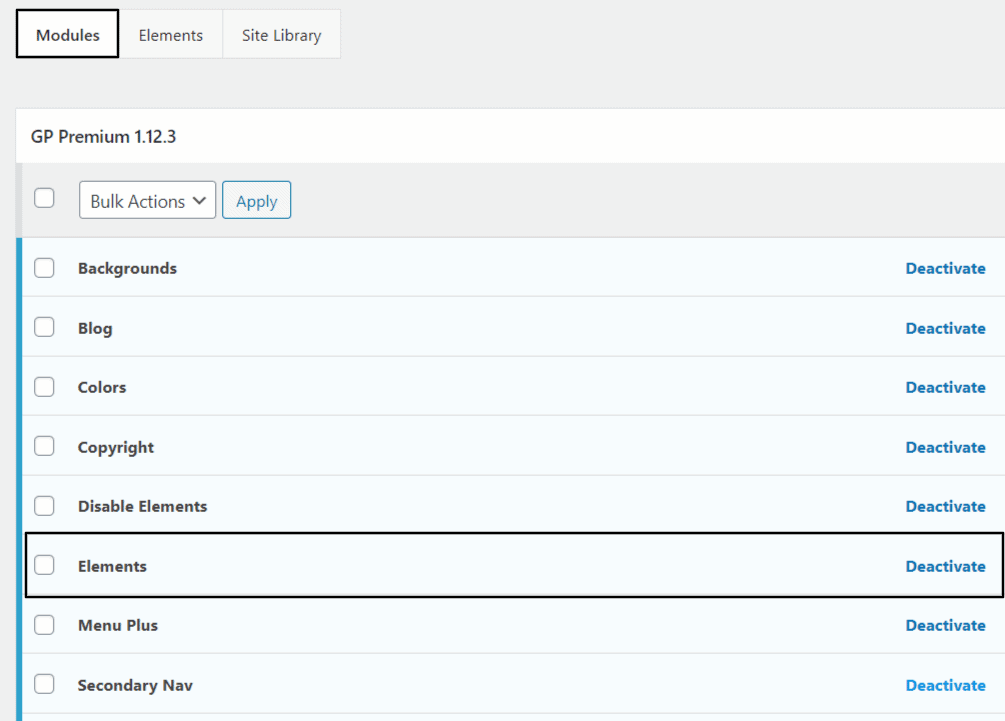
If you have done this already then you can skip to the third step.
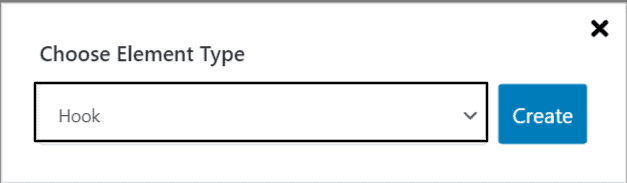
Step #3: Create a new Hook Element
Once Elements module will be activated,
Click on Appearance >> Elements and select Hook.
Step #4: Set the Title as “Author Box” and paste the HTML code
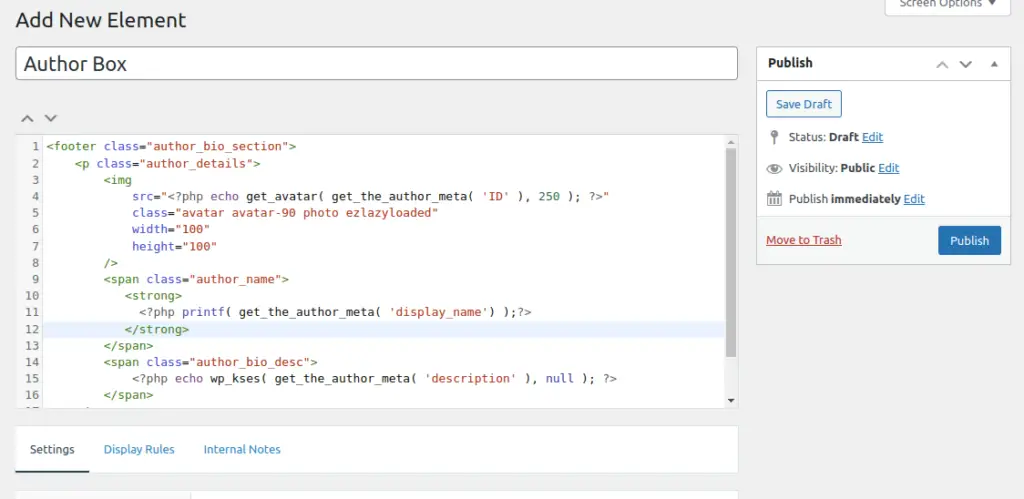
Here, is the source code
<footer class="author_bio_section">
    <p class="author_details">
        <img
            src="<?php echo get_avatar( get_the_author_meta( 'ID' ), 250 ); ?>"
            class="avatar avatar-90 photo ezlazyloaded"
            width="100"
            height="100"
        />
        <span class="author_name">
           <strong>
             <?php printf( get_the_author_meta( 'display_name') );?>
           </strong>
        </span>
        <span class="author_bio_desc">
            <?php echo wp_kses( get_the_author_meta( 'description' ), null ); ?>
        </span>
    </p>
</footer>
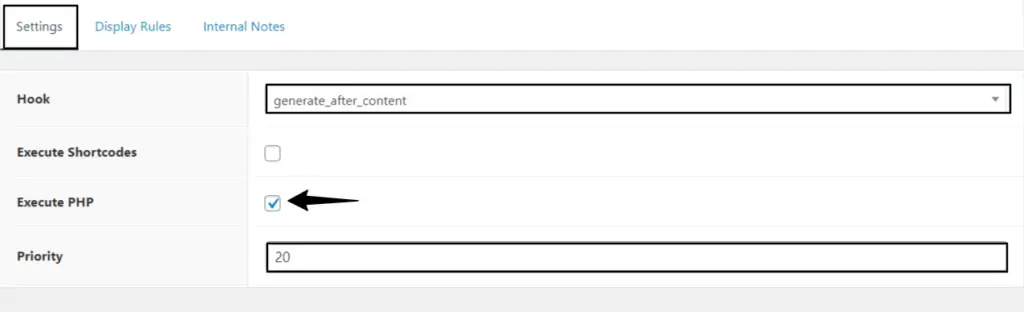
Step #5: Setup Hook Settings
After pasting the code you have to set up the Hook setting.
Scroll down a bit, you will see settings option.
Read More: 7 Best Free Image Optimization Plugins for WordPress
In the Hook option select generate_after_content and then click on Execute PHP and set the priority to 20.
Step #6: Setup Display Rule
Next, click on the Display Rules tab just right of settings.
Now in the Location select All singular and in the Exclude tab select Frontpage.
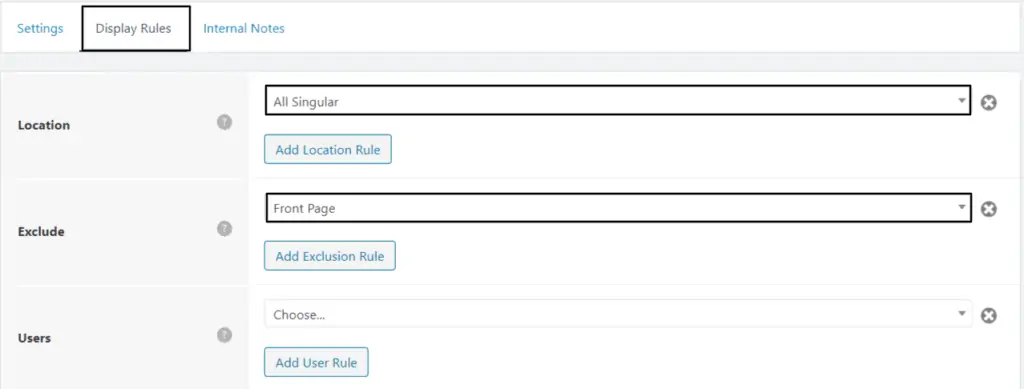
Click on Publish button.
Successfully, you have completed all the settings that was needed for Hook.
Step #7: Add CSS Code
Now you have to design your author box using CSS code.
So, to do that go to Appearance >> Customize.
Next, you need to select Additional CSS option and paste the below code, and hit the Publish button.
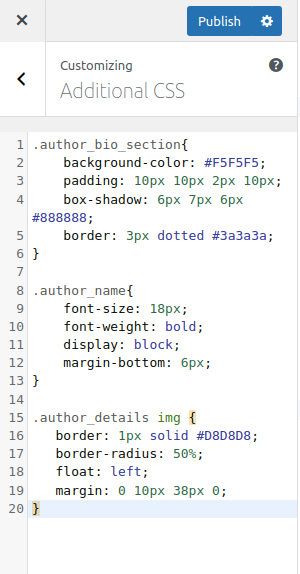
Here, is the CSS code
.author_bio_section{
    background-color: #F5F5F5;
    padding: 10px 10px 2px 10px;
    box-shadow: 6px 7px 6px #888888;
    border: 3px dotted #3a3a3a;
}

.author_name{
    font-size: 18px;
    font-weight: bold;
    display: block;
    margin-bottom: 6px;
}

.author_details img {
   border: 1px solid #D8D8D8;
   border-radius: 50%;
   float: left;
   margin: 0 10px 38px 0;
}
Great! You have successfully added Author box in your Premium Generatepress Theme without any plugin.
But if you are looking for free WordPress plugins for Author box, you can select any of these recommended plugins. These plugins are light weight and freely available.
That’s it.
We hope this article helped you to learn about How To Add Author Box In GeneratePress Premium Theme in a very detailed way.
If you liked this article, then please subscribe to our YouTube Channel for PHP & it’s framework, WordPress, Node Js video tutorials. You can also find us on Twitter and Facebook.
Read more