Inside this article we will see the concept i.e Bootstrap Growl jQuery Notification Plugin in Laravel 10. Article contains the classified information i.e Integrating jQuery Notification Plugin in Laravel application.
Bootstrap Growl jQuery Notification Plugin is a tool used for displaying notifications on web applications.
This plugin utilizes jQuery and Bootstrap Growl to provide customizable and responsive notifications to users in real-time. It enhances the user experience by providing feedback on events such as form submissions, system errors, and successful transactions.
Read More: How To Disable RSS Feed URLs in WordPress Website Tutorial
Let’s get started.
Laravel Installation
Open terminal and run this command to create a laravel project.
composer create-project laravel/laravel myblogIt will create a project folder with name myblog inside your local system.
To start the development server of laravel –
php artisan serveURL: http://127.0.0.1:8000
Assuming laravel already installed inside your system.
Bootstrap Growl Plugin Files
Bootstrap Growl is a jQuery plugin. This plugin works when we use plugin files inside application. It provides CSS & JS files.
Plugin JS Link
<strong># URL</strong>
https://cdnjs.cloudflare.com/ajax/libs/bootstrap-growl/1.0.0/jquery.bootstrap-growl.min.js

<strong># Tag</strong>
<script src="https://cdnjs.cloudflare.com/ajax/libs/bootstrap-growl/1.0.0/jquery.bootstrap-growl.min.js"></script>
Bootstrap CSS Link
<strong># URL</strong>
https://maxcdn.bootstrapcdn.com/bootstrap/3.3.6/css/bootstrap.min.css

<strong># Tag</strong>
<link rel="stylesheet" type="text/css" href="https://maxcdn.bootstrapcdn.com/bootstrap/3.3.6/css/bootstrap.min.css">
When you link these files with application, then you will able to use the methods of Bootstrap Growl Plugin.
$.bootstrapGrowl("<Message Here>", {})Read More: Laravel 10 Concept of Route Model Binding with Example
Create Application Controller (To Test)
Back to project terminal and run this artisan command.
$ php artisan make:controller SiteControllerIt will create a file SiteController.php inside /app/Http/Controllers folder.
Open SiteController.php and write this code into it.
<?php
namespace App\Http\Controllers;
use Illuminate\Http\Request;
class SiteController extends Controller
{
public function showGrowlMessages(){
// Flash messages settings
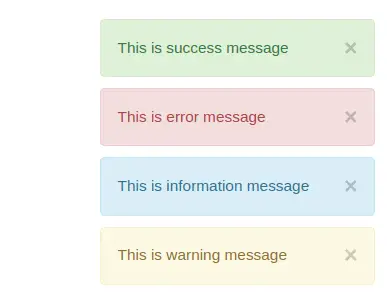
session()->flash("success", "This is success message");
session()->flash("warning", "This is warning message");
session()->flash("info", "This is information message");
session()->flash("error", "This is error message");
return view("growl-notification");
}
}
Here,
We stored each level of messages into it’s key. Like we have messages for success, error, warning, etc. These messages only for demonstration. You can change it according to need.
Read More: How To Create Custom Facade in Laravel 10 Tutorial
Create View Template
Create a file growl-notification.blade.php inside /resources/views folder.
Open template file and write this code into it.
<link href="https://maxcdn.bootstrapcdn.com/bootstrap/3.3.6/css/bootstrap.min.css" rel="stylesheet">

<script src="https://code.jquery.com/jquery-3.5.1.min.js"></script>
<script src="https://cdnjs.cloudflare.com/ajax/libs/bootstrap-growl/1.0.0/jquery.bootstrap-growl.min.js"></script>


<script>
$(function(){

    @if(Session::has('success'))
        $.bootstrapGrowl('{{ Session::get("success") }}',{
            type: 'success',
            delay: 4000,
        });
    @endif

    @if(Session::has('error'))
        $.bootstrapGrowl('{{ Session::get("error") }}',{
            type: 'danger',
            delay: 4000,
        });
    @endif

    @if(Session::has('info'))
        $.bootstrapGrowl('{{ Session::get("info") }}',{
            type: 'info',
            delay: 4000,
        });
    @endif

    @if(Session::has('warning'))
        $.bootstrapGrowl('{{ Session::get("warning") }}',{
            type: 'warning',
            delay: 4000,
        });
    @endif
});
</script>
Concept
Reading session stored flash message and display it into a growl notification level.
@if(Session::has('success'))
    $.bootstrapGrowl('{{ Session::get("success") }}',{
        type: 'success',
        delay: 4000,
    });
@endif
Add Route
Open web.php from /routes folder. Add this route into it.
//...
use App\Http\Controllers\SiteController;

//...
Route::get('growl-notification', [SiteController::class, 'showGrowlMessages']);
Application Testing
Run this command into project terminal to start development server,
php artisan serveURL: http://127.0.0.1:8000/growl-notification
Plugin Error If not Linked Properly
If you miss the plugin files to attach before use it in a correct way, then at console developers tab you will get some plugin errors.
$.bootstrapGrowl is not a function
We hope this article helped you to learn about Bootstrap Growl jQuery Notification Plugin in Laravel 10 in a very detailed way.
Read More: How To Use Trait in Laravel 10 Example Tutorial
If you liked this article, then please subscribe to our YouTube Channel for PHP & it’s framework, WordPress, Node Js video tutorials. You can also find us on Twitter and Facebook.
Read more