
The following article includes useful information on creating automated logs every 2 hours in CodeIgniter 4. Maintaining a robust log system is critical for monitoring and troubleshooting in any programme. However, you may wish to produce logs at regular intervals, such as every 2 hours, to capture critical occurrences or track system activity.
This tutorial will walk you through the process of configuring a logging system in CodeIgniter 4 that generates logs every 2 hours.
In Unix-like operating systems, a Cron job, also known as a Cron task, is a time-based scheduler. It allows you to schedule and automate the execution of specified commands or scripts at predefined intervals or durations.
Read More: CodeIgniter 4 RESTful APIs Development Using JWT
In this post, you will explore how to harness the power of Cron Jobs in CodeIgniter 4. Whether you need to send automated emails, maintaining logs, update database entries, or perform regular maintenance tasks. So, here you will see the concept of application cron setup basics.
Let’s get started.
CodeIgniter 4 Installation
To create a CodeIgniter 4 setup run this given command into your shell or terminal. Please make sure composer should be installed.
composer create-project codeigniter4/appstarter codeigniter-4Assuming you have successfully installed application into your local system.
Environment (.env) Setup
When we install CodeIgniter 4, we will have env file at root. To use the environment variables means using variables at global scope we need to do env to .env
Either we can do via renaming file as simple as that. Also we can do by terminal command.
Open project in terminal
cp env .envAbove command will create a copy of env file to .env file. Now we are ready to use environment variables.
Enable Development Mode
CodeIgniter starts up in production mode by default. You need to make it in development mode to see any error if you are working with application.
Open .env file from root.
# CI_ENVIRONMENT = production

 // Do it to

CI_ENVIRONMENT = development
Now application is in development mode.
Composer Installation (CodeIgniter Task Scheduler)
Open project terminal and run this composer command.
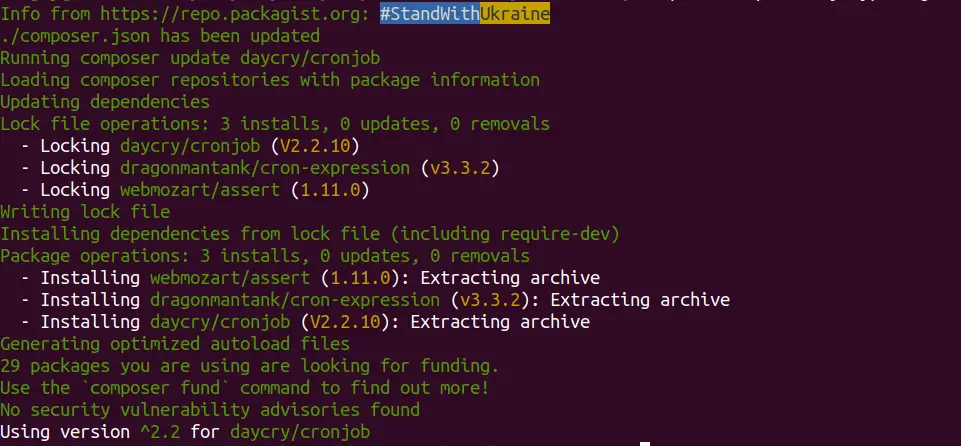
composer require daycry/cronjobYou should see in your terminal as:
Read More: How To Work with CodeIgniter 4 Database Queries Tutorial
Once you do the installation, you should see a command list of cron jobs inside php spark CLI.

Package Configuration to Application
Again, back to terminal and run this command.
php spark cronjob:publishOnce, you will run that. It will publish a file with name “CronJob.php” inside /app/Config folder.

Execute migration command to run pending migrations of application:
php spark migrate -allAll done with the setup.
Now, let’s create a job and scheduled it to run.
Create a Cron Job (Create Application Log)
This is only a demonstration code. You can use your own job concept in your application as per need.
Here, we are maintaining application logs after every 2 hours.
Open terminal and create a controller file.
php spark make:controller Background --suffixIt will create a file with name BackgroundController.php inside /app/Controllers folder.
Open controller file and write this complete code into it.
<?php

namespace App\Controllers;

use App\Controllers\BaseController;

class BackgroundController extends BaseController
{
    public function logMyCustomMessage(){

        log_message("error", "This is error message logged by Online Web Tutor");
        log_message("alert", "This is alert message logged by Online Web Tutor");
        log_message("emergency", "This is emergency message logged by Online Web Tutor");
        log_message("critical", "This is critical message logged by Online Web Tutor");
    }
}
Add Cron Route
Open Routes.php from /app/Config folder. Add this route into it.
//...

$routes->get("cron/manage-log", "BackgroundController::logMyCustomMessage");

//...
Now, job is ready. Next to link with task scheduler.
Read More: Step by Step Complete CodeIgniter 4 Basics Tutorial
Add Cron Job To CodeIgniter Task Scheduler
Open CronJob.php from /app/Config folder.
You will see a lot of code inside above file. We need to work only on init method of it. Rest you can do other settings as well as per documentation.
<?php

namespace Config;

use CodeIgniter\Config\BaseConfig;
use Daycry\CronJob\Scheduler;

class CronJob extends \Daycry\CronJob\Config\CronJob
{
    //...

    //... other code stuff

    /*
    |--------------------------------------------------------------------------
    | Cronjobs
    |--------------------------------------------------------------------------
    |
    | Register any tasks within this method for the application.
    | Called by the TaskRunner.
    |
    | @param Scheduler $schedule
    */
    public function init(Scheduler $schedule)
    {
        $schedule->url(base_url('cron/manage-log'))->named("LogMyMessage")->everyHour(2, 00);
        // Runs every 2 hours at XX:00.
    }
}
Enable CronJob For Tasks
Back to project terminal and run this command:
php spark cronjob:enableIt will enable CronJob processor.
You can also verify it by running this command:
php spark cronjob:listList of all cron jobs of your application.
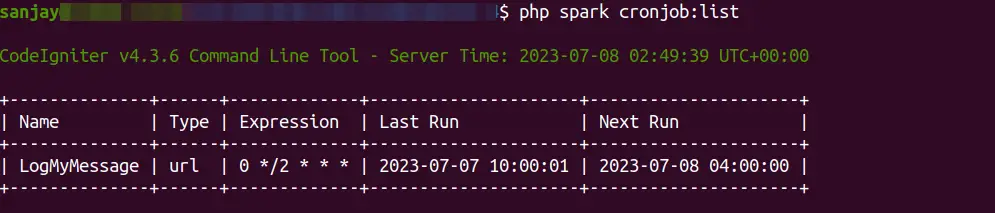
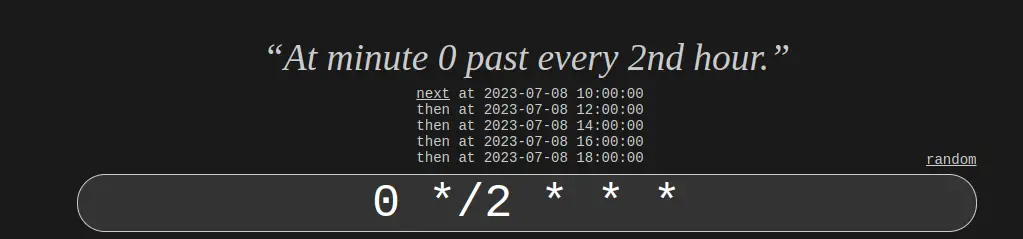
In Expression column, you will see the period of cron execution that is 0 */2 * * * which means,
How To Do Cron Testing
Open CronJob.php and for testing update this line of code:
$schedule->url(base_url('cron/log-my-message'))->named("LogMyMessage")->everyMinute();We updated from every 2nd hour to every minute. This is only for testing. Please undo changes once you done your testing.
Back to project terminal and run this command:
php spark cronjob:runIt will run your cron job for a single time.
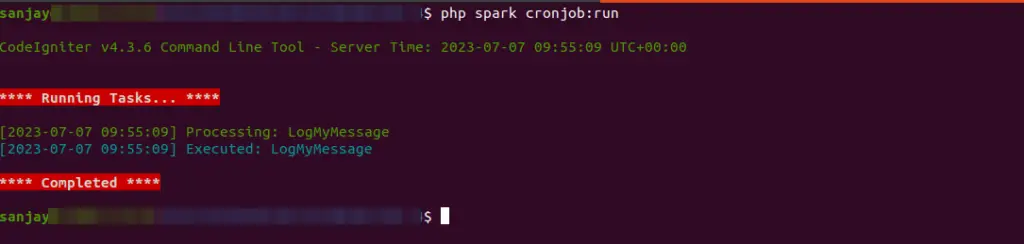
It will create a log file in your /public folder with name like this – publiclog-2023-07-07.log
Output
ERROR - 2023-07-08 03:02:07 --> This is error message logged by Online Web Tutor
ALERT - 2023-07-08 03:02:07 --> This is alert message logged by Online Web Tutor
CRITICAL - 2023-07-08 03:02:07 --> This is critical message logged by Online Web Tutor
Successfully, everything is working fine.
Next,
Read More: CodeIgniter 4 RESTful API Using Shield Authentication
Add CronJob Processor To Crontab
Back to your terminal, run this command.
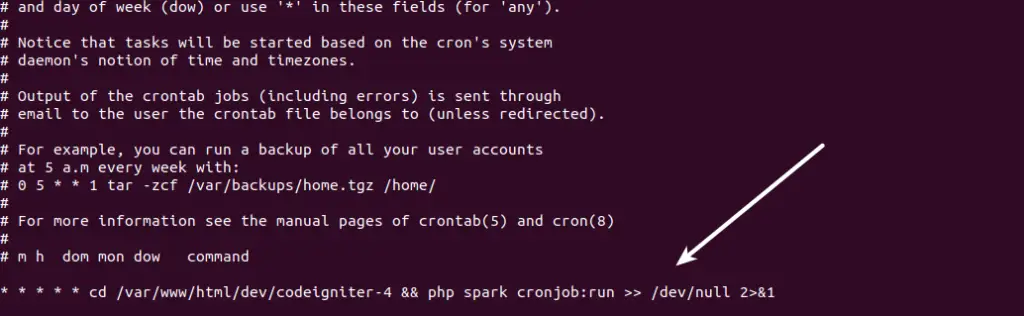
crontab -eIf you run that, it will open a terminal editor (nano editor) to add your cron jobs processors.
Add your job to run every minute.
Syntax:
* * * * * cd /path-to-your-project && php spark cronjob:run >> /dev/null 2>&1Example:
* * * * * cd /var/www/html/dev/codeigniter-4 && php spark cronjob:run >> /dev/null 2>&1Note*: Task scheduler will execute every minute but cron will run at the specified time period of in every 2 hours.
Once you add your code, just save it. Now, you have a job inside your crontab.
If everything went well, you should be able to see that your job will execute automatically At minute 0 past every 2nd hour.
That’s it.
We hope this article helped you to learn How To Create Automated Logs Every 2 hours in CodeIgniter 4 Tutorial in a very detailed way.
If you liked this article, then please subscribe to our YouTube Channel for PHP & it’s framework, WordPress, Node Js video tutorials. You can also find us on Twitter and Facebook.
Read more