Implementing drag and drop functionality for reordering items offers a user-friendly way to manage the order of elements in a list or a sequence. In CodeIgniter 4, integrating this feature using jQuery enables developers to create dynamic interfaces where users can rearrange items effortlessly.
In this tutorial, we’ll see the process of implementing drag and drop functionality for reordering items within a CodeIgniter 4 application using jQuery.
Read More: How To Connect CodeIgniter 4 with Multiple Databases?
Let’s get started.
CodeIgniter 4 Installation
To create a CodeIgniter 4 setup run this given command into your shell or terminal. Please make sure composer should be installed.
composer create-project codeigniter4/appstarter codeigniter-4Assuming you have successfully installed application into your local system.
Environment (.env) Setup
When we install CodeIgniter 4, we will have env file at root. To use the environment variables means using variables at global scope we need to do env to .env
Either we can do via renaming file as simple as that. Also we can do by terminal command.
Open project in terminal
cp env .envAbove command will create a copy of env file to .env file. Now we are ready to use environment variables.
Enable Development Mode
CodeIgniter starts up in production mode by default. You need to make it in development mode to see any error if you are working with application.
Open .env file from root.
# CI_ENVIRONMENT = production

 // Do it to

CI_ENVIRONMENT = development
Now application is in development mode.
Create Database
To create a database, either we can create via Manual tool of PhpMyadmin or by means of a mysql command.
We will use MySQL command to create database. Run this command into Sql tab of PhpMyAdmin.
CREATE DATABASE codeigniter4_app;Successfully, we have created a database.
Database Connection
Open .env file from project root.
Search for DATABASE. You should see the connection environment variables into it. Put your updated details of database connection string values.
#--------------------------------------------------------------------
# DATABASE
#--------------------------------------------------------------------

database.default.hostname = localhost
database.default.database = codeigniter4_app
database.default.username = admin
database.default.password = admin
database.default.DBDriver = MySQLi
database.default.DBPrefix =
database.default.port = 3306
Now, database successfully connected with the application.
Read More: How To Integrate ChatGPT API in CodeIgniter 4 Tutorial
Create Migration
Open project into terminal and run this command to create migration file.
php spark make:migration add_itemsIt will create a file –
- Migration file – xxx_AddItems.php inside /app/Database/Migrations folder.
Open Migration file and write this complete code into it.
<?php

namespace App\Database\Migrations;

use CodeIgniter\Database\Migration;

class AddItems extends Migration
{
	public function up()
	{
		$this->forge->addField([
			'id' => [
				'type' => 'INT',
				'constraint' => 5,
				'unsigned' => true,
				'auto_increment' => true,
			],
			'item_name' => [
				'type' => 'VARCHAR',
				'constraint' => 50,
				'null' => false
			],
			'priority' => [
				'type' => 'INT',
				'constraint' => 5,
				'null' => false,
				'default' => 0
			],
			'status' => [
				'type' => 'ENUM',
				'constraint' => ['1', '0'],
				'default' => '1',
			]
		]);
		$this->forge->addPrimaryKey('id');
		$this->forge->createTable('items');
	}

	public function down()
	{
		$this->forge->dropTable('items');
	}
}
Next,
Run Migration
We need to create table inside database.
php spark migrateThis command will create table – items inside database.
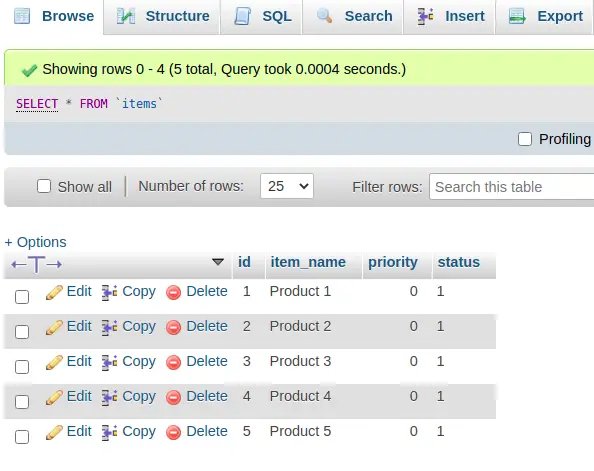
Let’s insert some Test data into this table.
Execute this sql query into database for fake rows.
<meta http-equiv="content-type" content="text/html; charset=utf-8">
INSERT INTO `items` (`id`, `item_name`, `priority`, `status`) VALUES
(1, 'Product 1', 0, '1'),
(2, 'Product 2', 0, '1'),
(3, 'Product 3', 0, '1'),
(4, 'Product 4', 0, '1'),
(5, 'Product 5', 0, '1');
Next,
Read More: CodeIgniter 4 How To Use Froala WYSIWYG HTML Editor Tutorial
Create Model & Controller
We need to create a model and a controller file.
Model File
php spark make:model ItemIt will create a model Item.php inside /app/Models folder.
Open file and write this complete code into it.
<?php

namespace App\Models;

use CodeIgniter\Model;

class Item extends Model
{
	protected $DBGroup              = 'default';
	protected $table                = 'items';
	protected $primaryKey           = 'id';
	protected $useAutoIncrement     = true;
	protected $insertID             = 0;
	protected $returnType           = 'array';
	protected $useSoftDelete        = false;
	protected $protectFields        = true;
	protected $allowedFields        = ['item_name', 'priority', 'status'];

	// Dates
	protected $useTimestamps        = false;
	protected $dateFormat           = 'datetime';
	protected $createdField         = 'created_at';
	protected $updatedField         = 'updated_at';
	protected $deletedField         = 'deleted_at';

	// Validation
	protected $validationRules      = [];
	protected $validationMessages   = [];
	protected $skipValidation       = false;
	protected $cleanValidationRules = true;

	// Callbacks
	protected $allowCallbacks       = true;
	protected $beforeInsert         = [];
	protected $afterInsert          = [];
	protected $beforeUpdate         = [];
	protected $afterUpdate          = [];
	protected $beforeFind           = [];
	protected $afterFind            = [];
	protected $beforeDelete         = [];
	protected $afterDelete          = [];
}
Controller File
To create a controller, run this command.
php spark make:controller Item --suffixIt will create ItemController.php inside /app/Controllers folder.
Open file and write this complete code into it.
<?php

namespace App\Controllers;

use App\Controllers\BaseController;
use App\Models\Item;

class ItemController extends BaseController
{
	public function index()
	{
		$itemsObj = new Item();

		$items = $itemsObj->orderBy('priority', 'ASC')->findAll();

		return view("items", compact("items"));
	}

	public function updateOrder()
	{
		$input = $this->request->getVar();

		if (isset($input["order"])) {

			$order  = explode(",", $input["order"]);

			for ($i = 0; $i < count($order); $i++) {

				$itemsObj = new Item();
				$data = [
					'priority' => $i
				];
				$itemsObj->update($order[$i], $data);
			}

			return json_encode([
				"status" => true,
				"message" => "Order updated"
			]);
		}
	}
}
Create Template File
Go to /app/Views folder and create a file with name items.php
Open items.php and write this complete code into it.
<!doctype html>
<html lang="en">

<head>
    <meta charset="utf-8">
    <meta name="viewport" content="width=device-width, initial-scale=1">
    <title>CodeIgniter 4 Drag and Drop Reorder Items with jQuery</title>
    <link rel="stylesheet" href="//code.jquery.com/ui/1.13.1/themes/base/jquery-ui.css">
    <style>
        #sortable {
            list-style-type: none;
            margin: 0 auto;
            padding: 0;
            width: 60%;
        }

        #sortable li {
            margin: 0 3px 3px 3px;
            padding: 0.4em;
            padding-left: 1.5em;
            font-size: 1.4em;
            height: 18px;
        }

        #sortable li span {
            position: absolute;
            margin-left: -1.3em;
        }
    </style>
</head>

<body>

    <h4 style="text-align: center;">CodeIgniter 4 Drag and Drop Reorder Items with jQuery</h4>
    <ul id="sortable">

        <?php
        if (count($items) > 0) {
            foreach ($items as $row) {
        ?>
                <li class="ui-state-default" id="<?php echo $row['id']; ?>"><span class="ui-icon ui-icon-arrowthick-2-n-s"></span><?php echo $row['item_name']; ?></li>
        <?php
            }
        }
        ?>

    </ul>

    <script src="https://code.jquery.com/jquery-3.6.0.js"></script>
    <script src="https://code.jquery.com/ui/1.13.1/jquery-ui.js"></script>
    <script>
        $(function() {

            $("#sortable").sortable({
                update: function(event, ui) {
                    updateOrder();
                }
            });
        });

        function updateOrder() {
            var item_order = new Array();
            $('#sortable li').each(function() {
                item_order.push($(this).attr("id"));
            });
            var order_string = 'order=' + item_order;
            $.ajax({
                type: "POST",
                url: "<?php echo base_url('update-order') ?>",
                data: order_string,
                cache: false,
                success: function(data) {}
            });
        }
    </script>
</body>

</html>
Read More: Step-by-Step CodeIgniter 4 HMVC Programming Tutorial
Add Route
Open Routes.php from /app/Config folder and add these route into it.
//...

$routes->get("items", "ItemController::index");
$routes->post("update-order", "ItemController::updateOrder");

//...
Application Testing
Open project terminal and start development server via command:
php spark serveURL: http://localhost:8080/items
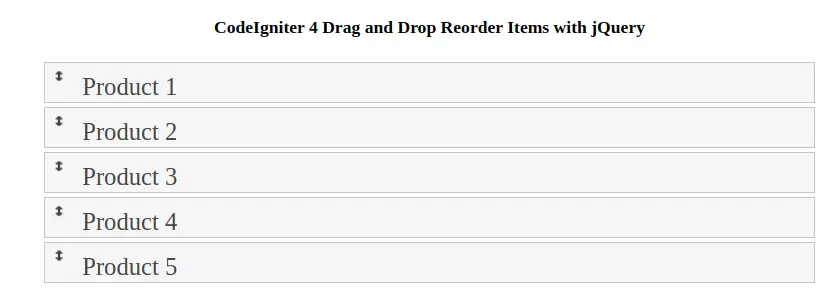
List of Items before sorting:
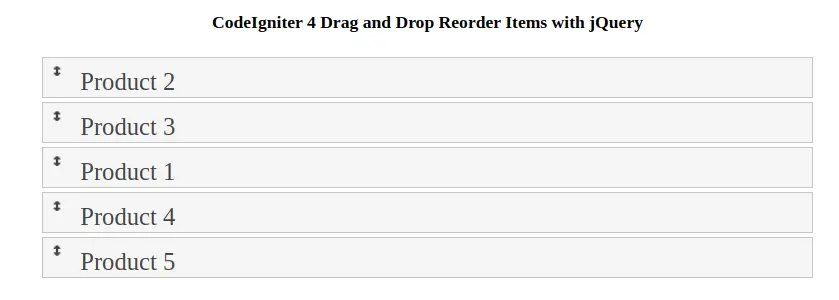
Drag & Sorted Items:
That’s it.
We hope this article helped you to learn about CodeIgniter 4 Drag and Drop Reorder Items with jQuery Tutorial in a very detailed way.
If you liked this article, then please subscribe to our YouTube Channel for PHP & it’s framework, WordPress, Node Js video tutorials. You can also find us on Twitter and Facebook.
Read more