
Inside this article we will see the concept of CodeIgniter 4 Integration of Google reCaptcha v2 Tutorial. Google reCAPTCHA is a CAPTCHA system that enables web hosts to distinguish between human and automated access to websites.
Tutorial will help you to understand the integration of google recaptcha v2 in CodeIgniter 4. This will be step by step guide article.
Google reCaptcha that provide security against hackers and sticks or curl requests. It assures that a computer user is a human. It is the best and most used captcha system available where users are only required to click on a checkbox and in some cases select some similar images related to conman question.
Read More: CodeIgniter 4 How To Get Single Row Data Tutorial
Let’ get started.
CodeIgniter 4 Installation
To create a CodeIgniter 4 setup run this given command into your shell or terminal. Please make sure composer should be installed.
composer create-project codeigniter4/appstarter codeigniter-4Assuming you have successfully installed application into your local system.
Environment (.env) Setup
When we install CodeIgniter 4, we will have env file at root. To use the environment variables means using variables at global scope we need to do env to .env
Either we can do via renaming file as simple as that. Also we can do by terminal command.
Open project in terminal
cp env .envAbove command will create a copy of env file to .env file. Now we are ready to use environment variables.
Enable Development Mode
CodeIgniter starts up in production mode by default. You need to make it in development mode to see any error if you are working with application.
Open .env file from root.
# CI_ENVIRONMENT = production

 // Do it to

CI_ENVIRONMENT = development
Now application is in development mode.
Google reCaptcha Credentials
Open browser and hit this link, it will need to login via your google account. Please login to create google recaptcha credentials.
You need to do these,
- Label name
- Select reCaptcha version type
- Domain to be linked
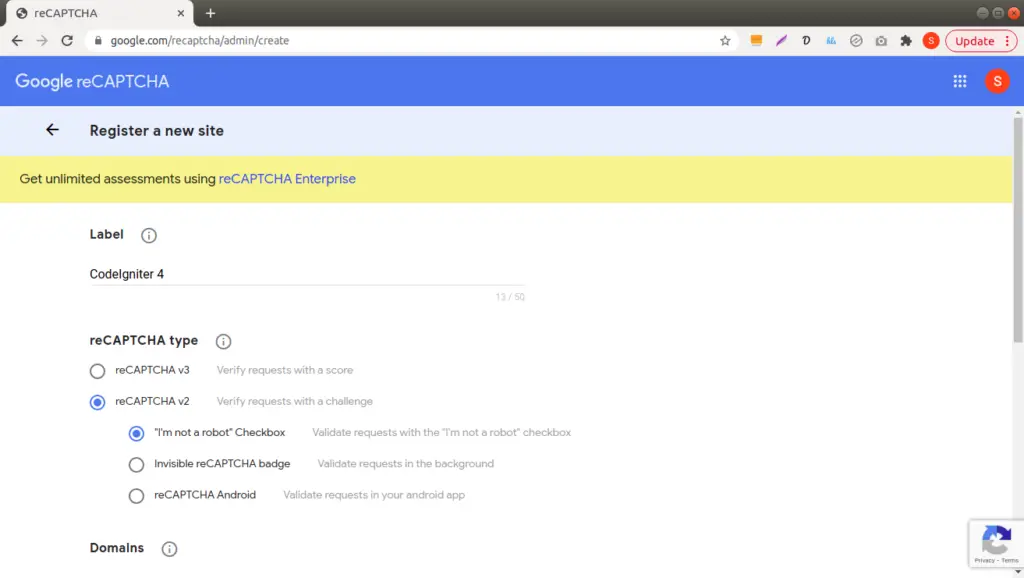
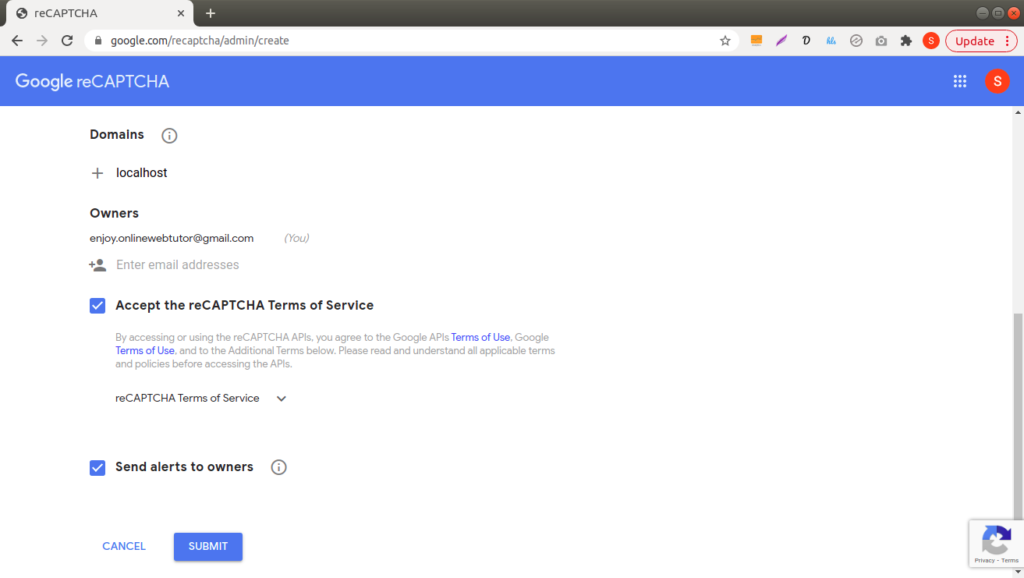
Click on Submit
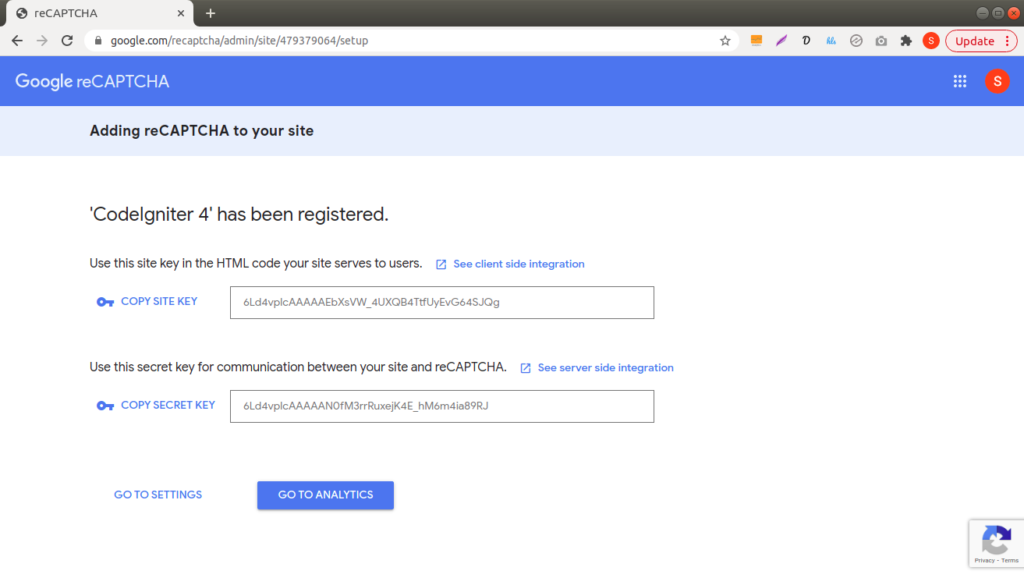
Copy your Site Key and Secret Key from here.
Read More: CodeIgniter 4 How To Read Parse JSON File Tutorial
Settings Environment Variables
Open .env file from application and add these keys into it.
...

RECAPTCHAV2_SITEKEY=6Ld4vpIcAAAAAEbXsVW_4UXQB4TtfUyEvG64SJQg

RECAPTCHAV2_SECRET=6Ld4vpIcAAAAAN0fM3rrRuxejK4E_hM6m4ia89RJ

...
Create Controller
Open project into terminal and run this spark command to create controller.
php spark make:controller Register --suffix
It will create RegisterController.php file inside /app/Controllers folder.
Open file write this complete code into it.
<?php
namespace App\Controllers;
use App\Controllers\BaseController;
class RegisterController extends BaseController
{
public function index()
{
return view('register');
}
public function googleCaptachStore()
{
// Automatic generated google captcha widget post variable
$recaptchaResponse = trim($this->request->getVar('g-recaptcha-response'));
// form data
$secret = env('RECAPTCHAV2_SECRET');
$credential = array(
'secret' => $secret,
'response' => $recaptchaResponse
);
$verify = curl_init();
curl_setopt($verify, CURLOPT_URL, "https://www.google.com/recaptcha/api/siteverify");
curl_setopt($verify, CURLOPT_POST, true);
curl_setopt($verify, CURLOPT_POSTFIELDS, http_build_query($credential));
curl_setopt($verify, CURLOPT_SSL_VERIFYPEER, false);
curl_setopt($verify, CURLOPT_RETURNTRANSFER, true);
$response = curl_exec($verify);
$status = json_decode($response, true);
$session = session();
if ($status['success']) {
$session->setFlashdata('msg', 'Form has been successfully submitted');
} else {
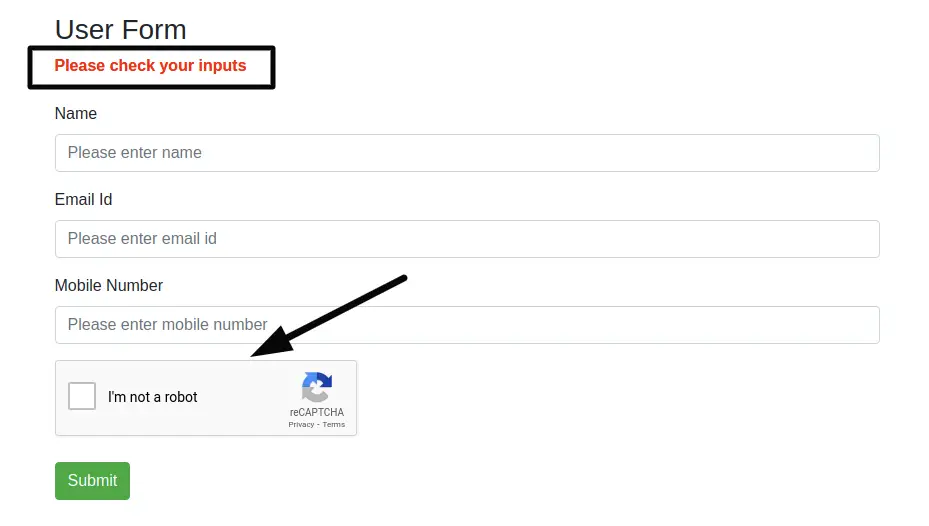
$session->setFlashdata('msg', 'Please check your inputs');
}
return redirect()->to('form');
}
}Next,
Layout Template
Create a file with name register.php inside /app/Views folder.
Open file and write this code into it.
<!doctype html>
<html lang="en">

<head>
    <meta charset="utf-8">
    <meta name="viewport" content="width=device-width, initial-scale=1, shrink-to-fit=no">
    <title>Codeigniter 4 Integration of Google Recaptcha v2</title>
    <link rel="stylesheet" href="https://stackpath.bootstrapcdn.com/bootstrap/4.3.1/css/bootstrap.min.css">
    <script src="https://ajax.googleapis.com/ajax/libs/jquery/1.9.1/jquery.js"></script>
    <script src='https://www.google.com/recaptcha/api.js'></script>
    <style>
        .error {
            color: red;
        }
    </style>
</head>

<body>
    <div class="container" style="margin-top:30px;">

        <div class="row">
            <div class="col-md-9">
                <h3>User Form</h3>
                <div class="error"><strong><?= session('msg') ?></strong></div>
                <br />
                <form method="post" action="<?= base_url('form-submit') ?>">
                    <div class="form-group">
                        <label for="formGroupExampleInput">Name</label>
                        <input type="text" name="name" class="form-control" id="formGroupExampleInput" placeholder="Please enter name">
                    </div>
                    <div class="form-group">
                        <label for="email">Email Id</label>
                        <input type="text" name="email" class="form-control" id="email" placeholder="Please enter email id">
                    </div>
                    <div class="form-group">
                        <label for="mobile_number">Mobile Number</label>
                        <input type="text" name="mobile_number" class="form-control" id="mobile_number" placeholder="Please enter mobile number" maxlength="10">
                    </div>
                    <div class="g-recaptcha" data-sitekey="<?= env('RECAPTCHAV2_SITEKEY') ?>"></div>
                    <br />
                    <div class="form-group">
                        <button type="submit" id="send_form" class="btn btn-success">Submit</button>
                    </div>
                </form>
            </div>
        </div>
    </div>
</body>

</html>
Read More: What are Working Components of CodeIgniter 4?
Add Route
Open Routes.php from /app/Config folder.
//..

$routes->get('form', 'RegisterController::index');
$routes->post('form-submit', 'RegisterController::googleCaptachStore');

//..
Application Testing
Open project terminal and start development server via command:
php spark serveURL: http://localhost:8080/form
Form submit without inputs
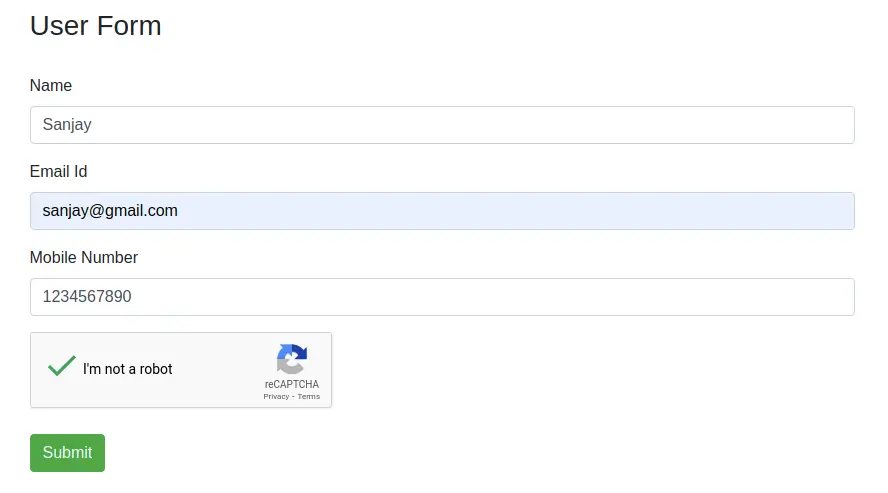
Form submit with inputs
That’s it.
We hope this article helped you to learn about CodeIgniter 4 Integration of Google reCaptcha v2 Tutorial in a very detailed way.
If you liked this article, then please subscribe to our YouTube Channel for PHP & it’s framework, WordPress, Node Js video tutorials. You can also find us on Twitter and Facebook.
Read more