
Database Seeding is a concept to seed dummy data or test data into database for application testing. It’s interesting topic to see and implement. This is newly added feature in CodeIgniter 4. Inside this article we will a complete concept of seeders in CodeIgniter 4.
We will also see the use of faker library with database seeders in codeigniter 4. Inside this seeding tutorial of codeigniter 4 we will cover each sections into well defined manner.
Learn More –
- CodeIgniter 4 Cookie Helper Tutorial
- CodeIgniter 4 Crop Image Before Upload Using Croppie.js
- CodeIgniter 4 CRUD REST APIs Development
- CodeIgniter 4 CSRF Token with Ajax Request
Let’s get started.
CodeIgniter 4 Installation
To create a CodeIgniter 4 setup run this given command into your shell or terminal. Please make sure composer should be installed.
composer create-project codeigniter4/appstarter codeigniter-4Assuming you have successfully installed application into your local system.
Environment (.env) Setup
When we install CodeIgniter 4, we will have env file at root. To use the environment variables means using variables at global scope we need to do env to .env
Either we can do via renaming file as simple as that. Also we can do by terminal command.
Open project in terminal
cp env .envAbove command will create a copy of env file to .env file. Now we are ready to use environment variables.
Enable Development Mode
CodeIgniter starts up in production mode by default. You need to make it in development mode to see any error if you are working with application.
Open .env file from root.
# CI_ENVIRONMENT = production

 // Do it to

CI_ENVIRONMENT = development
Now application is in development mode.
Create Database
To create a database, either we can create via Manual tool of PhpMyadmin or by means of a mysql command.
We will use MySQL command to create database. Run this command into Sql tab of PhpMyAdmin.
CREATE DATABASE codeigniter4_app;Successfully, we have created a database.
Create Database Tables
Next, we need to create few tables inside database.
CREATE TABLE users (
     id int(5) unsigned NOT NULL AUTO_INCREMENT,
     name varchar(100) NOT NULL,
     email varchar(100) NOT NULL,
     updated_at datetime DEFAULT NULL,
     created_at datetime DEFAULT CURRENT_TIMESTAMP,
     PRIMARY KEY (id),
     UNIQUE KEY email (email)
) ENGINE=InnoDB DEFAULT CHARSET=utf8;

CREATE TABLE products (
     id int(5) unsigned NOT NULL AUTO_INCREMENT,
     name varchar(100) NOT NULL,
     description text,
     amount int(5) unsigned NOT NULL,
     status int(5) NOT NULL DEFAULT '1',
     updated_at datetime DEFAULT NULL,
     created_at datetime DEFAULT CURRENT_TIMESTAMP,
     PRIMARY KEY (id)
) ENGINE=InnoDB DEFAULT CHARSET=utf8;
Database Connection
Open .env file from project root.
Search for DATABASE. You should see the connection environment variables into it. Put your updated details of database connection string values.
#--------------------------------------------------------------------
# DATABASE
#--------------------------------------------------------------------

database.default.hostname = localhost
database.default.database = codeigniter4_app
database.default.username = admin
database.default.password = admin
database.default.DBDriver = MySQLi
database.default.DBPrefix =
database.default.port = 3306
Now, database successfully connected with the application.
Create Seeders
In CodeIgniter 4, we have php spark commands available to work with seeders, migrations etc. Seeders are the php files which help us to create test data or fake data into tables and manage that.
Open codeigniter 4 application into terminal and type
$ php spark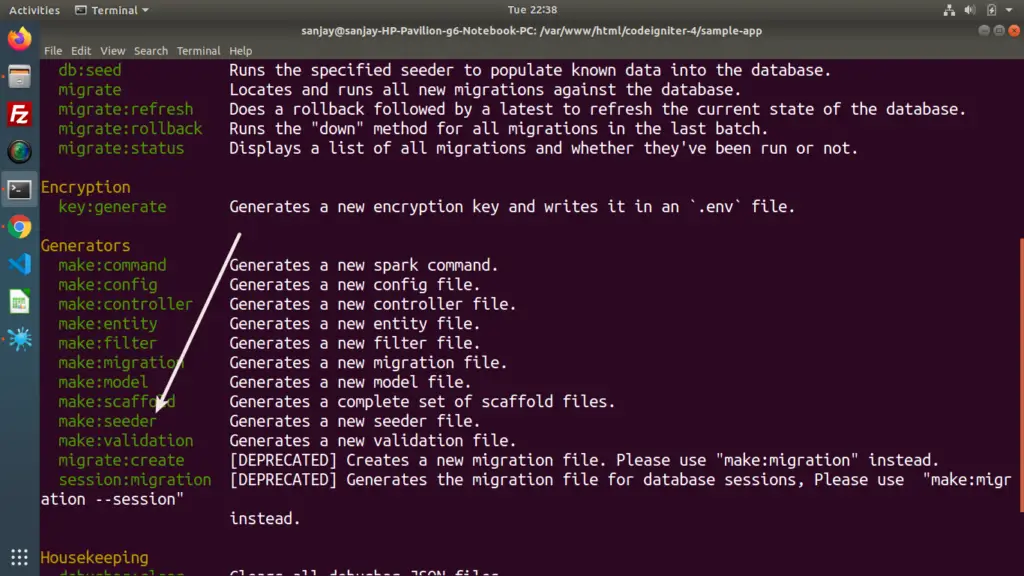
We will use two command from list one for Create & other for data seed.
Preparing Seeder Files
$ php spark make:seeder User --suffix

$ php spark make:seeder Product --suffix
When we create seeder file, it will be stored inside /app/Database/Seeds folder.
Files created for seeders as –
- UserSeeder.php for users table
- ProductSeeder.php for products table
Seeder File: UserSeeder.php
Write the following code into it.
<?php

namespace App\Database\Seeds;

use CodeIgniter\Database\Seeder;
use Faker\Factory;

class UserSeeder extends Seeder
{
    public function run()
    {
        for ($i = 0; $i < 10; $i++) {
			//to add 10 users. Change limit as desired
            $this->db->table('users')->insert($this->generateUsers());
        }
    }

    private function generateUsers(): array
    {
        $faker = Factory::create();
        return [
            'name' => $faker->name(),
            'email' => $faker->email
        ];
    }
}
Seeder File: ProductSeeder.php
Write the following code into it.
<?php

namespace App\Database\Seeds;

use CodeIgniter\Database\Seeder;
use Faker\Factory;

class ProductSeeder extends Seeder
{
    public function run()
    {
        for ($i = 0; $i < 10; $i++) {
			//to add 10 products. Change limit as desired
            $this->db->table('products')->insert($this->generateProducts());
        }
    }

    private function generateProducts(): array
    {
        $faker = Factory::create();
        return [
            'name' => $faker->name,
			'description' => $faker->sentence(6),
			'amount' => $faker->numberBetween(50, 200),
			'status' => $faker->randomElement([1, 0])
        ];
    }
}
Successfully, we have created and updated seeder files. Faker library is a default package included in CodeIgniter 4. Here we are using faker library to generate fake data.
use Faker\Factory;
$faker = Factory::create();
//.. then use the instance of $faker
Next, we need to seed data into database tables. Back to terminal.
Seed data into database table
Run these spark commands to seed data into respective tables.
$ php spark db:seed UserSeeder

$ php spark db:seed ProductSeeder
These two commands will seed data into users table and products table.
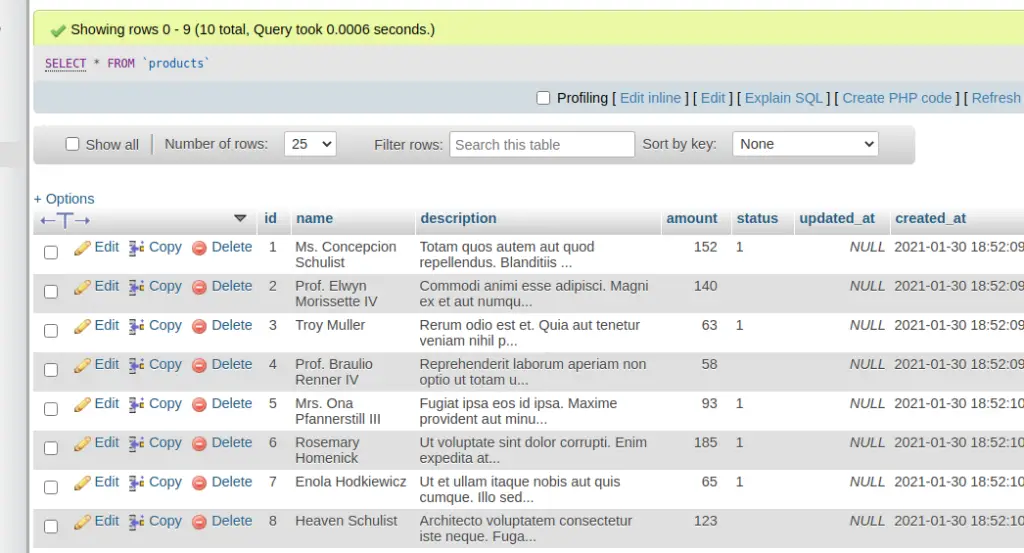
Database Tables
Table: users
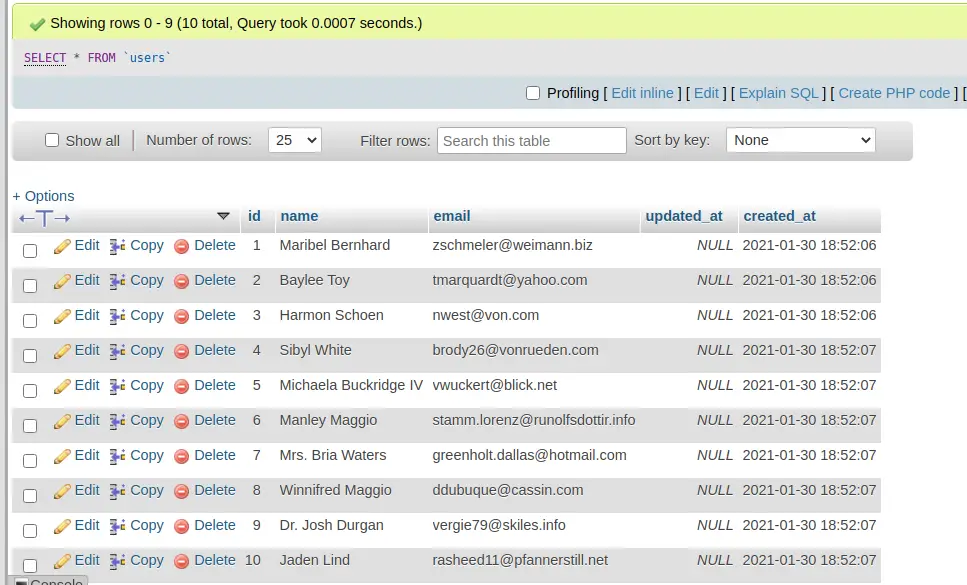
Table: products
We hope this article helped you to learn about Concept of Seeders in CodeIgniter 4 Tutorial in a very detailed way.
If you liked this article, then please subscribe to our YouTube Channel for PHP & it’s framework, WordPress, Node Js video tutorials. You can also find us on Twitter and Facebook.
Read more