
Validating user input is an important part of developing secure and robust web apps. Form validation is critical in CodeIgniter 4 for ensuring that data submitted by users fits particular criteria before it is processed or saved.
Using models for form validation adds another layer of organisation and separation of concerns to your application’s validation process.
In this tutorial, we will walk you through the process of conducting form validation in CodeIgniter 4 using models. We’ll look at how to develop validation rules, integrate them with your models, and establish a streamlined validation workflow to improve the security and reliability of your application.
Read More: CodeIgniter 4 How to Work with Redirection Tutorial
Let’s get started.
CodeIgniter 4 Installation
To create a CodeIgniter 4 setup run this given command into your shell or terminal. Please make sure composer should be installed.
composer create-project codeigniter4/appstarter codeigniter-4Assuming you have successfully installed application into your local system.
Environment (.env) Setup
When we install CodeIgniter 4, we will have env file at root. To use the environment variables means using variables at global scope we need to do env to .env
Either we can do via renaming file as simple as that. Also we can do by terminal command.
Open project in terminal
cp env .envAbove command will create a copy of env file to .env file. Now we are ready to use environment variables.
Enable Development Mode
CodeIgniter starts up in production mode by default. You need to make it in development mode to see any error if you are working with application.
Open .env file from root.
# CI_ENVIRONMENT = production

 // Do it to

CI_ENVIRONMENT = development
Now application is in development mode.
Database Connection
Open .env file from project root.
Search for DATABASE. You should see the connection environment variables into it. Put your updated details of database connection string values.
#--------------------------------------------------------------------
# DATABASE
#--------------------------------------------------------------------

database.default.hostname = localhost
database.default.database = codeigniter4_app
database.default.username = admin
database.default.password = admin
database.default.DBDriver = MySQLi
database.default.DBPrefix =
database.default.port = 3306
Now, database successfully connected with the application.
Create Database Table (Run SQL Command)
Next, we need a table. That table will be responsible to store data.
Let’s create table with some columns.
CREATE TABLE `tbl_members` (
 `id` int(11) NOT NULL AUTO_INCREMENT,
 `name` varchar(120) DEFAULT NULL,
 `email` varchar(120) DEFAULT NULL,
 `mobile` varchar(45) DEFAULT NULL,
 PRIMARY KEY (`id`)
) ENGINE=InnoDB DEFAULT CHARSET=latin1;
Successfully, you have created a table.
Read More: Step by Step How To Setup Cron Jobs in CodeIgniter 4 Tutorial
Setup Form Model
Model is the face of application with the database Models are created inside /app/Models.
Run this spark command in project terminal,
php spark make:model Member --suffixIt will create MemberModel.php inside /app/Models folder.
Open file and write this complete code into it.
<?php

namespace App\Models;

use CodeIgniter\Model;

class MemberModel extends Model
{
    protected $DBGroup          = 'default';
    protected $table            = 'tbl_members';
    protected $primaryKey       = 'id';
    protected $useAutoIncrement = true;
    protected $returnType       = 'array';
    protected $useSoftDeletes   = false;
    protected $protectFields    = true;
    protected $allowedFields    = [
        "name",
		"email",
		"mobile"
    ];

    // Dates
    protected $useTimestamps = false;
    protected $dateFormat    = 'datetime';
    protected $createdField  = 'created_at';
    protected $updatedField  = 'updated_at';
    protected $deletedField  = 'deleted_at';

    // Validation
    protected $validationRules      = [];
    protected $validationMessages   = [];
    protected $skipValidation       = false;
    protected $cleanValidationRules = true;

    // Callbacks
    protected $allowCallbacks = true;
    protected $beforeInsert   = [];
    protected $afterInsert    = [];
    protected $beforeUpdate   = [];
    protected $afterUpdate    = [];
    protected $beforeFind     = [];
    protected $afterFind      = [];
    protected $beforeDelete   = [];
    protected $afterDelete    = [];
}
Model is pointing to tbl_members table. We have specified all the table columns into $allowedFields array.
Inside this model skeleton, protected $validationRules, protected $validationMessages these are the variables used for providing input validations.
Validation Rules
<strong>// Validation</strong>
protected <strong>$validationRules</strong> = [
   "name" => "required|min_length[3]|max_length[120]",
   "email" => "required|valid_email|min_length[5]|is_unique[tbl_members.email]",
   "mobile" => "required"
];
Validation Messages
protected $validationMessages = [
  "name" => [
     "required" => "Name is required",
     "min_length" => "Minimum length of name should be 3 chars",
     "max_length" => "Maximum length of name should be 120 chars",
   ],
   "email" => [
      "required" => "Email needed",
      "valid_email" => "Please provide a valid email address"
   ],
  "mobile" => [
      "required" => "Mobile number needed"
   ]
];
Here, we have written form input validation rules and messages.
Now,
Please, update MemberModel.php with above code explanation.
<?php

namespace App\Models;

use CodeIgniter\Model;

class MemberModel extends Model
{
    protected $DBGroup          = 'default';
    protected $table            = 'tbl_members';
    protected $primaryKey       = 'id';
    protected $useAutoIncrement = true;
    protected $returnType       = 'array';
    protected $useSoftDeletes   = false;
    protected $protectFields    = true;
    protected $allowedFields    = [
        "name",
		"email",
		"mobile"
    ];

    // Dates
    protected $useTimestamps = false;
    protected $dateFormat    = 'datetime';
    protected $createdField  = 'created_at';
    protected $updatedField  = 'updated_at';
    protected $deletedField  = 'deleted_at';

    // Validation
    protected $validationRules      = [
		"name" => "required|min_length[3]|max_length[120]",
		"email" => "required|valid_email|min_length[5]|is_unique[tbl_members.email]",
		"mobile" => "required"
	];
	protected $validationMessages   = [
		"name" => [
			"required" => "Name is required",
			"min_length" => "Minimum length of name should be 3 chars",
			"max_length" => "Maximum length of name should be 120 chars",
		],
		"email" => [
			"required" => "Email needed",
			"valid_email" => "Please provide a valid email address"
		],
		"mobile" => [
			"required" => "Mobile number needed"
		]
	];
    protected $skipValidation       = false;
    protected $cleanValidationRules = true;

    // Callbacks
    protected $allowCallbacks = true;
    protected $beforeInsert   = [];
    protected $afterInsert    = [];
    protected $beforeUpdate   = [];
    protected $afterUpdate    = [];
    protected $beforeFind     = [];
    protected $afterFind      = [];
    protected $beforeDelete   = [];
    protected $afterDelete    = [];
}
Create View Layout
As, form have input fields as name, email, mobile. So with respective to these fields need to create a form.
Let’s create a view file add-member.php inside /app/Views folder.
Open file and write this complete code into it.
<!DOCTYPE html>
<html lang="en">

<head>
    <title>CodeIgniter 4 Form Validation Using Model Tutorial</title>
    <meta charset="utf-8">
    <meta name="viewport" content="width=device-width, initial-scale=1">
    <link rel="stylesheet" href="https://maxcdn.bootstrapcdn.com/bootstrap/3.4.1/css/bootstrap.min.css">
    <script src="https://ajax.googleapis.com/ajax/libs/jquery/3.5.1/jquery.min.js"></script>
</head>

<body>
    <div class="container" style="margin-top:50px;">
        <div class="panel panel-primary">
            <div class="panel-heading">Form</div>
            <div class="panel-body">

                <?php
                // To print success flash message
                if (session()->get("success")) {
                ?>
                    <div class="alert alert-success">
                        <?= session()->get("success") ?>
                    </div>
                    <?php
                }
                ?>

                <?php
                // To print error messages
                if (!empty($errors)) : ?>
                <div class="alert alert-danger">
                    <?php foreach ($errors as $field => $error) : ?>
                    <p><?= $error ?></p>
                    <?php endforeach ?>
                </div>
                <?php endif ?>

                <form action="<?= base_url('add-member') ?>" method="post">
                    <p>
                        Name: <input type="text" class="form-control" name="name" placeholder="Enter name" />
                    </p>

                    <p>
                        Email: <input type="email" class="form-control" name="email" placeholder="Enter email" />
                    </p>

                    <p>
                        Mobile: <input type="text" class="form-control" name="mobile" placeholder="Enter mobile" />
                    </p>

                    <p>
                        <button type="submit" class="btn btn-success">Submit</button>
                    </p>
                </form>
            </div>
        </div>
    </div>
</body>

</html>
Create Form Controller
Loading url Helper
Open BaseController.php from /app/Controllers folder.
Search for $helpers, inside this helpers array simply add this url helper.
protected $helpers = ["url"];This url helper will load base_url() and site_url() functions.
Run this spark command,
php spark make:controller Member --suffixIt will create MemberController.php inside /app/Controllers folder.
Open file and write this complete code into it.
<?php

namespace App\Controllers;

use App\Models\MemberModel;

class MemberController extends BaseController
{
	public function addMember()
	{
		helper(["url"]);

		if ($this->request->getMethod() == "post") {

			$memberModel = new MemberModel();

			$session = session(); // loading session service

			$data = [
				"name" => $this->request->getVar("name"),
				"email" => $this->request->getVar("email"),
				"mobile" => $this->request->getVar("mobile"),
			];

			if ($memberModel->save($data) === false) {

				return view('add-member', [
					'errors' => $memberModel->errors()
				]);
			} else {

				$session->setFlashdata("success", "Data saved successfully");

				return redirect()->to(base_url('add-member'));
			}
		}
		return view("add-member");
	}
}
Read More: Change Default Timezone in CodeIgniter 4 Tutorial
All available form validation rules for input fields Click here to go.
Code Explanation
- if ($this->request->getMethod() == “post”) {} – Checking request method type. Same method we are using for GET and POST.
- $memberModel = new MemberModel(); – Creating Model instance
- $memberModel->save($data) === false – Validating input field with rules and messages.
- “errors”, $memberModel->errors() Storing errors into errors variable.
- $this->request->getVar(“name”) – Reading value of input field with “name” attribute.
- $session->setFlashdata(“success”, “Data saved successfully”);
- return redirect()->to(base_url(‘add-member’)); – Redirecting to add-member route after operation.
Alternative way (Bind input validations with Model)
If we follow this, no need to add rules and messages into Model file. We can also control input validation from controller file directly.
//..

public function addMember()
{
  helper(["url"]);

  if ($this->request->getMethod() == "post") {

    $memberModel = new MemberModel();

    $session = session(); // loading session service

    $data = [
      "name" => $this->request->getVar("name"),
      "email" => $this->request->getVar("email"),
      "mobile" => $this->request->getVar("mobile"),
    ];

    $validationRules = [
      "name" => "required|min_length[3]|max_length[120]",
      "email" => "required|valid_email|min_length[5]|is_unique[tbl_members.email]",
      "mobile" => "required"
    ];
    $memberModel->setValidationRules($validationRules);

    $fieldValidationMessage = [
      "name" => [
        "required" => "Name is required",
        "min_length" => "Minimum length of name should be 3 chars",
        "max_length" => "Maximum length of name should be 120 chars",
      ],
      "email" => [
        "required" => "Email needed",
        "valid_email" => "Please provide a valid email address"
      ],
      "mobile" => [
        "required" => "Mobile number needed"
      ]
    ];
    $memberModel->setValidationMessages($fieldValidationMessage);

    if ($memberModel->save($data) === false) {

      return view('add-member', [
        'errors' => $memberModel->errors()
      ]);
    } else {

      $session->setFlashdata("success", "Data saved successfully");

      return redirect()->to(base_url('add-member'));
    }
  }
  return view("add-member");
}
Add Route
Open Routes.php from /app/Config. Add this route.
//...

$routes->match(["get", "post"], "add-member", "MemberController::addMember");

//...
Application Testing
Open project terminal and start development server via command:
php spark serveURL: http://localhost:8080/add-member
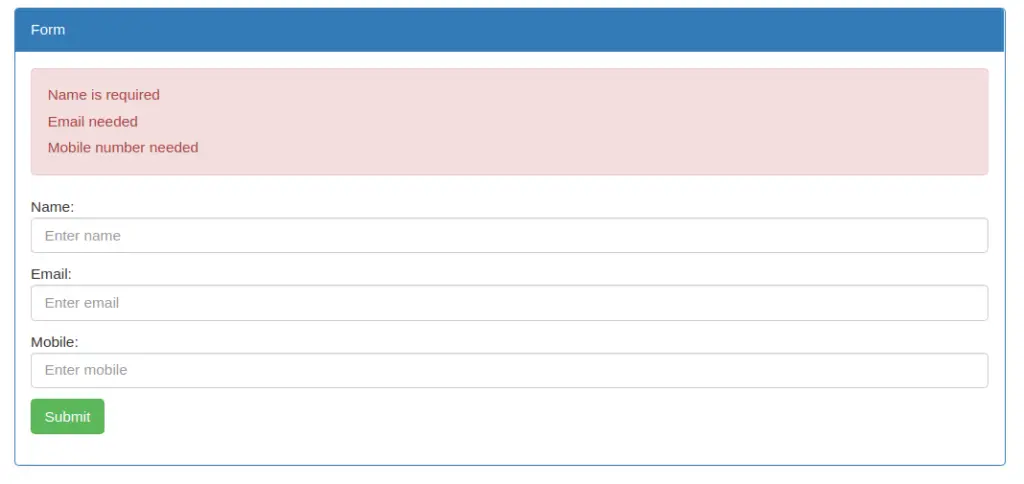
Submitting Form without any inputs
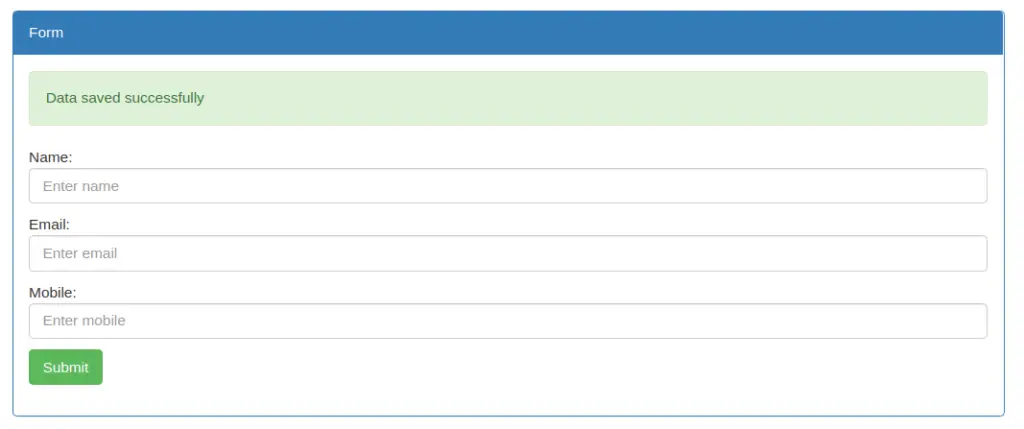
Submitting form with Inputs
That’s it.
We hope this article helped you to learn about CodeIgniter 4 Form Validation Using Model Tutorial in a very detailed way.
If you liked this article, then please subscribe to our YouTube Channel for PHP & it’s framework, WordPress, Node Js video tutorials. You can also find us on Twitter and Facebook.
Read more