
Gutenberg, the block-based editor in WordPress, offers the flexibility to create custom blocks tailored to specific content needs. Crafting a custom Gutenberg block allows WordPress developers to extend the editor’s functionality and create unique content elements seamlessly.
In this tutorial, we’ll see the comprehensive process of creating a custom Gutenberg block in WordPress. Utilizing JavaScript, WordPress core elements and PHP, we’ll guide you through the steps to build a custom block
Here, we’ll see to create a custom block that generates an orange background paragraph.
Read More: Top 7 ChatGPT Free Plugins for WordPress that You Must Try
Let’s get started.
What are Custom Blocks in WordPress?
Custom Blocks in WordPress refer to custom designed content blocks created using the WordPress Block Editor (Gutenberg). These blocks are essentially the building blocks of content within the editor and can be customized and extended to add various functionalities beyond the default blocks provided by WordPress.
When you’re creating content using the Block Editor, you can add blocks for paragraphs, headings, images, galleries, and more. However, the true power lies in the ability to create your own custom blocks tailored to your specific needs.
Getting Started: Setting Up the Block
To begin, we’ll create a WordPress plugin for our custom block. The plugin will consist of PHP, JavaScript files defining the block’s behavior and appearance.
Step #1: Plugin Setup
Start by creating a new directory within the WordPress plugins folder and name it orange-paragraph-block.
Step #2: Provide Plugin Basic Info
Create a basic PHP file into your plugin’s folder with name orange-paragraph-block.php
Open file and write this complete code into it,
<?php
/*
Plugin Name: Orange Background Paragraph
Description: A custom Gutenberg block for paragraph with orange background
Version: 1.0
Author: Online Web Tutor
Author URI: https://onlinewebtutorblog.com/
*/

function orange_paragraph_block_assets() {
    // Enqueue block editor JavaScript
    wp_enqueue_script(
        'orange-paragraph-block',
        plugin_dir_url(__FILE__) . 'orange-paragraph-block.js',
        array('wp-blocks', 'wp-editor', 'wp-components', 'wp-element', 'wp-api')
    );
}

add_action('enqueue_block_editor_assets', 'orange_paragraph_block_assets');
Read More: How To Create a WebPage Scrapper WordPress Plugin
Step #3: JavaScript Setup (orange-paragraph-block.js)
Developing the Orange Paragraph Block
Let’s explore how the block code operates:
>> Block Registration: The block is registered using registerBlockType, defining its title, icon, category, and attributes (such as content).
>> Editor and Output: The block’s edit function controls its behavior in the editor, setting up a RichText element that represents the paragraph. It includes handlers for content changes and inline styling for the orange background.
>> Saving Content: The save function defines how the block’s content is saved. It ensures the orange background paragraph is rendered correctly on the frontend.
Next,
Inside the newly created directory, put the JavaScript file orange-paragraph-block.js. This file will define the block’s behavior and rendering logic using the WordPress block editor APIs.
Open file and write this complete code into it,
const { registerBlockType } = wp.blocks;
const { RichText } = wp.blockEditor;
const { createElement } = wp.element;

registerBlockType('owt-orange-paragraph/orange-paragraph-block', {
    title: 'Orange Paragraph Block',
    icon: 'format-aside',
    category: 'common',

    attributes: {
        content: {
            type: 'string',
            source: 'html',
            selector: 'p',
        },
    },

    edit: ({ attributes, setAttributes }) => {
        const { content } = attributes;

        const onChangeContent = newContent => {
            setAttributes({ content: newContent });
        };

        return createElement(
            RichText, {
                tagName: 'p',
                className: 'orange-paragraph',
                value: content,
                onChange: onChangeContent,
                style: { backgroundColor: 'orange', padding: '10px' },
                placeholder: 'Enter your text here...',
                // Add inline editor styles
                style: {
                    backgroundColor: 'orange',
                    padding: '10px',
                    minHeight: '50px',
                    color: '#fff',
                },
            }
        );
    },

    save: ({ attributes }) => {
        const { content } = attributes;
        return createElement('p', {
            className: 'orange-paragraph',
            style: { backgroundColor: 'orange', padding: '10px' },
            dangerouslySetInnerHTML: { __html: content },
        });
    },
});
Testing and Implementation
After creating the plugin and its files, activate it from the WordPress admin panel.
Navigate to the block editor, and you’ll find the “Orange Paragraph Block” in the common category.
Step #1: Create a Post & Search Block (For example)
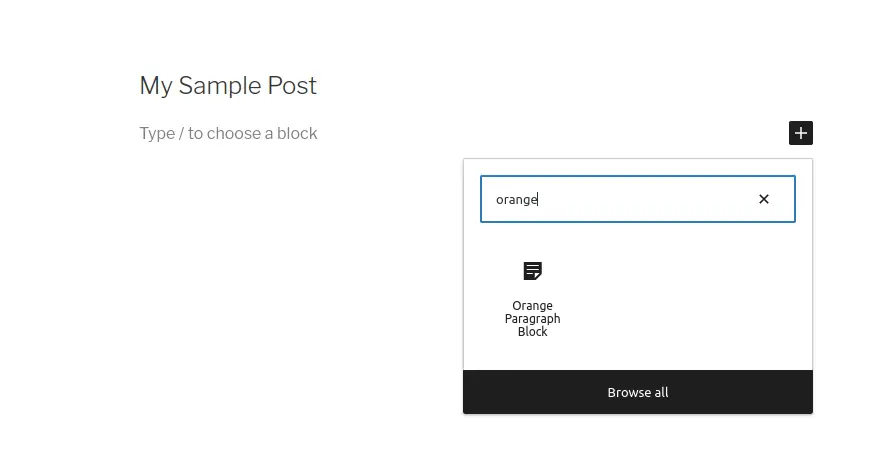
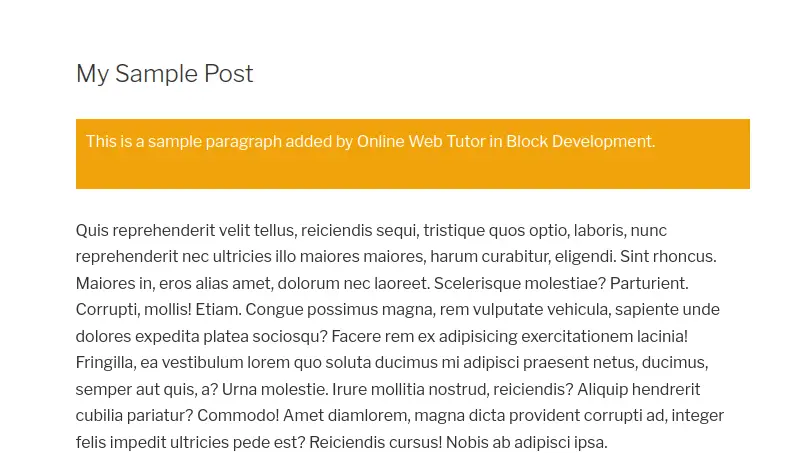
Step #2: Use Block (Block editor)
Read More: 7 Best Free Image Optimization Plugins for WordPress
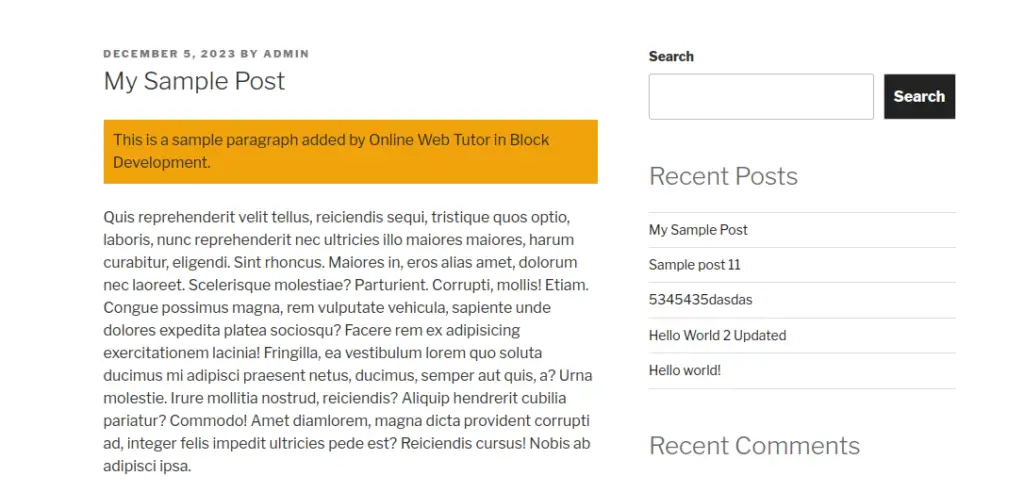
Step #3: Front-end view (Saved Content)
Conclusion
Creating custom blocks expands the capabilities of the WordPress editor, enabling users to create content tailored to their needs. In this tutorial, we explored building a custom block that generates a paragraph with an orange background.
By understanding the block creation process and leveraging WordPress’s block editor APIs, you can create diverse content components, enhancing your website’s visual appeal and functionality.
Experiment further with different block attributes, styles, and functionalities to create an array of custom blocks, elevating your content creation experience in WordPress.
That’s it.
We hope this article helped you to learn about How To Create Gutenberg Block for WordPress Example in a very detailed way.
If you liked this article, then please subscribe to our YouTube Channel for PHP & it’s framework, WordPress, Node Js video tutorials. You can also find us on Twitter and Facebook.
Read more