Components are the re-usable section or layout which we can use inside laravel application. In laravel there are two methods to writing a components: class based components and anonymous components. Click here to learn complete details of components in laravel 8.
Learn More –
- Call MySQL Stored Procedure in Laravel 8 Tutorial
- Chatbot Conversation integration in Laravel 8 Using Botman
- Complete Laravel 8 CRUD Application Tutorial
- Complete Laravel 8 Vue JS CRUD Tutorial
Inside this article we will see how to create reusable components in laravel 8 using components and slots. This article will be super easy to understand for the implementation.
Laravel provide components and slots for creating blade component sections in application.
Let’s get started.
Laravel Installation
We will create laravel project using composer. So, please make sure your system should have composer installed. If not, may be this article will help you to Install composer in system.
Here is the command to create a laravel project-
composer create-project --prefer-dist laravel/laravel blog
To start the development server of Laravel –
php artisan serve
URL: http://127.0.0.1:8000
Assuming laravel already installed inside your system.
Create a Component File
Create a file with name message.blade.php inside /resources/views/components. You need to create a components folder as well inside it.
Open message.blade.php and write this complete code into it.
<div class="panel {{ $class }}">
    <div class="panel-heading">{{ $title }}</div>
    <div class="panel-body">{{ $slot }}</div>
</div>
Here, we have 3 placeholders as $class, $title and $slot.
When we will use this component then according to message type we will replace these values.
Create a Layout File
Create a my-template.blade.php blade layout file inside /resources/views folder.
Open my-template.blade.php and write this complete code into it.
<!DOCTYPE html>
<html>
<head>
<title>How to Create Reusable Components in Laravel 8</title>
<link rel="stylesheet" href="https://maxcdn.bootstrapcdn.com/bootstrap/3.4.1/css/bootstrap.min.css" />
</head>
<body>
<div class="container">
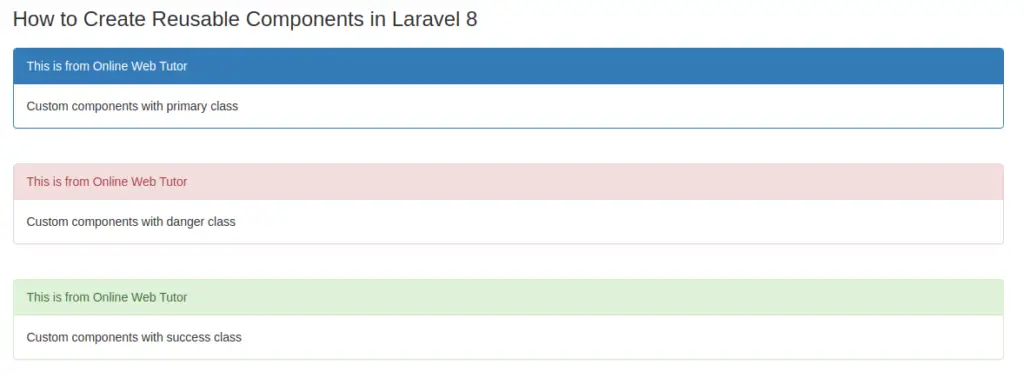
<h3>How to Create Reusable Components in Laravel 8</h3>
<div style="margin-top:20px;">
<!-- For General info -->
@component('components.message')
@slot('class')
panel-primary
@endslot
@slot('title')
This is from Online Web Tutor
@endslot
Custom components with primary class
@endcomponent
<br/>
<!-- For Error -->
@component('components.message')
@slot('class')
panel-danger
@endslot
@slot('title')
This is from Online Web Tutor
@endslot
Custom components with danger class
@endcomponent
<br/>
<!-- For Success -->
@component('components.message')
@slot('class')
panel-success
@endslot
@slot('title')
This is from Online Web Tutor
@endslot
Custom components with success class
@endcomponent
</div>
</div>
</body>
</html>Code Explanation
- @component(‘components.message’) … @endcomponent is used to use the component. It uses message.blade.php from components folder.
- @slot(‘class’) … @endslot It used to place dynamic value for class ($class) placeholder. Same will be for $title placeholder.
- Custom message – Custom components with success class will be rendered using $slot placeholder.
Add Route
Open web.php file from /routes folder. Add given route into it.
//...

Route::get('my-message', function () {

    return view('my-template');

});

//...
Application Testing
Run this command into project terminal to start development server,
php artisan serveURL – http://127.0.0.1:8000/my-message
We hope this article helped you to learn about How to create reusable components in laravel 8 in a very detailed way.
If you liked this article, then please subscribe to our YouTube Channel for PHP & it’s framework, WordPress, Node Js video tutorials. You can also find us on Twitter and Facebook.
Read more