Inside this article we will see How to upload and save XML file in laravel 9. There are actually very few simple steps and also you can follow this step in any PHP and it’s framework. This is not laravel specific.
To know the topic, reading xml, upload and save file in laravel we will consider a sample xml and read it in code. Reading data from files and dump into database table is usually very common to web application.

Above image is view of sample xml file and it’s data. This data we will consider and insert into table.
Learn More –
- Laravel 9 REST API Development Using JWT Authentication
- Laravel 9 REST API Development Using Passport Tutorial
- Laravel 9 REST API Development Using Sanctum Tutorial
- Laravel 9 Scout How To Add Full Text Search in Table
Let’s get started.
Laravel Installation
Open terminal and run this command to create a laravel project.
composer create-project laravel/laravel myblogIt will create a project folder with name myblog inside your local system.
To start the development server of laravel –
php artisan serveURL: http://127.0.0.1:8000
Assuming laravel already installed inside your system.
Create Database & Connect
To create a database, either we can create via Manual tool of PhpMyadmin or by means of a mysql command.
CREATE DATABASE laravel_app;
To connect database with application, Open .env file from application root. Search for DB_ and update your details.
DB_CONNECTION=mysql
DB_HOST=127.0.0.1
DB_PORT=3306
DB_DATABASE=laravel_app
DB_USERNAME=root
DB_PASSWORD=root
Create Model & Migration
Open project into terminal.
Let’s create model and migration by using a single command.
Creating model and migration …
$ php artisan make:model XmlData -mAbove command will create 2 files –
- Model file with name XmlData.php inside /app/Models folder.
- Migration File with name 2022_03_21_040518_create_xml_data_table.php inside /database/migrations folder.
Open up the migration file and write this code snippet
<?php
use Illuminate\Database\Migrations\Migration;
use Illuminate\Database\Schema\Blueprint;
use Illuminate\Support\Facades\Schema;
return new class extends Migration
{
/**
* Run the migrations.
*
* @return void
*/
public function up()
{
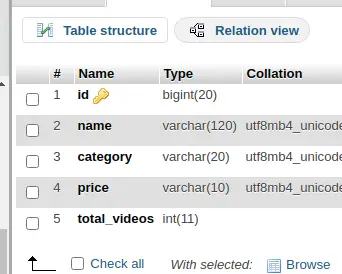
Schema::create('xml_data', function (Blueprint $table) {
$table->id();
$table->string("name", 120);
$table->string("category", 20);
$table->string("price", 10);
$table->integer("total_videos");
});
}
/**
* Reverse the migrations.
*
* @return void
*/
public function down()
{
Schema::dropIfExists('xml_data');
}
};
Open model file XmlData.php and write this code into it.
<?php

namespace App\Models;

use Illuminate\Database\Eloquent\Factories\HasFactory;
use Illuminate\Database\Eloquent\Model;

class XmlData extends Model
{
    use HasFactory;

    public $timestamps = false;
}
Run Migration
Back to terminal and run this command to run migration file.
$ php artisan migrateIt will run all pending migrations of your application. xml_data table will be created.
Next,
Create Controller
We need to create a controller where we will parse or read xml data string from file. Put your XML file into public folder.
To create controller, run this command –
$ php artisan make:controller ReadXmlControllerIt will create a file inside /app/Http/Controllers folder.
Open up the created file ReadXmlController.php and write this code into it.
<?php

namespace App\Http\Controllers;

use Illuminate\Http\Request;
use App\Models\XmlData;

class ReadXmlController extends Controller
{
    public function index(Request $req)
    {
        $xmlDataString = file_get_contents(public_path('sample-course.xml'));
        $xmlObject = simplexml_load_string($xmlDataString);

        $json = json_encode($xmlObject);
        $phpDataArray = json_decode($json, true);

        // echo "<pre>";
        // print_r($phpDataArray);

        if (count($phpDataArray['course']) > 0) {

            $dataArray = array();

            foreach ($phpDataArray['course'] as $index => $data) {

                $dataArray[] = [
                    "name" => $data['name'],
                    "category" => $data['category'],
                    "price" => $data['price'],
                    "total_videos" => $data['videos']
                ];
            }

            XmlData::insert($dataArray);
        }
    }
}
- public_path(‘sample-course.xml’) XML file should be placed in public directory. public_path returns the path upto /public folder
- simplexml_load_string($xmlDataString); It’s a PHP function used to read xml file
- XmlData::insert($dataArray); Insert data array into table
Add Route
Open web.php from /routes folder. Add this route into it.
//...
use App\Http\Controllers\ReadXmlController;

Route::get("read-xml", [ReadXmlController::class, "index"]);

//...
Application Testing
Run this command into project terminal to start development server,
php artisan serveURL: http://127.0.0.1:8000/read-xml
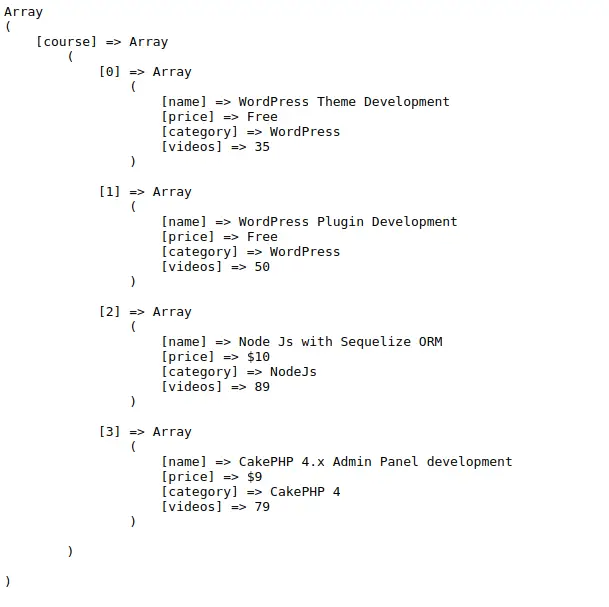
When we dump all data of XML file into output screen, it will be –
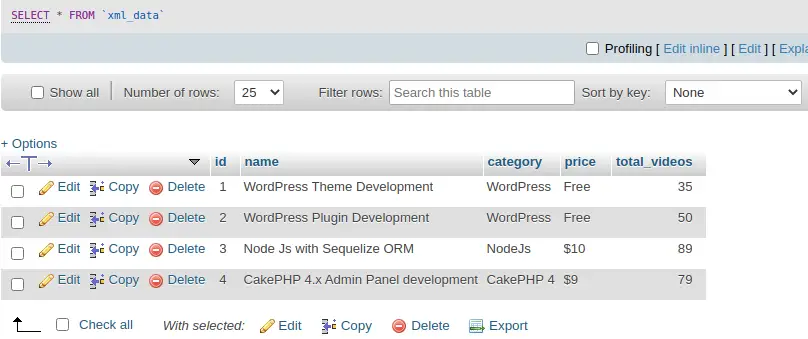
Once data will be uploaded, then database view will be like this –
We hope this article helped you to learn about i.e How To Upload And Save XML Data in Laravel 9 Tutorial in a very detailed way.
If you liked this article, then please subscribe to our YouTube Channel for PHP & it’s framework, WordPress, Node Js video tutorials. You can also find us on Twitter and Facebook.
Read more