Image manipulation class in CodeIgniter 4 is a library which performs many super things. Here, we have few list of them.
- Image resize
- Image rotate
- Image crop
- Thumbnail generation
Availability of image library provides lots of flexible functions which works with image about any kind of alteration. While working with image functionality in PHP, we need few extensions. Those PHP extension should be enabled.
Inside this article we will discuss about Image manipulation class in codeigniter 4.
Learn More –
- How To Rotate Image in CodeIgniter 4 Tutorial
- How To Use Flash Message in CodeIgniter 4 ?
- How To Use Namespace Routes in CodeIgniter 4
- How to Work with CodeIgniter 4 Form Validation Library
Let’s get started.
CodeIgniter 4 Installation
To create a CodeIgniter 4 setup run this given command into your shell or terminal. Please make sure composer should be installed.
composer create-project codeigniter4/appstarter codeigniter-4Assuming you have successfully installed application into your local system.
Initializing Image Manipulation Class
Like other classed in CodeIgniter 4, same we need to load by calling it’s service.
$image = \Config\Services::image();You can pass the alias for the image library you wish to use into the Service function.
$image = Config\Services::image('imagick');Needed PHP Extension Before Work
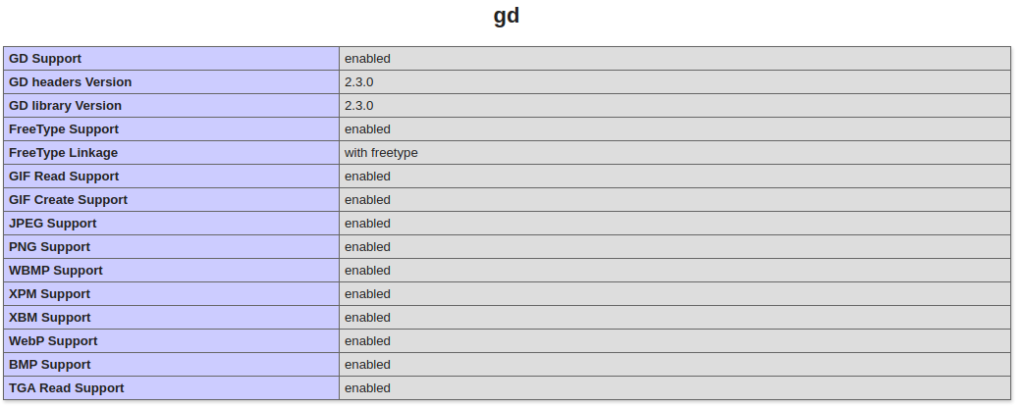
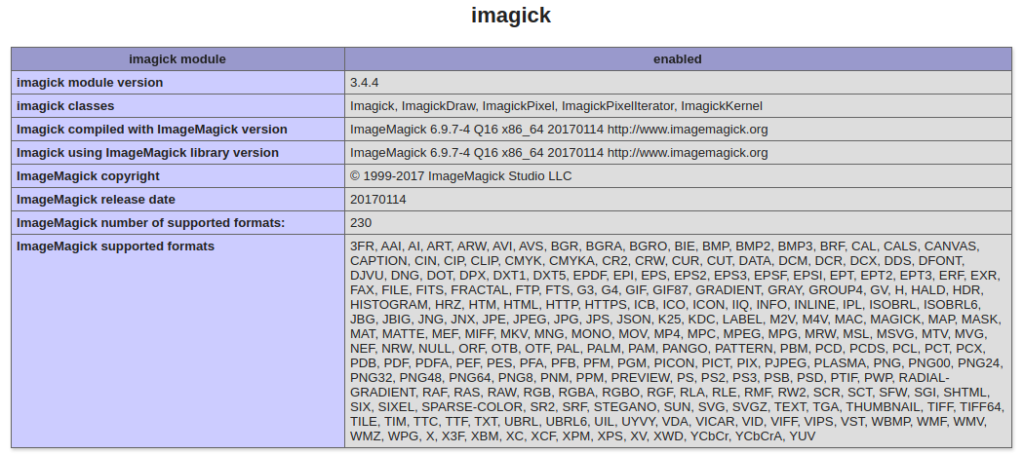
While working with image related stuff in PHP, make sure your PHP version should have these two most common image processing libraries GD Library and Imagick extensions enabled.
Whether your system already contains these extensions or not you can verify like this –
- Create info.php file at your localhost directory
- <?php phpinfo(); ?> Add this code into info.php file.
- Run this file into browser
You should see these information into php information page.
GD Extension Enabled
Imagick Extension Enabled
So, these two extensions we need, if you don’t have. Please install it first.
Image Processing Functions in CodeIgniter 4
There are several functions and/or methods which works with images for it’s manipulations.
‘Fit’ Method
$image = \Config\Services::image()
              ->withFile('/path/to/image/mypic.jpg')
              ->fit(100, 100, 'center')
              ->save('/path/to/image/mypic_thumb.jpg');
The above code tells the library to look for an image called mypic.jpg located in the source image folder, then create a new image from it that is 100 x 100 pixels using the GD2 image library, and save it to a new file (the thumb).
‘Rotate’ Method
$image = \Config\Services::image()
              ->withFile('/path/to/image/mypic.jpg')
              ->rotate(90)
              ->save('/path/to/image/mypic_thumb.jpg');
Above code will take source image and rotate it to 90 deg and save it to the new location.
More about Rotate method here we have an article. click here to learn.
‘Text’ Method
$image = \Config\Services::image()
          ->withFile('/path/to/image/mypic.jpg')
          ->text('Copyright 2021 My Photo Co', [
                  'color'      => '#fff',
                  'opacity'    => 0.5,
                  'withShadow' => true,
                  'hAlign'     => 'center',
                  'vAlign'     => 'bottom',
                  'fontSize'   => 20
             ])
          ->save('/path/to/image/mypic_thumb.jpg');
Above code will take source image and add a text watermark into image and save it to the new location.
More about Adding a watermark text on image here we have an article. click here to learn.
‘Resize’ Method
$image = \Config\Services::image()
              ->withFile('/path/to/image/mypic.jpg')
              ->resize(200, 100, true, 'height')
              ->save('/path/to/image/mypic_thumb.jpg');
Above code will take source image and resize to 200 (width) X 100 (height) image and save it to the new location. It will generate image thumbnail.
More about generating thumbnail of image methods here we have an article. click here to learn.
We hope this article helped you to learn Image Manipulation Class in CodeIgniter 4 Tutorial in a very detailed way.
If you liked this article, then please subscribe to our YouTube Channel for PHP & it’s framework, WordPress, Node Js video tutorials. You can also find us on Twitter and Facebook.
Read more