
Inside this article we will see the concept i.e Laravel 10 How To Create Signature Pad Using jQuery. Article contains the classified information i.e Create & Save Signature Data in Laravel application.
Signature Pad is a HTML5 canvas based smooth signature drawing using variable width spline interpolation. It is a plugin for the jQuery JavaScript library that allows users to easily create and capture digital signatures in web applications.
jQuery Signature Pad is commonly used in e-commerce, document signing, and other applications where a digital signature is required.
Read More: SweetAlert2 jQuery Notification Plugin in Laravel 10 Tutorial
Let’s get started.
Laravel Installation
Open terminal and run this command to create a laravel project.
composer create-project laravel/laravel myblogIt will create a project folder with name myblog inside your local system.
To start the development server of laravel –
php artisan serveURL: http://127.0.0.1:8000
Assuming laravel already installed inside your system.
Create Images Folder
Go to /public folder available at application root. Create a folder with name images. We will save generated signature images inside it.
Make sure images folder should have sufficient permission to write content into it.
Read More: Bootstrap Growl jQuery Notification Plugin in Laravel 10
Create Application Controller
Open project into terminal and run this command into it.
$ php artisan make:controller DataControllerIt will create DataController.php file inside /app/Http/Controllers folder. Open controller file and write this code into it.
<?php
namespace App\Http\Controllers;
use Illuminate\Http\Request;
class DataController extends Controller
{
public function index()
{
return view('signature');
}
public function store(Request $request)
{
$folderPath = public_path('images/');
$image = explode(";base64,", $request->signed);
$image_type = explode("image/", $image[0]);
$image_type_png = $image_type[1];
$image_base64 = base64_decode($image[1]);
$file = $folderPath . uniqid() . '.'.$image_type_png;
file_put_contents($file, $image_base64);
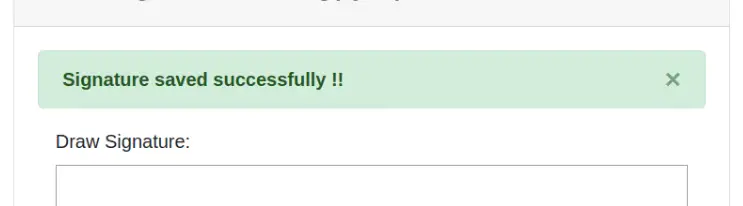
return back()->with('success', 'Signature saved successfully !!');
}
}
Create View Template
Create a fie signature.blade.php inside /resources/views folder.
Open signature.blade.php and write this code into it.
<html>
<head>
<title>Laravel 10 How To Create Signature Pad Using jQuery</title>
<link rel="stylesheet" type="text/css" href="https://cdnjs.cloudflare.com/ajax/libs/twitter-bootstrap/4.3.1/css/bootstrap.css">
<link rel="stylesheet" href="https://cdnjs.cloudflare.com/ajax/libs/jqueryui/1.12.1/jquery-ui.min.css"/>
<link rel="stylesheet" type="text/css" href="http://keith-wood.name/css/jquery.signature.css">
<style>
.kbw-signature { width: 100%; height: 200px;}
#sig canvas{ width: 100% !important; height: auto;}
</style>
</head>
<body>
<div class="container">
<div class="row">
<div class="col-md-8 offset-md-3 mt-5">
<div class="card">
<div class="card-header">
<h5>Laravel 10 How To Create Signature Pad Using jQuery</h5>
</div>
<div class="card-body">
@if ($message = Session::get('success'))
<div class="alert alert-success alert-dismissible">
<button type="button" class="close" data-dismiss="alert">×</button>
<strong>{{ $message }}</strong>
</div>
@endif
<form method="POST" action="{{ route('signature_pad.store') }}">
@csrf
<div class="col-md-12">
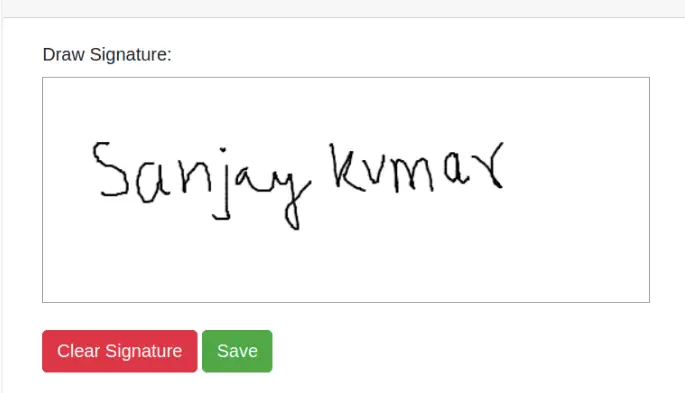
<label class="" for="">Draw Signature:</label>
<br/>
<div id="sig"></div>
<br><br>
<button id="clear" class="btn btn-danger">Clear Signature</button>
<button class="btn btn-success">Save</button>
<textarea id="signature" name="signed" style="display: none"></textarea>
</div>
</form>
</div>
</div>
</div>
</div>
</div>
<script src="https://code.jquery.com/jquery-3.5.1.min.js"></script>
<script src="https://code.jquery.com/ui/1.12.1/jquery-ui.min.js"></script>
<script type="text/javascript" src="http://keith-wood.name/js/jquery.signature.js"></script>
<script type="text/javascript">
var sig = $('#sig').signature({syncField: '#signature', syncFormat: 'PNG'});
$('#clear').click(function(e) {
e.preventDefault();
sig.signature('clear');
$("#signature").val('');
});
</script>
</body>
</html>Read More: How To Disable RSS Feed URLs in WordPress Website Tutorial
Add Route
Open web.php file from /routes folder. Add these routes into it.
//...

use App\Http\Controllers\DataController;

//...

Route::get('signature-pad', [DataController::class, 'index']);
Route::post('signature-pad', [DataController::class, 'store'])->name('signature_pad.store');
Application Testing
Run this command into project terminal to start development server,
php artisan serveURL: http://127.0.0.1:8000/signature-pad
When we hit Save button, it will save the signature image into images folder.
We hope this article helped you to learn Laravel 10 How To Create Signature Pad Using jQuery in a very detailed way.
Read More: Laravel 10 Concept of Route Model Binding with Example
If you liked this article, then please subscribe to our YouTube Channel for PHP & it’s framework, WordPress, Node Js video tutorials. You can also find us on Twitter and Facebook.
Read more