Rich text editors are a great addition to online applications because they allow users to easily generate and amend material. To improve content management capabilities, CKEditor, a popular and feature-rich WYSIWYG editor, may be simply incorporated into Laravel 10 projects.
We will walk you through the process of integrating the CKEditor plugin into Laravel 10, allowing you to create a robust and user-friendly content editing experience.
By the end of this course, you’ll have the skills and expertise to use CKEditor to enrich your Laravel 10 applications, allowing users to easily create and edit rich content.
Read More: Laravel 10 RESTful APIs with Passport Authentication
Let’s get started.
What is Ckeditor?
CKEditor, originally known as FCKEditor, is a popular open-source WYSIWYG (What You See Is What You Get) web content text editor. It is intended to make producing and formatting rich text within web applications easier by allowing users to edit and format text as if they were using a word processor.
CKEditor’s key features and qualities include:
- WYSIWYG Editing: CKEditor is a user-friendly interface that allows users to visually generate and edit information. As users format their text, they can see how it will appear on the web page, making it simple to apply styles, headings, lists, and other formatting without having to write HTML code.
- Rich Text Formatting: CKEditor provides numerous formatting options, such as font styles, sizes, colours, alignment, and paragraph spacing. Users can also make bulleted and numbered lists, insert tables, photos, and links, and use several text styles (bold, italic, underline, and so on).
- Customizability: CKEditor is quite adaptable. Developers can customise the editor to add or exclude specific functionalities based on the needs of their application. You can improve its functionality and appearance by creating custom plugins and styles.
- Cross-Browser Compatibility: CKEditor is cross-browser compatible, ensuring consistent editing experiences across platforms and devices.
Laravel Installation
Open terminal and run this command to create a laravel project.
composer create-project laravel/laravel myblogIt will create a project folder with name myblog inside your local system.
To start the development server of laravel –
php artisan serveURL: http://127.0.0.1:8000
Assuming laravel already installed inside your system.
Create Database & Connect
To create a database, either we can create via Manual tool of PhpMyadmin or by means of a mysql command.
CREATE DATABASE laravel_app;
To connect database with application, Open .env file from application root. Search for DB_ and update your details.
DB_CONNECTION=mysql
DB_HOST=127.0.0.1
DB_PORT=3306
DB_DATABASE=laravel_app
DB_USERNAME=root
DB_PASSWORD=root
Create Table Migration
Open project into terminal and run this command,
php artisan make:migration create_blogs_tableIt will create a file xxx_create_blogs_table.php inside /database/migrations folder.
Open file and write this complete code into it,
<?php

use Illuminate\Database\Migrations\Migration;
use Illuminate\Database\Schema\Blueprint;
use Illuminate\Support\Facades\Schema;

return new class extends Migration
{
    /**
     * Run the migrations.
     */
    public function up(): void
    {
        Schema::create('blogs', function (Blueprint $table) {
            $table->id();
            $table->string('title', 150);
            $table->string('author_name', 150);
            $table->text('description');
        });
    }

    /**
     * Reverse the migrations.
     */
    public function down(): void
    {
        Schema::dropIfExists('blogs');
    }
};
Run Migration
Run migration command to create table,
php artisan migrateIt creates a table called blogs inside your database.
Setup Data Model & Controller
Back to project terminal and run commands,
Create Model Class
php artisan make:model BlogIt will create a model class file with name Blog.php inside /app/Models folder.
Read More: Laravel 10 RESTful APIs with JWT Authentication Tutorial
Open file and write this complete code into it,
<?php

namespace App\Models;

use Illuminate\Database\Eloquent\Factories\HasFactory;
use Illuminate\Database\Eloquent\Model;

class Blog extends Model
{
    use HasFactory;

    /**
     * The attributes that are mass assignable.
     *
     * @var array<int, string>
     */
    protected $fillable = [
        'title',
        'description',
        'author_name'
    ];

    public $timestamps = false;
}
Create Controller Class
php artisan make:controller BlogControllerIt will create a controller class BlogController.php inside /app/Http/Controllers folder.
Open file and write this complete code into it,
<?php

namespace App\Http\Controllers;

use App\Models\Blog;
use Illuminate\Http\Request;
use Illuminate\View\View;

class BlogController extends Controller
{
    public function index(): View
    {
        return view('blog-form');
    }

    public function submitData(Request $request)
    {
        $validatedData = $request->validate([
            'title' => 'required',
            'description' => 'required',
            'author_name' => 'required'
        ]);

        $blog = new Blog();

        $blog->title = $request->title;
        $blog->description = $request->description;
        $blog->author_name = $request->author_name;

        $blog->save();

        return redirect('form')->with('success', 'Blog saved successfully!');
    }
}
Next,
Setup Blade Template with Ckeditor Plugin
Create a file blog-form.blade.php inside /resources/views folder.
Open file and write this code into it,
<html lang="en">

<head>
    <title>Laravel 10 How To Integrate Ckeditor Plugin Tutorial</title>
    <link href="https://maxcdn.bootstrapcdn.com/bootstrap/4.0.0-beta/css/bootstrap.min.css" rel="stylesheet">
</head>

<body>
    <div class="container" style="margin-top: 20px;">
        <div class="row">
            <div class="col-md-12">
                @if (Session::has('success'))
                <div class="alert alert-success">
                    {{ Session::get('success') }}
                    @php
                    Session::forget('success');
                    @endphp
                </div>
                @endif
                <h4 class="text-center">Laravel 10 How To Integrate Ckeditor Plugin Tutorial</h4><br>
                <form method="post" action="{{ route('blog.submit') }}" class="form form-horizontal">
                    @csrf
                    <div class="form-group">
                        <label>Title</label>
                        <input type="text" name="title" class="form-control" />
                    </div>
                    <div class="form-group">
                        <label>Description</label>
                        <textarea class="form-control" id="description-ckeditor" name="description"></textarea>
                    </div>
                    <div class="form-group">
                        <label>Author Name</label>
                        <input type="text" name="author_name" class="form-control" />
                    </div>
                    <div class="form-group">
                        <input type="submit" value="Submit" class="btn btn-primary" />
                    </div>
                </form>
            </div>
        </div>
    </div>
    <script src="https://code.jquery.com/jquery-3.2.1.min.js"></script>
    <script src="https://cdn.ckeditor.com/4.15.1/standard/ckeditor.js"></script>
    <script>
    CKEDITOR.replace('description-ckeditor');
    </script>
</body>

</html>
Add Route
Open web.php from /routes folder. Add these routes into it,
//...

use App\Http\Controllers\BlogController;

Route::get('form', [BlogController::class, 'index']);
Route::post('submit', [BlogController::class, 'submitData'])->name("blog.submit");
//...
Application Testing
Run this command into project terminal to start development server,
php artisan serveRead More: Laravel 10 How To get Browser Details Example Tutorial
URL: http://127.0.0.1:8000/form
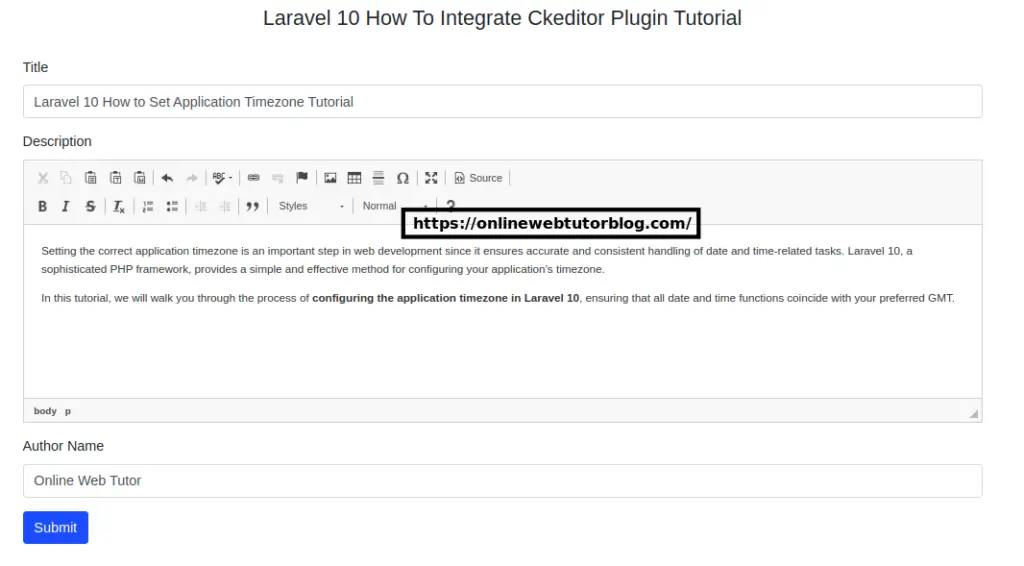
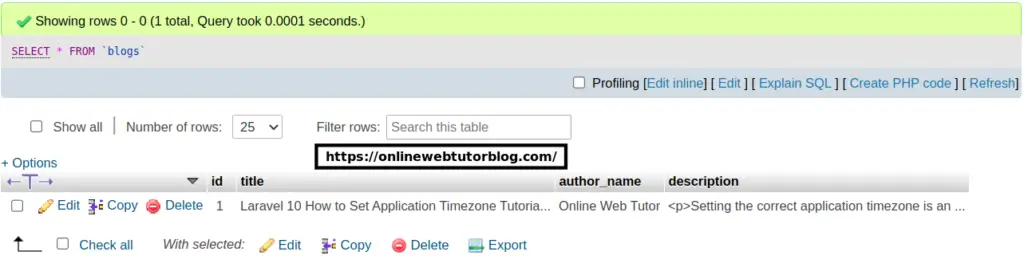
Click on Submit button to save form data,

You should see data saved inside blogs table.
That’s it.
We hope this article helped you to learn about Laravel 10 How To Integrate Ckeditor Plugin Tutorial in a very detailed way.
If you liked this article, then please subscribe to our YouTube Channel for PHP & it’s framework, WordPress, Node Js video tutorials. You can also find us on Twitter and Facebook.
Read more