In many applications, you have been observed file upload process is bit attractive. Inside this article we will see the concept of Laravel 8 drag and drop file upload using dropzone jquery plugin.
Dropzone.js is a jquery plugin, dropzone.js through we can select one by one image and also with preview.
Uploading files in application using dropzone plugin is super easy. This tutorial is very interesting and easy to learn.
We can upload any type of file using dropzone but for this tutorial we will use the feature to upload only images via dropzone jquery plugin.
Let’s get started.
Laravel Installation
We will create laravel project using composer. So, please make sure your system should have composer installed. If not, may be this article will help you to Install composer in system.
Here is the command to create a laravel project-
composer create-project --prefer-dist laravel/laravel blog
To start the development server of Laravel –
php artisan serve
URL: http://127.0.0.1:8000
Assuming laravel already installed inside your system.
Create Database & Connect
To create a database, either we can create via Manual tool of PhpMyadmin or by means of a mysql command.
CREATE DATABASE laravel_app;
To connect database with application, Open .env file from application root. Search for DB_ and update your details.
DB_CONNECTION=mysql
DB_HOST=127.0.0.1
DB_PORT=3306
DB_DATABASE=laravel_app
DB_USERNAME=root
DB_PASSWORD=root
Create Model & Migration
We will create a model and a migration file. These are because when we upload images from dropzone we will save it to database.
Open terminal and run this artisan command
$ php artisan make:model ImageUpload -m
It will create a model (ImageUpload.php) and a migration file (2021_04_30_152115_create_image_uploads_table.php). -m to create migration file.
You should see these two files.
- Model file is at /app/Models
- Migration file is at /database/migrations
Open Migration file and write this updated code into it.
<?php

use Illuminate\Database\Migrations\Migration;
use Illuminate\Database\Schema\Blueprint;
use Illuminate\Support\Facades\Schema;

class CreateImageUploadsTable extends Migration
{
    /**
     * Run the migrations.
     *
     * @return void
     */
    public function up()
    {
        Schema::create('image_uploads', function (Blueprint $table) {
            $table->id();
            $table->text('filename');
            $table->timestamps();
        });
    }

    /**
     * Reverse the migrations.
     *
     * @return void
     */
    public function down()
    {
        Schema::dropIfExists('image_uploads');
    }
}
Migrate Migration
Back to terminal and run this artisan command.
$ php artisan migrate
It will create a table image_uploads into database.
Create Controller
Next, we need to create a controller file.
$ php artisan make:controller DropzoneController
It will create a file DropzoneController.php at /app/Http/Controllers folder.
Open DropzoneController.php and write this updated code.
<?php

namespace App\Http\Controllers;

use Illuminate\Http\Request;
use App\Models\ImageUpload;

class DropzoneController extends Controller
{
    /**
     * Generate Image upload View
     *
     * @return void
     */
    public function dropzone()
    {
        return view('upload-view');
    }

    /**
     * Image Upload Code
     *
     * @return void
     */
    public function dropzoneStore(Request $request)
    {
        $image = $request->file('file');

        $imageName = $image->getClientOriginalName();

        $image->move(public_path('images'), $imageName);

        $imageUpload = new ImageUpload();
        $imageUpload->filename = $imageName;
        $imageUpload->save();

        return response()->json([
            'status' => 1,
            'filename' => $imageName
        ]);
    }
}
Create Routes
Open web.php from /routes folder.
# Add this header
use App\Http\Controllers\DropzoneController;

//...
Route::get('image-upload', [ DropzoneController::class, 'dropzone' ]);
Route::post('dropzone/store', [ DropzoneController::class, 'dropzoneStore' ])->name('dropzone.store');
Create Blade Layout File
Next, need to create upload-view.blade.php inside /resources/views folder.
Open this view file and write this updated code.
<!DOCTYPE html>
<html>

<head>
    <title>Laravel 8 Drag And Drop File Upload Using Dropzone - Online Web Tutor</title>
    <link rel="stylesheet" href="https://maxcdn.bootstrapcdn.com/bootstrap/3.4.1/css/bootstrap.min.css">
    <script src="https://ajax.googleapis.com/ajax/libs/jquery/3.5.1/jquery.min.js"></script>
    <link href="https://cdnjs.cloudflare.com/ajax/libs/dropzone/4.0.1/min/dropzone.min.css" rel="stylesheet">
    <script src="https://cdnjs.cloudflare.com/ajax/libs/dropzone/4.2.0/min/dropzone.min.js"></script>
</head>

<body>

    <div class="container section">
        <div class="row">
            <div class="col-md-8 col-md-offset-2">
                <h3 class="text-center">Laravel 8 Drag And Drop File Upload Using Dropzone</h3>
                <form action="{{ route('dropzone.store') }}" method="POST" enctype="multipart/form-data" class="dropzone" id='image-upload'>
                    @csrf
                    <div>
                        <h3 class="text-center">Upload Multiple Image By Click On Box</h3>
                    </div>
                </form>
            </div>
        </div>
    </div>
    <script type="text/javascript">
        Dropzone.options.imageUpload = {
            maxFilesize: 1,
            acceptedFiles: ".jpeg,.jpg,.png,.gif",
        };
    </script>
</body>

</html>
Application Testing
Run this command into project terminal to start development server,
php artisan serveURL: http://127.0.0.1:8000/image-upload
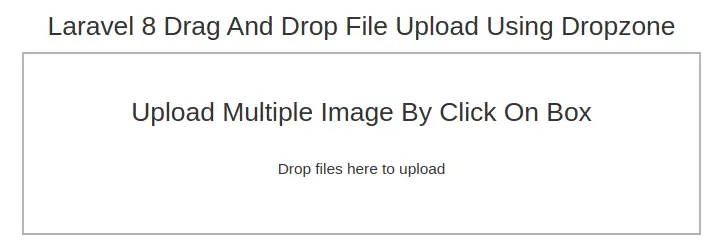
This is the view we will get before upload.
Let’s upload few images by dragging and dropping into area.
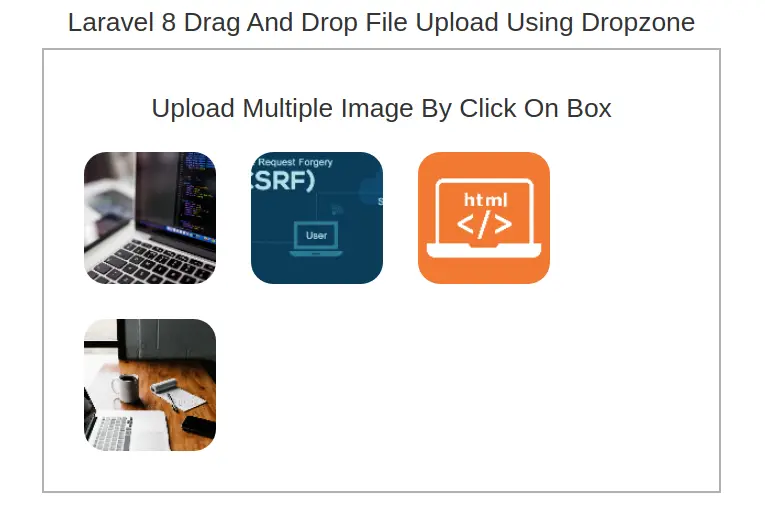
Data has been saved to database table as well.

We hope this article helped you to learn about Laravel 8 Drag and Drop File Upload Using Dropzone Tutorial in a very detailed way.
If you liked this article, then please subscribe to our YouTube Channel for PHP & it’s framework, WordPress, Node Js video tutorials. You can also find us on Twitter and Facebook.
Read more