Sending an email in web application is very common. Laravel provides the predefined Mail class used to send mail. We only need to use & configure it. The content of this article is very useful to understand the things about markdown mailable email template components.
Inside this article we will understand about Laravel 9 markdown mailable email Template components. Additionally we will see how can we do custom changes with email header, footer, add custom image etc.
Markdown mailable templates and it’s components are laravel 9 default generated templates.
Learn More –
- Laravel 9 One to Many Eloquent Relationship Tutorial
- Laravel 9 One to One Eloquent Relationship Tutorial
- Laravel 9 Send Mail Using Gmail SMTP Server Tutorial
- How To Change Email Subject in Laravel 9 Tutorial
Let’s get started.
Laravel Installation
Open terminal and run this command to create a laravel project.
composer create-project laravel/laravel myblogIt will create a project folder with name myblog inside your local system.
To start the development server of laravel –
php artisan serveURL: http://127.0.0.1:8000
Assuming laravel already installed inside your system.
Default Markdown Mailable Template File
We can create custom email template file to send emails. But Laravel has a default behaviour to generate markdown mailable template and it’s components.
Open project into terminal and run this artisan command.
$ php artisan make:mail TestMail --markdown=emails.sample-emailThis command will create two files –
- Mail class file at /app/Http/Mail/TestMail.php
- Markdown template file at /resources/views/emails/sample-email.blade.php
Open sample-email.blade.php
@component('mail::message')
# Introduction

The body of your message.

@component('mail::button', ['url' => ''])
Button Text
@endcomponent

Thanks,<br>
{{ config('app.name') }}
@endcomponent
This email template is used when we send any email via markdown. It contains a logo, a email header, a footer, a button etc. These components of markdown mailable email template makes more powerful feature for template customization.
Markdown Mailable Components
Laravel 9 mailable template system contains several components like Button, Panel, Table, etc. These components we can use in mail templates to create html layout for mail layout.
Button Component
The button component renders a centered button link. It contains the view for a button i.e an anchor tag. To include a button simply write this component code.
@component('mail::button', ['url' => $url, 'color' => 'info'])
     View Product
@endcomponent
Panel Component
The panel component renders the given block of text in a panel. Here is the simple which gives a panel view.
@component('mail::panel')
  This is a panel of Online Web Tutor
@endcomponent
Table Component
The table component allows you to transform a Markdown table into an HTML table.. Simple code to create table component –
@component('mail::table')
| Author           | Playlist         | Video Count  |
| ---------------- |:----------------:| ------------:|
| Sanjay           | Laravel 8        | 90           |
| Online Web tutor | CodeIgniter 4    | 35           |
@endcomponent
Inside this pre defined mailable template we have only component based structure. Only we have to change the message within defined components.
But in case if we want to do more customization within components, in simple way not available. But we can do this in a different way.
Laravel provides the hidden components structure in format of code as well.
Publish Markdown Mailables Template Files
Export all of the Markdown mail components to application for customization, use the <strong>vendor:publish</strong> artisan command
Open project into terminal and run this artisan command.
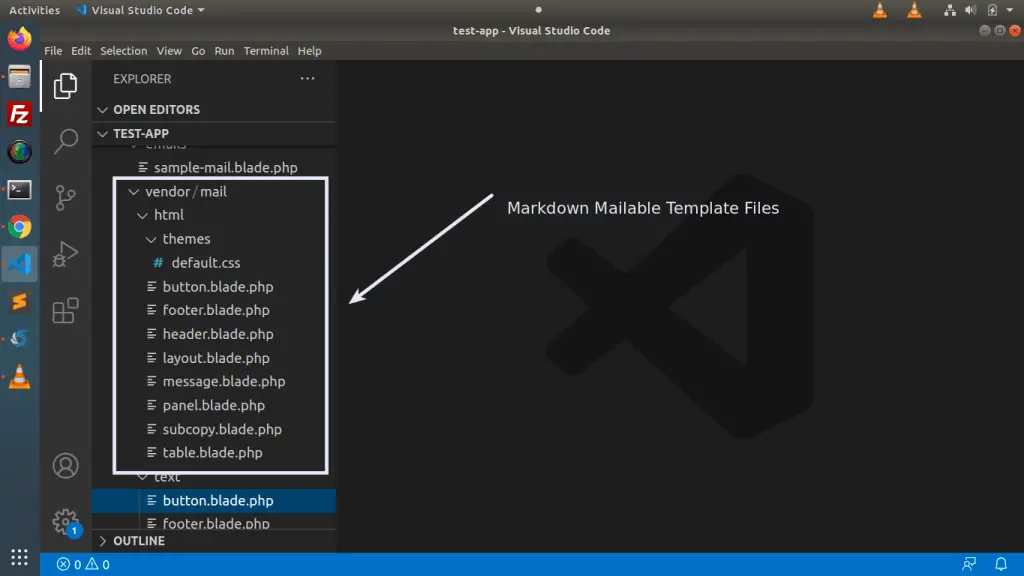
$ php artisan vendor:publish --tag=laravel-mailThis command will publish the Markdown mail components to /resources/views/vendor/mail.
The <strong>mail</strong> directory will contain an <strong>html</strong> and a <strong>text</strong> directory, each containing their respective representations of every available component.
Now, we are free to customize these components however we like.

We need to customize this files only which automatically controls the ui of components.
Logo Customization
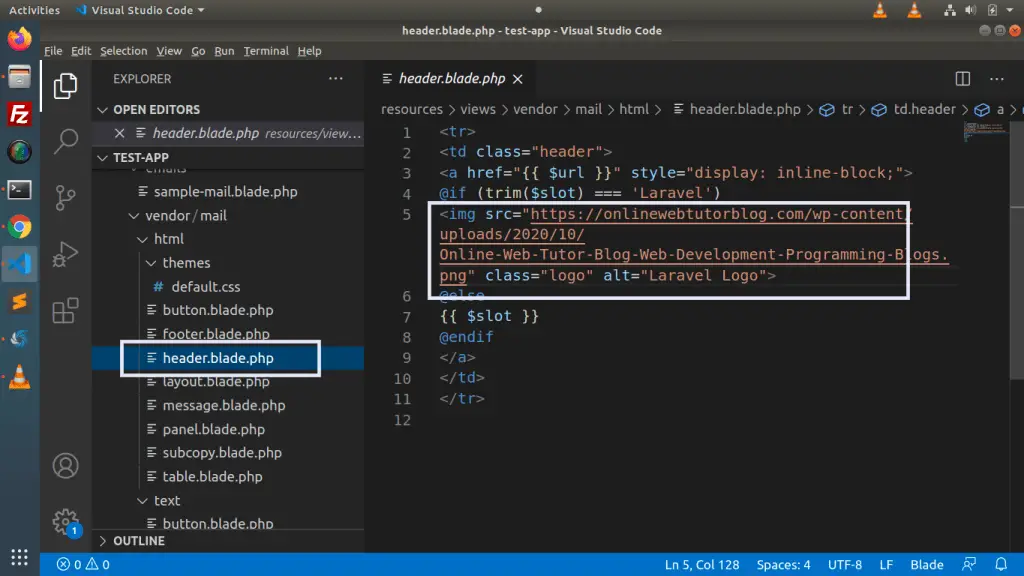
Open header.blade.php from /resources/views/vendor/mail/html folder.
Add your own custom logo path into it. Have a look this image.

We hope this article helped you to learn about Laravel 9 Markdown Mailable Email Template Components Tutorial in a very detailed way.
If you liked this article, then please subscribe to our YouTube Channel for PHP & it’s framework, WordPress, Node Js video tutorials. You can also find us on Twitter and Facebook.
Read more