Sending an email in web application is very common. Laravel provides the predefined Mail class used to send mail. We only need to use & configure it.
Inside this article we will see customize Markdown Email Template in Laravel 8. Additionally we will see how can we do custom changes with email header, footer, add custom image etc.
Markdown mailable templates are laravel 8 default provided templates.
Send Email in Laravel Using GMail SMTP with Custom Email template, Click here.
Let’s get started.
Laravel Installation
We will create laravel project using composer. So, please make sure your system should have composer installed. If not, may be this article will help you to Install composer in system.
Here is the command to create a laravel project-
composer create-project --prefer-dist laravel/laravel blog
To start the development server of Laravel –
php artisan serve
URL: http://127.0.0.1:8000
Assuming laravel already installed inside your system.
Send Email Using Markdown Mailable Template
To get the concept of sending an email by Gmail SMTP server using markdown mailable template, Click here to learn in detail.
Inside above article, we have sent the mail without any customization into the pre defined template of laravel 8.
Let’s get started about the step by step customization of mailable template.
Understanding Markdown Mailable Template File
Open project into terminal and run this artisan command.
$ php artisan make:mail TestMail --markdown=emails.sample-email
This command will create two files –
- Mail class file at /app/Http/Mail/TestMail.php
- Markdown template file at /resources/views/emails/sample-email.blade.php
Open sample-email.blade.php
@component('mail::message')
# Introduction

The body of your message.

@component('mail::button', ['url' => ''])
Button Text
@endcomponent

Thanks,<br>
{{ config('app.name') }}
@endcomponent
This email template is used when we send any email via markdown. It contains a logo, a email header, a footer etc.
Button Component
The button component renders a centered button link. It contains the view for a button i.e an anchor tag. To include a button simply write this component code.
@component('mail::button', ['url' => $url, 'color' => 'info'])View Product@endcomponent

Panel Component
The panel component renders the given block of text in a panel. Here is the simple which gives a panel view.
@component('mail::panel')This is a panel of Online Web Tutor@endcomponent

Table Component
The table component allows you to transform a Markdown table into an HTML table.. Simple code to create table component –
@component('mail::table')| Author | Playlist | Video Count || ---------------- |:----------------:| ------------:|| Sanjay | Laravel 8 | 90 || Online Web tutor | CodeIgniter 4 | 35 |@endcomponent

Inside this pre defined mailable template we have only component based structure, don’t have actually too much options available for customization. Only we have to change the message within defined components.
How can we enable the hidden layouts of mailable template ?
Publish Markdown Mailables Template Files
Export all of the Markdown mail components to application for customization, use the <strong>vendor:publish</strong> Artisan command
Open project into terminal and run this artisan command.
$ php artisan vendor:publish --tag=laravel-mail
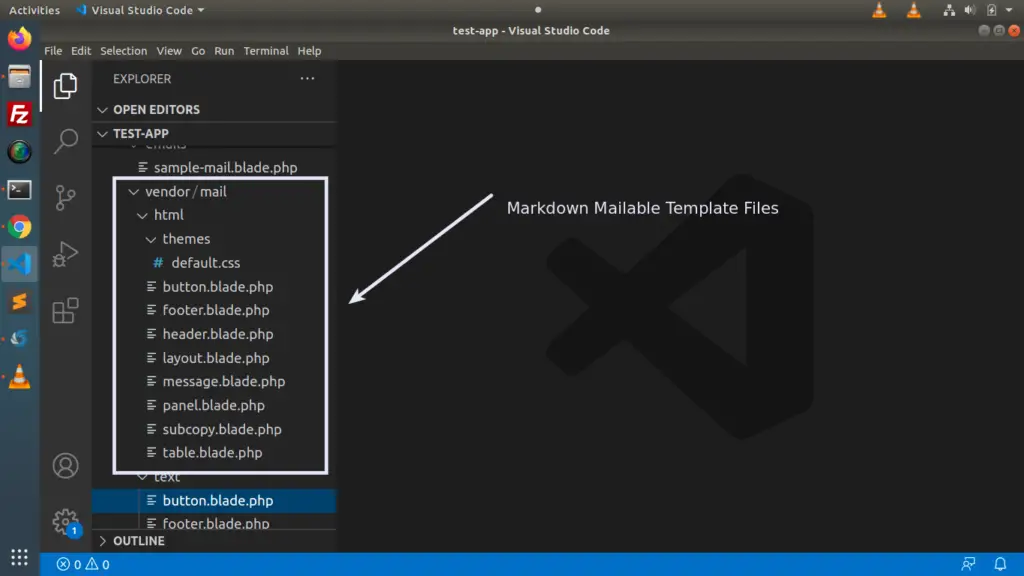
This command will publish the Markdown mail components to /resources/views/vendor/mail.
The <strong>mail</strong> directory will contain an <strong>html</strong> and a <strong>text</strong> directory, each containing their respective representations of every available component. Now, we are free to customize these components however we like.

We need to customize this files only, which automatically controls the ui of components.
Logo Customization
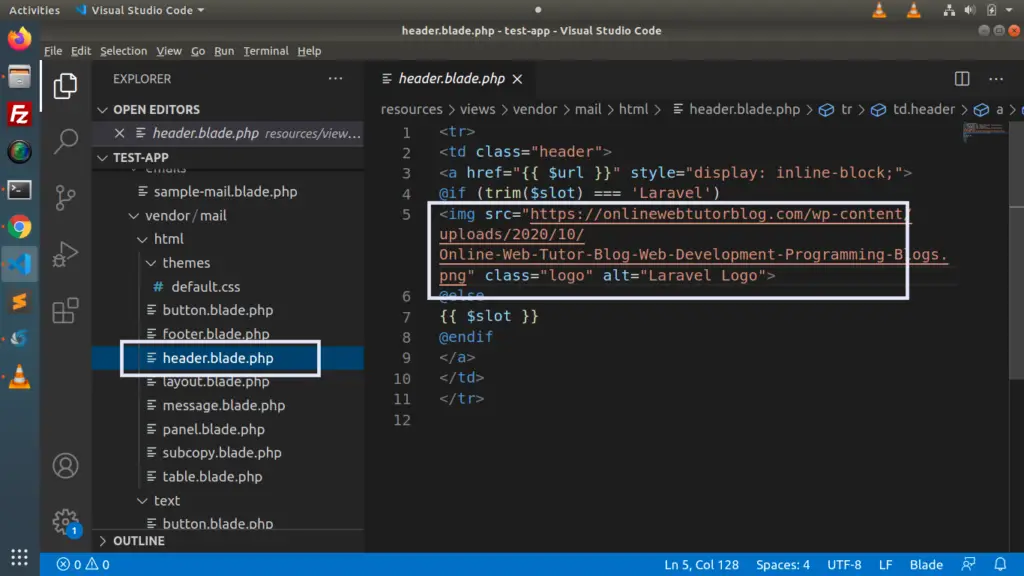
Open header.blade.php from /resources/views/vendor/mail/html folder.
Add your own custom logo path into it. Have a look this image.

We hope this article helped you to learn about Customization of Markdown Mailable Email Templates in a very detailed way.
If you liked this article, then please subscribe to our YouTube Channel for PHP & it’s framework, WordPress, Node Js video tutorials. You can also find us on Twitter and Facebook.
Read more