
Laravel 10 provides developers with a comprehensive framework for interacting with MySQL databases and extracting valuable insights. Among the SQL operations available, the RIGHT JOIN stands out as a powerful tool for combining data from two tables, including unmatched records from the right table.
This technique is very beneficial when you need to prioritise data from the correct table while yet having the option to merge data from related tables.
Read More: Laravel 10 MySQL Left Join Example Tutorial
In this article, we will walk you through a detailed example of using the RIGHT JOIN procedure in Laravel 10 with MySQL. We will walk you through the process of building migration files, establishing database associations, and running RIGHT JOIN queries to retrieve and harmonise data.
Let’s get started.
Types of Joins
As per the documentation we have following types of joins available –
- Inner Join
- Left Join
- Right Join
- Cross Join
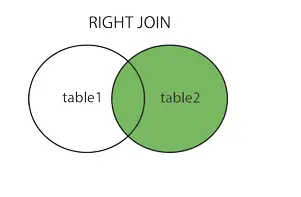
What is Right Join?
Right Join – This also works same the matched condition between two or more than two tables. But in this case we also get the rows of right table which doesn’t match with the condition with the left hand sided table. Means we get all rows of right table including values of matched with left table.
How can we use inside an application and get relational data we will see by making an application. Let’s create an application in which we use Right Join.
Laravel Installation
Open terminal and run this command to create a laravel project.
composer create-project laravel/laravel myblogIt will create a project folder with name myblog inside your local system.
To start the development server of laravel –
php artisan serveURL: http://127.0.0.1:8000
Assuming laravel already installed inside your system.
Create Database & Connect
To create a database, either we can create via Manual tool of PhpMyadmin or by means of a mysql command.
CREATE DATABASE laravel_app;
To connect database with application, Open .env file from application root. Search for DB_ and update your details.
DB_CONNECTION=mysql
DB_HOST=127.0.0.1
DB_PORT=3306
DB_DATABASE=laravel_app
DB_USERNAME=root
DB_PASSWORD=root
Setup Migrations & Model
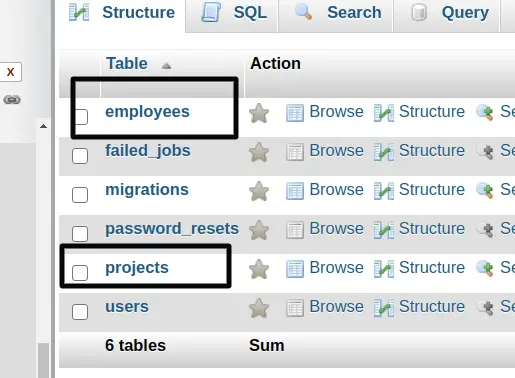
Create migrations and models for Employees and Projects table.
Read More: Tyrone’s Unblocked Games – Play Online Games
Open project into terminal and run this artisan command.
$ php artisan make:model Employee -mIt will create two files –
- Model file Employee.php inside /app/Models folder.
- Migration file 2023_08_11_062204_create_employees_table.php inside /database/migrations folder.
$ php artisan make:migration create_projects_tableIt will create a migration file 2023_08_11_062234_create_projects_table.php inside /database/migrations folder.
Open xxx_create_employees_table.php and write this following code into it.
<?php

use Illuminate\Database\Migrations\Migration;
use Illuminate\Database\Schema\Blueprint;
use Illuminate\Support\Facades\Schema;

return new class extends Migration
{
    /**
     * Run the migrations.
     */
    public function up(): void
    {
        Schema::create('employees', function (Blueprint $table) {
            $table->id();
            $table->string("name", 50);
            $table->string("email", 50);
            $table->string("phone_no", 20);
        });
    }

    /**
     * Reverse the migrations.
     */
    public function down(): void
    {
        Schema::dropIfExists('employees');
    }
};
Open xxx_create_projects_table.php and write this following code into it.
<?php

use Illuminate\Database\Migrations\Migration;
use Illuminate\Database\Schema\Blueprint;
use Illuminate\Support\Facades\Schema;

return new class extends Migration
{
    /**
     * Run the migrations.
     */
    public function up(): void
    {
        Schema::create('projects', function (Blueprint $table) {
            $table->id();
            $table->integer('employee_id')->unsigned();
            $table->string("project_name", 100);
            $table->foreign('employee_id')
                ->references('id')->on('employees')
                ->onDelete('cascade');
        });
    }

    /**
     * Reverse the migrations.
     */
    public function down(): void
    {
        Schema::dropIfExists('projects');
    }
};
Migrate Migrations
Back to terminal and run this command to migrate all migrations.
$ php artisan migrateRead More: LiveLeak Alternatives
This command will migrate all.
Insert Test Data (Tables)
We have some mysql queries which will insert test data to employees and projects table.
Copy command and run into SQL tab of mysql database.
--
-- Dumping data for table `employees`
--

INSERT INTO `employees` (`id`, `name`, `email`, `phone_no`) VALUES
(1, 'Sanjay Kumar', 'sanjay@gmail.com', '8527419630'),
(2, 'Vijay Kumar', 'vijay@gmail.com', '9632587410'),
(3, 'Ashish Kumar', 'ashish@gmail.com', '7896541356');
(4, 'Dhananjay Kumar', 'dhananjay@gmail.com', '7896585296'),
(5, 'Pradeep Kumar', 'pradeep@gmail.com', '7896556565');
--
-- Dumping data for table `projects`
--

INSERT INTO `projects` (`id`, `employee_id`, `project_name`) VALUES
(1, 1, 'Project 4'),
(2, 105, 'Project 7'),
(3, 300, 'Project 50');
Create Controller
Open project into terminal and run this command.
$ php artisan make:controller SiteControllerIt will create SiteController.php file inside /app/Http/Controllers folder.
Open SiteController.php and write this code into it.
<?php

namespace App\Http\Controllers;

use Illuminate\Http\Request;
use App\Models\Employee;

class SiteController extends Controller
{
    public function getData()
    {
        $data = Employee::rightJoin("projects", function ($join) {

            $join->on("projects.employee_id", "=", "employees.id");

        })->get();

        echo "<pre>";
        print_r($data);
    }
}
There are 2 methods available by which you can use right join concept.
Method #1
$data = Employee::rightJoin("projects", function ($join) {
    $join->on("projects.employee_id", "=", "employees.id");
})->get();
Method #2
$data = Employee::rightJoin("projects", "projects.employee_id", "=", "employees.id")->get();Query will be,
select * from `employees` right join `projects` on `projects`.`employee_id` = `employees`.`id`Add Route
Open web.php file from /routes folder.
//...

use App\Http\Controllers\SiteController;

Route::get("right-join", [SiteController::class, "getData"]);

//...
Application Testing
Run this command into project terminal to start development server,
php artisan serveURL: http://127.0.0.1:8000/right-join
You will get your data set at output screen.
Read More: Laravel 10 How To Setup Ajax Request Tutorial
Complete Data of Right table + Matched data with Left Table
Advanced Cases in Right Join
Assuming these cases, you can take a hint from these.
Example 1: Laravel Eloquent rightJoin() with 2 Tables
$users = User::rightJoin('posts', 'users.id', '=', 'posts.user_id') ->get(['users.*', 'posts.descrption']);Generated Query
select `users`.*, `posts`.`descrption` from `users` right join `posts` on `users`.`id` = `posts`.`user_id`Example 2: Laravel Eloquent rightJoin() with 3 Tables
$users = User::rightJoin('posts', 'posts.user_id', '=', 'users.id') ->rightJoin('comments', 'comments.post_id', '=', 'posts.id') ->get(['users.*', 'posts.descrption']);Generated Query
select `users`.*, `posts`.`descrption` from `users` right join `posts` on `posts`.`user_id` = `users`.`id` right join `comments` on `comments`.`post_id` = `posts`.`id`Example 3: Laravel Eloquent rightJoin() with Multiple Conditions
$users = User::rightJoin('posts', 'posts.user_id', '=', 'users.id')             ->where('users.status', 'active')
->where('posts.status','active')
->get(['users.*', 'posts.descrption']);
Generated Query
select `users`.*, `posts`.`descrption` from `users` right join `posts` on `posts`.`user_id` = `users`.`id` where `users`.`status` = active and `posts`.`status` = activeWe hope this article helped you to learn about Laravel 10 MySQL Right Join Example Tutorial in a very detailed way.
If you liked this article, then please subscribe to our YouTube Channel for PHP & it’s framework, WordPress, Node Js video tutorials. You can also find us on Twitter and Facebook.
Read more