This article on utilising the YajraBox Server Side Datatable in Laravel 10 will teach you all you need to know about working with datatables. As a Laravel developer, you understand the importance of data tables in quickly displaying and managing massive datasets.
YajraBox Server Side Datatable is a robust tool that integrates server-side processing and sophisticated functionality seamlessly into Laravel 10 projects. We will walk you through the step-by-step process of building YajraBox Server Side Datatable, which will allow you to easily manage pagination, filtering, and sorting actions on the server side.
Read More: Laravel 10 Step By Step Stub Customization Tutorial
Let’s get started.
Laravel Installation
Open terminal and run this command to create a laravel project.
composer create-project laravel/laravel myblogIt will create a project folder with name myblog inside your local system.
To start the development server of laravel –
php artisan serveURL: http://127.0.0.1:8000
Assuming laravel already installed inside your system.
Create Database & Connect
To create a database, either we can create via Manual tool of PhpMyadmin or by means of a mysql command.
CREATE DATABASE laravel_app;
To connect database with application, Open .env file from application root. Search for DB_ and update your details.
DB_CONNECTION=mysql
DB_HOST=127.0.0.1
DB_PORT=3306
DB_DATABASE=laravel_app
DB_USERNAME=root
DB_PASSWORD=root
Create Migration in Laravel
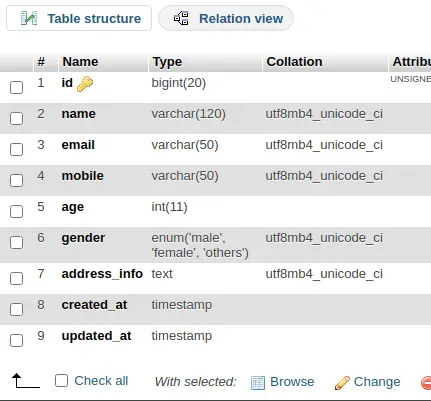
We will create a students table using migration and then we seed test data inside it.
Open project into terminal and run this command to create migration file.
$ php artisan make:migration create_students_tableIt will create 2023_03_17_031027_create_students_table.php file inside /database/migrations folder. Open migration file and write this following code into it.
The code is all about for the schema of students table.
<?php

use Illuminate\Database\Migrations\Migration;
use Illuminate\Database\Schema\Blueprint;
use Illuminate\Support\Facades\Schema;

return new class extends Migration
{
    /**
     * Run the migrations.
     *
     * @return void
     */
    public function up()
    {
        Schema::create('students', function (Blueprint $table) {
            $table->id();
            $table->string("name", 120);
            $table->string("email", 50)->nullable();
            $table->string("mobile", 50)->nullable();
            $table->integer("age");
            $table->enum("gender", ["male", "female", "others"]);
            $table->text("address_info");
            $table->timestamp("created_at")->useCurrent();
            $table->timestamp("updated_at")->useCurrent();
        });
    }

    /**
     * Reverse the migrations.
     *
     * @return void
     */
    public function down()
    {
        Schema::dropIfExists('students');
    }
};
Run Migration
Back to terminal and run this command.
$ php artisan migrateIt will create students table inside database.
Read More: How To Work with Laravel 10 Model Events Tutorial
Create Application Model
Back to project terminal and run this command to create model.
$ php artisan make:model StudentIt will create Student.php file inside /app/Models folder. This file will help when we generate data using factory and insert into table.
Next,
How To Create Data Factory for Data
Copy this command and run into terminal to create a factory file.
$ php artisan make:factory StudentFactoryIt will create a file StudentFactory.php inside /database/factories folder. Open file and write this following code into it.
<?php

namespace Database\Factories;

use Illuminate\Database\Eloquent\Factories\Factory;

/**
 * @extends \Illuminate\Database\Eloquent\Factories\Factory<\App\Models\Student>
 */
class StudentFactory extends Factory
{
    /**
     * Define the model's default state.
     *
     * @return array<string, mixed>
     */
    public function definition()
    {
        return [
            "name" => $this->faker->name(),
            "email" => $this->faker->safeEmail,
            "mobile" => $this->faker->phoneNumber,
            "age" => $this->faker->numberBetween(25, 45),
            "gender" => $this->faker->randomElement([
                "male",
                "female",
                "others"
            ]),
            "address_info" => $this->faker->address
        ];
    }
}
Next,
Process to Call Model Factory
Open DatabaseSeeder.php from /database/seeders folder. Load model and factory.
<?php

namespace Database\Seeders;

use Illuminate\Database\Console\Seeds\WithoutModelEvents;
use Illuminate\Database\Seeder;

class DatabaseSeeder extends Seeder
{
    /**
     * Seed the application's database.
     *
     * @return void
     */
    public function run()
    {
         \App\Models\Student::factory(100)->create();
    }
}
Concept
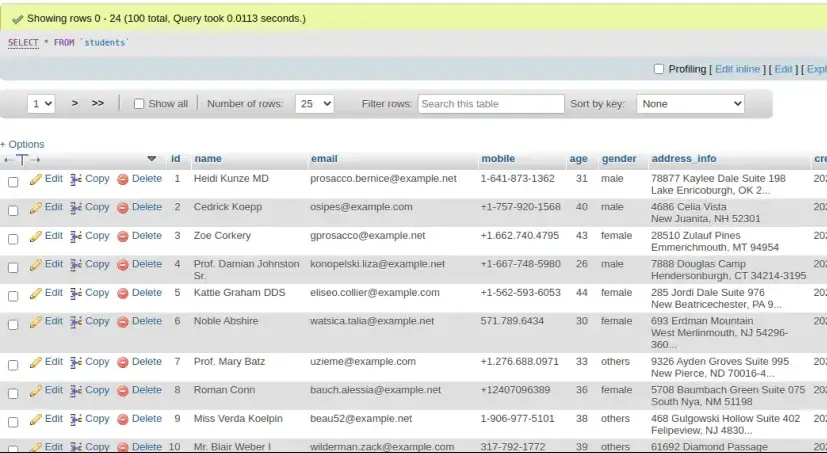
\App\Models\Student::factory(100)->create();It will generate 100 fake rows of student using StudentFactory.php file and save into students table.
Read More: Laravel 10 How To Connect with Multiple Database Tutorial
Run Data Seeder
Back to project terminal and run this command to run factory to seed fake data.
$ php artisan db:seedIt will generate and save fake data into students table.
Install Yajra Datatable – A Laravel Package
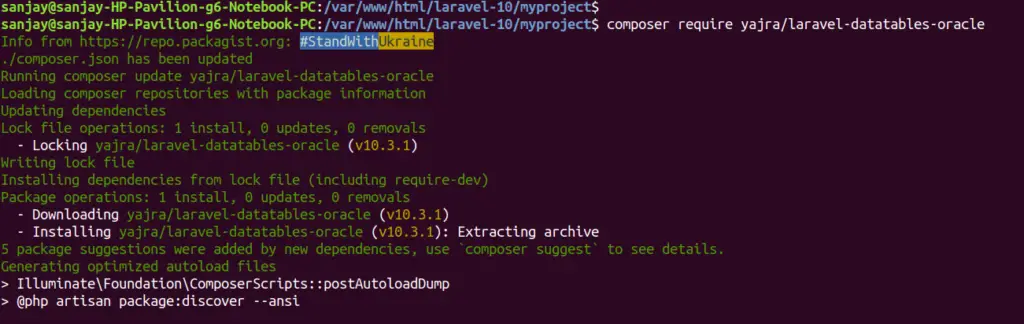
To install yajrabox, we need to run a composer command. Open up the project terminal and type this command and execute.
$ composer require yajra/laravel-datatables-oracleWhile installation of this package, you will get such type of screen over terminal.
Create Controller
Open project into terminal and run this command into it.
$ php artisan make:controller StudentControllerIt will create StudentController.php file inside /app/Http/Controllers folder. Open controller file and write this code into it.
<?php

namespace App\Http\Controllers;

use Illuminate\Http\Request;
use App\Models\Student;
use Yajra\DataTables\DataTables;

class StudentController extends Controller
{
    public function index(Request $request)
    {
        if ($request->ajax()) {
            $data = Student::select('*');
            return Datatables::of($data)
                ->addIndexColumn()
                ->addColumn('gender', function ($row) {

                    return ucfirst($row['gender']);
                })
                ->addColumn('action', function ($row) {

                    $btn = '<a href="javascript:void(0)" data-id="' . $row['id'] . '" class="edit btn btn-success btn-sm text-center">View</a>';

                    return $btn;
                })
                ->rawColumns(['action'])
                ->make(true);
        }

        return view('student');
    }
}
Concept
Here, is the complete code by which we are handling Yajra DataTable with Table data.
$data = Student::select('*');

return Datatables::of($data)
    ->addIndexColumn()
    ->addColumn('gender', function ($row) {

        return ucfirst($row['gender']);
    })
    ->addColumn('action', function ($row) {

        $btn = '<a href="javascript:void(0)" data-id="' . $row['id'] . '" class="edit btn btn-success btn-sm text-center">View</a>';

        return $btn;
    })
    ->rawColumns(['action'])
    ->make(true);
Create Template To Show DataTable
Create a fie student.blade.php inside /resources/views folder.
Open student.blade.php and write this content into it.
<!DOCTYPE html>
<html>

<head>
    <title>How to Use Yajra Datatables in Laravel 10</title>
    <meta name="csrf-token" content="{{ csrf_token() }}">
    <link href="https://cdnjs.cloudflare.com/ajax/libs/twitter-bootstrap/5.0.1/css/bootstrap.min.css" rel="stylesheet">
    <link href="https://cdn.datatables.net/1.11.4/css/dataTables.bootstrap5.min.css" rel="stylesheet">
</head>

<body>

    <div class="container">
        <h3 class="text-center mt-3 mb-4">How to Use Yajra Datatables in Laravel 10</h3>
        <table class="table table-bordered data-table">
            <thead>
                <tr>
                    <th>No</th>
                    <th>Name</th>
                    <th>Email</th>
                    <th>Mobile</th>
                    <th>Gender</th>
                    <th width="100px" class="text-center">Action</th>
                </tr>
            </thead>
            <tbody>
            </tbody>
        </table>
    </div>

</body>

<script src="https://code.jquery.com/jquery-3.5.1.js"></script>
<script src="https://cdn.datatables.net/1.11.4/js/jquery.dataTables.min.js"></script>
<script src="https://cdn.datatables.net/1.11.4/js/dataTables.bootstrap5.min.js"></script>

<script type="text/javascript">
    $(function() {

        var table = $('.data-table').DataTable({
            processing: true,
            serverSide: true,
            ajax: "{{ route('students.index') }}",
            columns: [{
                    data: 'id',
                    name: 'id'
                },
                {
                    data: 'name',
                    name: 'name'
                },
                {
                    data: 'email',
                    name: 'email'
                },
                {
                    data: 'mobile',
                    name: 'mobile'
                },
                {
                    data: 'gender',
                    name: 'gender'
                },
                {
                    data: 'action',
                    name: 'action',
                    orderable: false,
                    searchable: false
                },
            ]
        });

    });

</script>

</html>
Add Route
Open web.php file from /routes folder. Add this route into it.
//...

use App\Http\Controllers\StudentController;

//...

Route::get('students', [StudentController::class, 'index'])->name('students.index');
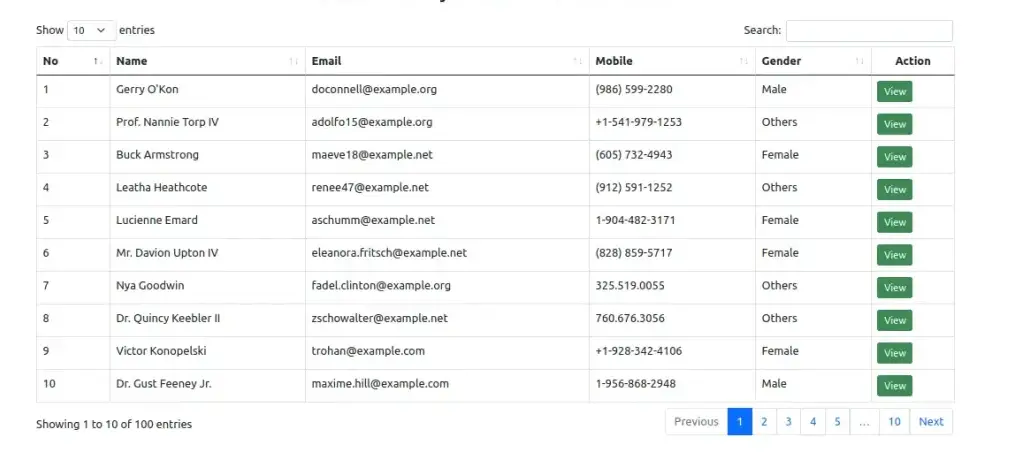
Application Testing
Run this command into project terminal to start development server,
php artisan serveURL: http://127.0.0.1:8000/students
We hope this article helped you to learn about Laravel 10 YajraBox Server Side Datatable Tutorial in a very detailed way.
Read More: Laravel 10 Generate PDF and Attach To GMail Email Tutorial
If you liked this article, then please subscribe to our YouTube Channel for PHP & it’s framework, WordPress, Node Js video tutorials. You can also find us on Twitter and Facebook.
Read more