Laravel artisan provides a command palette to operate with laravel application. It is a command line tool which gives application access by means of commands. We can create like controllers, components, models, migrations etc.
In case if we need some custom command in artisan command list. This tutorial will be the perfect guide to create artisan command.
Inside this article we will see step by step guide to laravel 9 create custom artisan command. We will have only few simple steps to do this.
Learn More –
- How To Change Email Subject in Laravel 9 Tutorial
- How to Check If a File Exists in Laravel 9 Tutorial
- How to Generate Unique Slug in Laravel 9 Tutorial
- How To Get HTTP Hostname In Laravel 9 Tutorial
Let’s get started.
Laravel Installation
Open terminal and run this command to create a laravel project.
composer create-project laravel/laravel myblogIt will create a project folder with name myblog inside your local system.
To start the development server of laravel –
php artisan serveURL: http://127.0.0.1:8000
Assuming laravel already installed inside your system.
Laravel Artisan Command Panel
Open project into terminal and type this artisan command to see all available commands.
$ php artisanThis command will list all available commands in artisan panel.
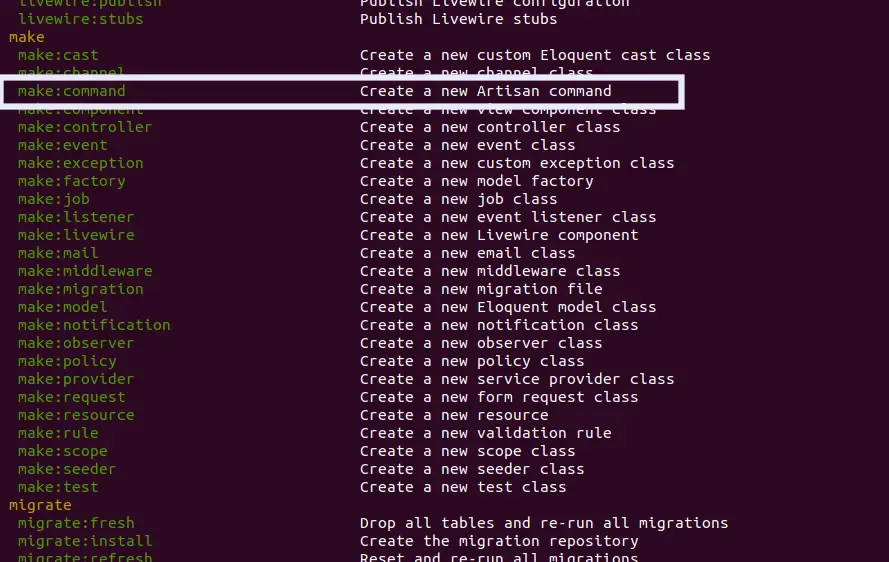
Inside this list we should see a command called make:command. Have a look into this image.

make:command is used to create artisan command.
When we create custom artisan command, then command files will be stored inside /app/Console/Commands folder.
Initially, Commands folder will not be inside folder structure. But when we create command files, it will create that.
Command #1 – Create Basic Artisan Command
We will create a simple basic command which asks for user information and simply displays all information into console.
Run this command to create command file.
$ php artisan make:command UserInfoCommand file UserInfo.php will be created inside /app/Console/Commands folder.
Open UserInfo.php and write this code into it.
<?php

namespace App\Console\Commands;

use Illuminate\Console\Command;

class UserInfo extends Command
{
    /**
     * The name and signature of the console command.
     *
     * @var string
     */
    protected $signature = 'user:info';

    /**
     * The console command description.
     *
     * @var string
     */
    protected $description = 'This is the command asks for user information and display';

    /**
     * Execute the console command.
     *
     * @return int
     */
    public function handle()
    {
        $name = $this->ask('What is your name?');

        $email = $this->ask('What is your email address?');

        $this->info('User Informations: Name - ' . $name . " and Email - " . $email);
    }
}
- $signature – It gives command syntax to artisan panel.
- $description – Description of command
- $this->info – It provides a information line at console
You will see your created custom command into artisan command’s list.

Usage of Command
Back to terminal and run this command
$ php artisan user:info
Command #2 – Use of Model into Command File
Suppose, you have users table in your database and also User.php as a model file for that.
Here,
We create a command which asks for user information, we fill the user info into terminal and then it will save to database table.
Custom Command For Create User
Back to terminal and run this spark command.
$ php artisan make:command UserCreateIt will create a file UserCreate.php into /app/Console/Commands folder.
Open UserCreate.php and write this command.
<?php

namespace App\Console\Commands;

use Illuminate\Console\Command;
use Illuminate\Support\Facades\Hash;
use App\Models\User;

class UserCreate extends Command
{
    /**
     * The name and signature of the console command.
     *
     * @var string
     */
    protected $signature = 'user:create';

    /**
     * The console command description.
     *
     * @var string
     */
    protected $description = 'This is the command asks for user information and create into database';

    /**
     * Execute the console command.
     *
     * @return int
     */
    public function handle()
    {
        $input['name'] = $this->ask('What is your name?');

        $input['email'] = $this->ask('What is your email address?');

        $input['password'] = $this->ask('Provide your secret password?');

        $input['password'] = Hash::make($input['password']);

        User::create($input);

        $this->info("User created successfully");
    }
}
Usage of Command
Back to terminal and run this command
$ php artisan user:createThis command will asks for user information like name, email & password and then it will create user after that.

We hope this article helped you to learn about How To Laravel 9 Create Custom Artisan Command Tutorial in a very detailed way.
If you liked this article, then please subscribe to our YouTube Channel for PHP & it’s framework, WordPress, Node Js video tutorials. You can also find us on Twitter and Facebook.
Read more