Inside this article we will see the concept i.e Laravel 9 How To Redirect with Flashdata Example Tutorial. Article contains the classified information about Laravel 9 Redirection with flash data.
If you are looking for a solution i.e How to pass flash session data with redirect in laravel then this article will help you a lot for this. Tutorial is super easy to understand and implement it in your code as well.
Sometimes we need to get the flash message with redirection which is a type of some error, some information, etc, so this article will help to get that concept.
Read More: Laravel 9 Redirection with Form Inputs Example Tutorial
Let’s get started.
Laravel Installation
Open terminal and run this command to create a laravel project.
composer create-project laravel/laravel myblogIt will create a project folder with name myblog inside your local system.
To start the development server of laravel –
php artisan serveURL: http://127.0.0.1:8000
Assuming laravel already installed inside your system.
Create Controller
Back to project terminal and run this command to create a controller file.
$ php artisan make:controller BlogControllerAbove command will create a file i.e BlogController.php inside /app/Http/Controllers folder.
<?php

namespace App\Http\Controllers;

use Illuminate\Http\Request;

class BlogController extends Controller
{
    public function index()
    {
        return view('blog-form');
    }

    public function submitData(Request $request)
    {
        // $validatedData = $request->validate([
        //     'title' => 'required',
        //     'description' => 'required',
        //     'author_name' => 'required'
        // ]);

        //.. Also you can add code to save data into database

        return redirect('form')->with('success', 'Data saved successfully!');
    }
}
Concept
Redirect to route with form inputs
return redirect('form')->with('success', 'Data saved successfully!');Read More: CodeIgniter 4 Redirection with Form Inputs Example Tutorial
Alternative,
return back()->with('success','Data saved successfully!');Create Blade Template File
Create a file blog-form.blade.php inside /resources/views folder.
Open view file and write this code into it.
<html lang="en">

<head>
    <link href="https://maxcdn.bootstrapcdn.com/bootstrap/4.0.0-beta/css/bootstrap.min.css" rel="stylesheet">
</head>

<body>
    <div class="container" style="margin-top: 20px;">
        <div class="row">
            <div class="col-md-12">
                @if (Session::has('success'))
                    <div class="alert alert-success">
                        {{ Session::get('success') }}
                        @php
                            Session::forget('success');
                        @endphp
                    </div>
                @endif
                <h4 class="text-center">Laravel 9 How To Redirect with Flashdata Example Tutorial</h4><br>

                <form method="post" action="{{ route('blog.submit') }}" class="form form-horizontal">
                    @csrf
                    <div class="form-group">
                        <label>Title</label>
                        <input type="text" name="title" class="form-control"/>
                    </div>
                    <div class="form-group">
                        <label>Description</label>
                        <textarea class="form-control" id="description-ckeditor" name="description"></textarea>
                    </div>
                    <div>
                        <label>Author Name</label>
                        <input type="text" name="author_name" class="form-control"/>
                    </div>
                    <br>
                    <div class="form-group">
                        <input type="submit" value="Submit" class="btn btn-primary" />
                    </div>
                </form>
            </div>
        </div>
    </div>
    <script src="https://code.jquery.com/jquery-3.2.1.min.js"></script>
    <script src="https://cdn.ckeditor.com/4.15.1/standard/ckeditor.js"></script>
    <script>
        CKEDITOR.replace('description-ckeditor');

    </script>
</body>

</html>
Concept
@if (Session::has('success'))
    <div class="alert alert-success">
        {{ Session::get('success') }}
        @php
            Session::forget('success');
        @endphp
    </div>
@endif
Read More: CodeIgniter 4 How To Integrate Ckeditor Example Tutorial
Alternative,
The second way to get the session stored flash message.
@if (session('success'))
    <div class="alert alert-success">
        {{ session('success') }}
    </div>
@endif
Add Route
Open web.php from /routes folder. Add these routes into it.
//...

use App\Http\Controllers\BlogController;

Route::get('form', [BlogController::class, 'index']);
Route::post('submit', [BlogController::class, 'submitData'])->name("blog.submit");
//...
Application Testing
Run this command into project terminal to start development server,
php artisan serveURL: http://127.0.0.1:8000/form
Provide form inputs and submit
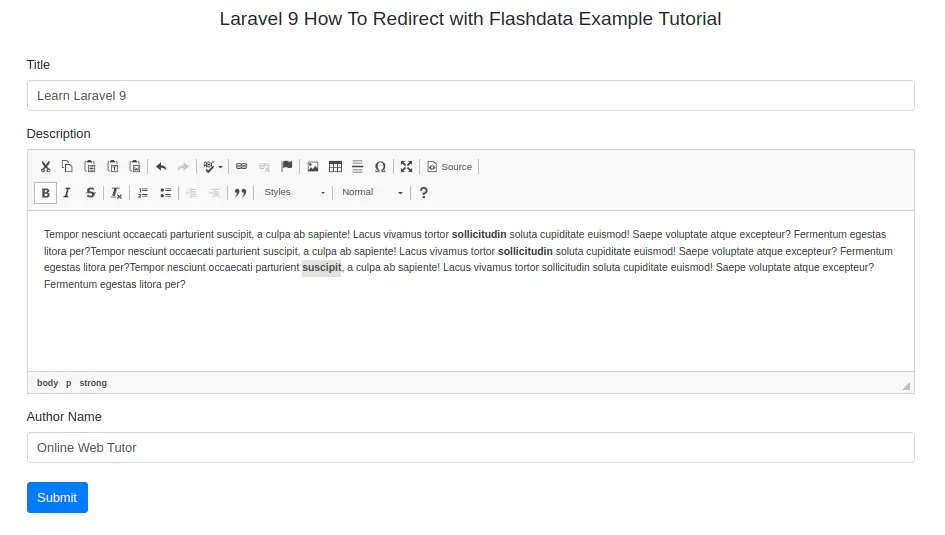
After successful form submission, you should see the flash message of it.

We hope this article helped you to learn Laravel 9 How To Redirect with Flashdata Example Tutorial in a very detailed way.
Read More: Laravel 9 How To Integrate Ckeditor Example Tutorial
If you liked this article, then please subscribe to our YouTube Channel for PHP & it’s framework, WordPress, Node Js video tutorials. You can also find us on Twitter and Facebook.