Inside this article we will see the concept i.e Laravel 9 How To Upload File with Progress Bar Tutorial. Article contains classified information about uploading files with jquery progress bar.
If you are looking for an article which gives you the understanding of uploading files in laravel 9 via showing progress bar then this article will help you a lot to do this. Upload files with progress is quite interesting topic as well as from user prospective it is a creative way to upload files.
Learn More –
- Laravel 9 Cookies – Get, Set, Delete Cookie Example Tutorial
- Laravel 9 Livewire Multi Step Form Wizard Tutorial
- Laravel 9 Work with Exception Handling Example Tutorial
- Laravel 9 How To Work With Livewire Pagination Example
Let’s get started.
Laravel Installation
Open terminal and run this command to create a laravel project.
composer create-project laravel/laravel myblogIt will create a project folder with name myblog inside your local system.
To start the development server of laravel –
php artisan serveURL: http://127.0.0.1:8000
Assuming laravel already installed inside your system.
Create Controller
Back to project terminal and run this command to create controller file.
$ php artisan make:controller FileControllerIt will create FileController.php file inside /app/Http/Controllers folder.
<?php

namespace App\Http\Controllers;

use Illuminate\Http\Request;

class FileController extends Controller
{
    /**
     * Show the application dashboard.
     *
     * @return \Illuminate\Http\Response
     */
    public function index()
    {
        return view('fileUpload');
    }

    /**
     * Show the application dashboard.
     *
     * @return \Illuminate\Http\Response
     */
    public function store(Request $request)
    {
        $request->validate([
            'file' => 'required',
        ]);

        $fileName = time() . '.' . request()->file->getClientOriginalExtension();

        request()->file->move(public_path('files'), $fileName);

        return response()->json(['success' => 'You have successfully upload file.']);
    }
}
We are uploading file into /public/files folder.
request()->file->move(public_path('files'), $fileName);You can use the same concept to save data into database table.
Next,
We will create blade template file from where we will upload file.
Create Blade Template
Create fileUpload.blade.php file inside /resources/views folder. Open fileUpload.blade.php and write this complete code into it.
<!DOCTYPE html>
<html lang="{{ str_replace('_', '-', app()->getLocale()) }}">
<head>
    <meta charset="utf-8">
    <meta name="viewport" content="width=device-width, initial-scale=1">
    <title>Laravel 9 How To Upload File with Progress Bar Tutorial</title>
    <link href="https://cdn.jsdelivr.net/npm/bootstrap@5.0.1/dist/css/bootstrap.min.css" rel="stylesheet">
</head>
<body>
    <div class="container mt-5" style="max-width: 900px">

        <div class="alert alert-primary mb-4 text-center">
           <h4>Laravel 9 How To Upload File with Progress Bar Tutorial</h4>
        </div>
        <form id="fileUploadForm" method="POST" action="{{ route('file.upload') }}" enctype="multipart/form-data">
            @csrf
            <div class="form-group mb-3">
                <input name="file" type="file" class="form-control">
            </div>
            <div class="form-group">
                <div class="progress">
                    <div class="progress-bar progress-bar-striped progress-bar-animated bg-success" role="progressbar" aria-valuenow="0" aria-valuemin="0" aria-valuemax="100" style="width: 0%"></div>
                </div>
            </div>
            <div class="d-grid mt-4">
                <input type="submit" value="Submit" class="btn btn-primary">
            </div>
        </form>
    </div>
    <script src="https://ajax.googleapis.com/ajax/libs/jquery/3.3.1/jquery.min.js"></script>
    <script src="https://cdnjs.cloudflare.com/ajax/libs/jquery.form/4.3.0/jquery.form.min.js"></script>
    <script>
        $(function () {
            $(document).ready(function () {
                $('#fileUploadForm').ajaxForm({
                    beforeSend: function () {
                        var percentage = '0';
                    },
                    uploadProgress: function (event, position, total, percentComplete) {
                        var percentage = percentComplete;
                        $('.progress .progress-bar').css("width", percentage+'%', function() {
                          return $(this).attr("aria-valuenow", percentage) + "%";
                        })
                    },
                    complete: function (xhr) {
                        console.log('File has uploaded');
                    }
                });
            });
        });
    </script>
</body>
</html>
Concept
Here, It is the jquery concept that we used to show progress bar when file uploads.
$('#fileUploadForm').ajaxForm({
    beforeSend: function () {
        var percentage = '0';
    },
    uploadProgress: function (event, position, total, percentComplete) {
        var percentage = percentComplete;
        $('.progress .progress-bar').css("width", percentage+'%', function() {
          return $(this).attr("aria-valuenow", percentage) + "%";
        })
    },
    complete: function (xhr) {
        console.log('File has uploaded');
    }
});
Add Route
Open web.php file from /routes folder. Add this given route into it.
//...

use App\Http\Controllers\FileController;

Route::controller(FileController::class)->group(function(){
    Route::get('file-upload', 'index');
    Route::post('file-upload', 'store')->name('file.upload');
});
Application Testing
Run this command into project terminal to start development server,
php artisan serveURL: http://127.0.0.1:8000/file-upload
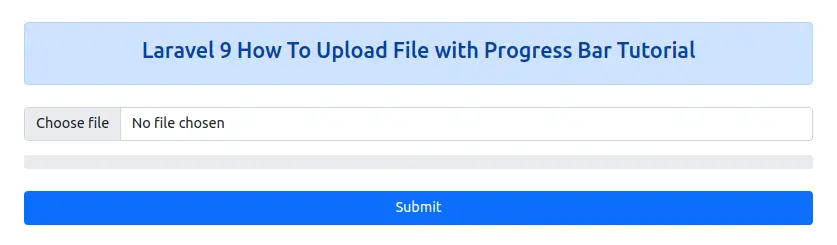
It will show the upload form
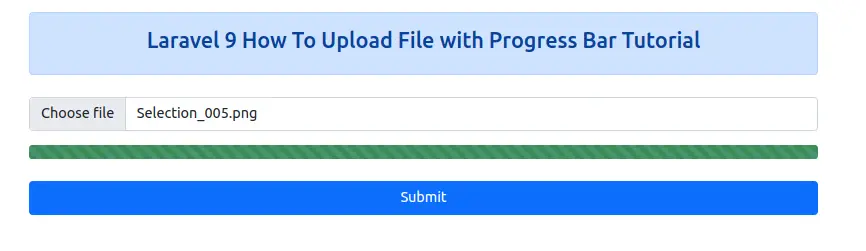
When you select & upload file
We hope this article helped you to learn about Laravel 9 How To Upload File with Progress Bar Tutorial in a very detailed way.
If you liked this article, then please subscribe to our YouTube Channel for PHP & it’s framework, WordPress, Node Js video tutorials. You can also find us on Twitter and Facebook.