
Creating secure and authenticated REST APIs is a must for modern online applications. The combination of Node.js, a configurable runtime environment, and the Express.js framework provides a good basis for developing RESTful APIs.
We will walk you through the process of creating REST APIs using JWT (JSON Web Token) authentication using Node.js and Express.js, allowing you to construct APIs that securely authenticate and authorise users.
By the end of this lesson, you’ll have the skills and expertise to build safe and authenticated REST APIs in Node.js and Express.js, ensuring that your APIs are both functional and secure.
Read More: Create HTTP Web Server in Node js Using Express js
Here, you will see the concept of these apis:
- Register User API
- User Login API
- Profile API
Let’s get started.
What is a Protected API in application?
An API (Application Programming Interface) that is protected in an application is one that is secured and requires authentication and authorisation techniques to access its resources.
Protected APIs are used to restrict access to specific application functionality or data, ensuring that only authorised users or applications may make requests and receive information.
Project Setup
To work and create REST APIs with JWT we will do a node setup from scratch. And here we will use these following packages,
- express
- mysql2
- sequelize
- body-parser
- nodemon
- jsonwebtoken
- bcrypt
Step #1
Create an application folder with any name say “project” in your local machine. Open project into terminal and run this command to create package.json file.
npm init -yAbove command will create package.json file with all default settings. This file is very important for any node application.
Next,
Step #2
You need to install the needed packages. Run this command to install all packages in one line,
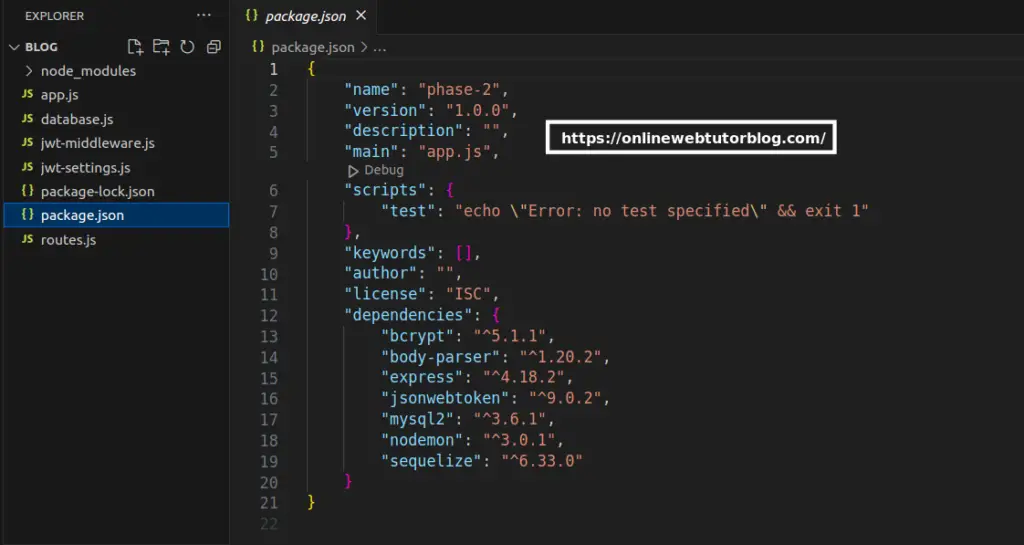
npm install express nodemon mysql2 sequelize body-parser jsonwebtoken bcryptOnce all packages will be installed, you will see into package.json file as:
"dependencies": {
    "bcrypt": "^5.1.1",
    "body-parser": "^1.20.2",
    "express": "^4.18.2",
    "jsonwebtoken": "^9.0.2",
    "mysql2": "^3.6.1",
    "nodemon": "^3.0.1",
    "sequelize": "^6.33.0"
}
Step #3
Create few more application files app.js, database.js, jwt-settings.js, jwt-middleware.js, and routes.js
Once you create this file then you need to update the “main” property of object of package.json file. Here, is the view of application setup:
Now, we’ll start APIs developemnt.
Node REST APIs with JWT: Database & Table Setup
Open PhpMyAdmin in your system. First create a database say “node_crud_apis“.
Read More: Building CRUD APIs with Node.js, Express, and Sequelize
Next,
Open database.js file and write this complete code into it,
const { Sequelize, DataTypes } = require("sequelize");
// Database object
const sequelizeDbObject = new Sequelize("node_phase2_apis", "yiron", "Yiron@123", {
host: "localhost",
dialect: "mysql"
});
// Database check
sequelizeDbObject.authenticate().then((response) => {
console.log("Database connected");
}).catch((error) => {
console.log("Failed to connect with database");
});
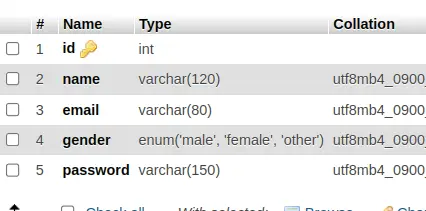
// Create "users" table
const userTable = sequelizeDbObject.define("users", {
name: {
type: DataTypes.STRING(120),
allowNull: false
},
email: {
type: DataTypes.STRING(80),
allowNull: false,
},
gender: {
type: DataTypes.ENUM("male", "female", "other"),
defaultValue: "male"
},
password: {
type: DataTypes.STRING(150),
allowNull: false
}
}, {
timestamps: false
});
// Sync tables and create in database
sequelizeDbObject.sync();
module.exports = {
"UserTable": userTable
};
Node REST APIs with JWT: Settings of Basic of JWT
It will contain the basic jwt settings like expiresIn, notBefore, etc.
Open jwt-settings.js file, write the following code into it.
module.exports = {
    audience: "appusers",
    issuer: "nodeapplication",
    expiresIn: "100000", // numeric value - it will be in seconds
    notBefore: "2000", // in "", '' it will be in milliseconds
    secretKey: "samplekeyfortoken"
};
What is Middleware in an Application?
Middleware is an important notion in online application development, especially in frameworks such as Express.js (Node.js) and Laravel (PHP).
It refers to a set of functions or handlers that are performed in a specified order throughout the processing of an HTTP request as it moves through the request-response cycle of the application. Middleware functions can execute activities such as authentication, authorisation, logging, data translation, and error handling since they have access to the request and response objects.
Node REST APIs with JWT: Setup JWT Middleware
Here, middleware is the barrier which filters HTTP request before processing any protected API route. If request contains an authroization header with a Valid token value then protected APIs will be processed.
Open jwt-middleware.js file, write the following code into it.
const JWT = require("jsonwebtoken");
const jwtSettings = require("./jwt-settings");

let checkToken = (req, res, next) => {

    let isToken = req.header("authorization");

    if (isToken) {

        JWT.verify(isToken, jwtSettings.secretKey, (error, data) => {

            if (error) {
                res.json({
                    status: false,
                    message: error
                });
            } else {

                // valid token value
                req.data = data;

                next(); // This next method will be the route where using this middleware
            }
        });
    } else {

        res.json({
            status: false,
            message: "Please pass authorization header token"
        });
    }
};

module.exports = {
    "checkToken": checkToken
}
Node REST APIs with JWT: APIs Routes Setup
Here, you will setup apis routes for register, login, and profile.
Open routes.js and write this complete code into it,
const express = require("express");
const { UserTable } = require("./database");
const bcrypt = require("bcrypt");
const JWT = require("jsonwebtoken");

// Custom modules
const jwtConfig = require("./jwt-settings");
const jwtMiddleware = require("./jwt-middleware");

const router = express.Router();

// Register User
router.post("/register", (req, res) => {

    // email check
    UserTable.findOne({
        where: {
            email: req.body.email
        }
    }).then((user) => {

        if (user) {

            // user exists
            res.json({
                status: false,
                message: "User already exists with this email"
            });
        } else {

            // name, email, gender, password
            UserTable.create({
                name: req.body.name,
                email: req.body.email,
                gender: req.body.gender,
                password: bcrypt.hashSync(req.body.password, 10)
            }).then((response) => {

                res.json({
                    stauts: true,
                    message: "User registered successfully"
                });
            }).catch((error) => {

                res.json({
                    status: false,
                    message: "Failed to execute insert query"
                })
            });
        }
    }).catch((error) => {

        console.log(error);
    });
});

// User login
router.post("/login", (req, res) => {

    UserTable.findOne({
        where: {
            email: req.body.email
        }
    }).then((user) => {

        if (user) {

            if (bcrypt.compareSync(req.body.password, user.password)) {

                // Password also matches
                let userToken = JWT.sign({
                    id: user.id,
                    email: user.email
                }, jwtConfig.secretKey, {
                    audience: jwtConfig.audience,
                    issuer: jwtConfig.issuer,
                    expiresIn: jwtConfig.expiresIn,
                    notBefore: jwtConfig.notBefore
                });

                res.json({
                    status: true,
                    message: "User logged in",
                    token: userToken
                });
            } else {

                res.json({
                    status: false,
                    message: "Password didn't match"
                });
            }
        } else {

            res.json({
                status: false,
                message: "User doesn't exists with this email"
            });
        }
    }).catch((error) => {

        res.json({
            status: false,
            message: "Failed to execute select query"
        });
    });
});

// Profile API
router.get("/profile", jwtMiddleware.checkToken, (req, res) => {

    res.json({
        status: true,
        message: "Profile data",
        user: req.data
    })
});

// Welcome page route
router.get("/", (req, res) => {

    res.json({
        status: true,
        message: "Welcome to Landing page of REST API development with JWT"
    })
});

module.exports = router;
Read More: How To Read and Write Json File in Node Js Tutorial
Node REST APIs with JWT: Main Application File Settings
Here, you will see the main entry of file is app.js.
Open app.js and write this complete code into it,
const express = require("express");
const bodyParser = require("body-parser");

const appRoutes = require("./routes");

const app = express();
const PORT = 8087;

app.use(bodyParser.json());

app.use("/", appRoutes);

// Listen application requests
app.listen(PORT, () => {

    console.log("Application started");
});
Application Testing
Open project terminal and run this command,
npx nodemonIt will start development server.
Once you server will start. You will see your table called “users” automatically created inside database.
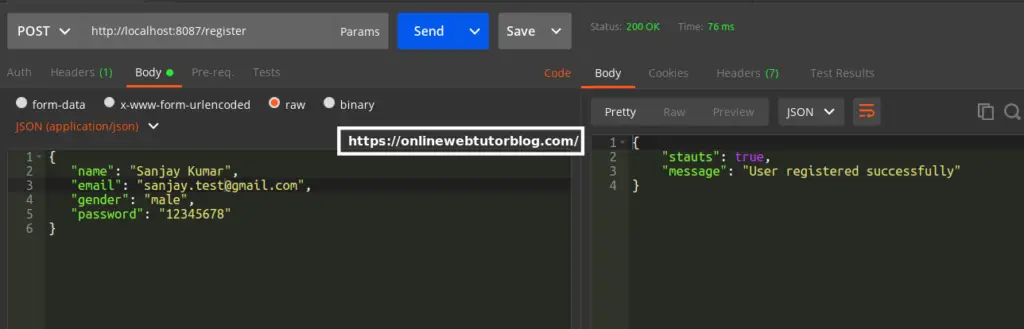
User Register API
URL – http://localhost:8087/register
Method – POST
Header –
Content-Type:application/jsonForm data –
{
   "name": "Sanjay Kumar",
   "email": "sanjay.test@gmail.com",
   "gender": "male",
   "password": "12345678"
}
Screenshot –
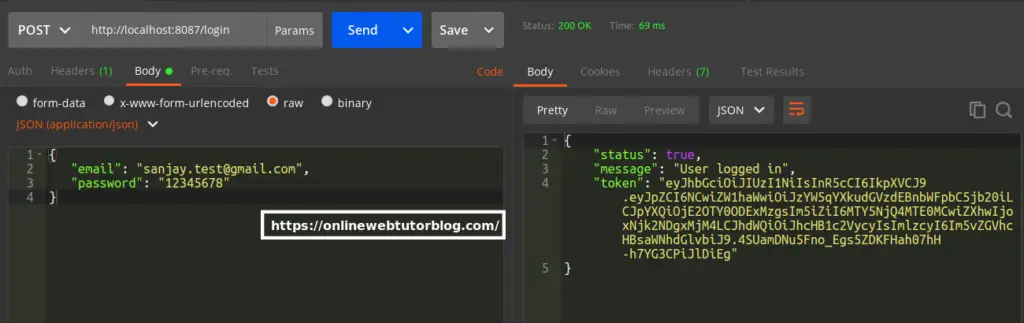
User Login API
URL – http://localhost:8087/login
Method – POST
Header –
Content-Type:application/jsonForm data –
{
   "email": "sanjay.test@gmail.com",
   "password": "12345678"
}
Screenshot –
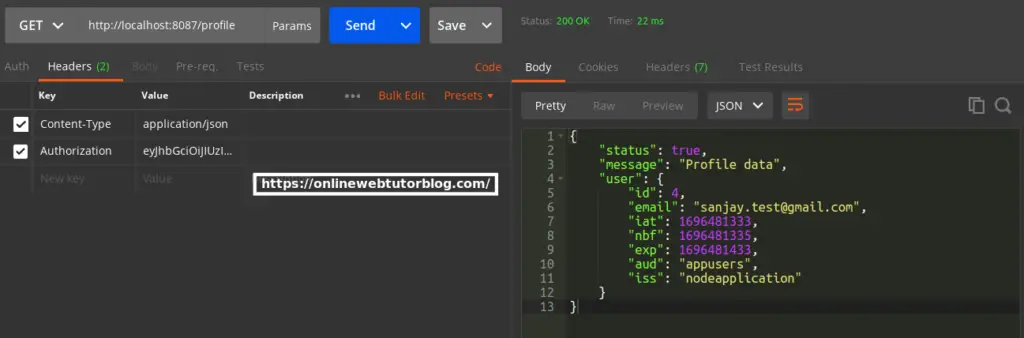
User Profile API
URL – http://localhost:8087/profile
Method – GET
Header –
Content-Type:application/json

Authorization: xxx.yyy.zzz
<strong>xxx.yyy.zzz</strong> is the jwt token value generated in login api.
Screenshot –
That’s it.
We hope this article helped you to learn about Nodejs Express REST APIs with JWT Authentication Tutorial in a very detailed way.
If you liked this article, then please subscribe to our YouTube Channel for PHP & it’s framework, WordPress, Node Js video tutorials. You can also find us on Twitter and Facebook.
Read more