Resizing Images before upload is a very primary topic but in this topic many developers get stuck. When we upload image it will be of any size but we need to resize it first before upload.
In this article, we will see the entire concept of laravel 8 to generate thumbnail images without using any jquery plugin or doing some extra effort to resize and upload images in the laravel 8 project.
This article is totally from scratch. All steps will be super easy to understand. We will upload an image, resize, upload to server and then save to database table.
We have other articles on images as –
- Add Watermark Text on image, Click here to learn.
Let’s see the topic Resize Images in Laravel 8 before uploading to server.
Let’s get started.
Laravel Installation
We will create laravel project using composer. So, please make sure your system should have composer installed. If not, may be this article will help you to Install composer in system.
Here is the command to create a laravel project-
composer create-project --prefer-dist laravel/laravel blog
To start the development server of Laravel –
php artisan serve
URL: http://127.0.0.1:8000
Assuming laravel already installed inside your system.
Create Database & Connect
To create a database, either we can create via Manual tool of PhpMyadmin or by means of a mysql command.
CREATE DATABASE laravel_app;
To connect database with application, Open .env file from application root. Search for DB_ and update your details.
DB_CONNECTION=mysql
DB_HOST=127.0.0.1
DB_PORT=3306
DB_DATABASE=laravel_app
DB_USERNAME=root
DB_PASSWORD=root
Install Intervention Image Package
Open project into terminal and run this given composer command. It will install the intervention image library to application.
This package helps us to create image thumbnails, watermarks, or format large image files.
$ composer require intervention/image
While working with image related stuff in PHP, make sure your PHP version should have these two most common image processing libraries GD Library and Imagick extensions enabled.
Whether your system already contains these extensions or not you can verify like this –
- Create info.php file at your localhost directory
- <?php phpinfo(); ?> Add this code into info.php file.
- Run this file into browser
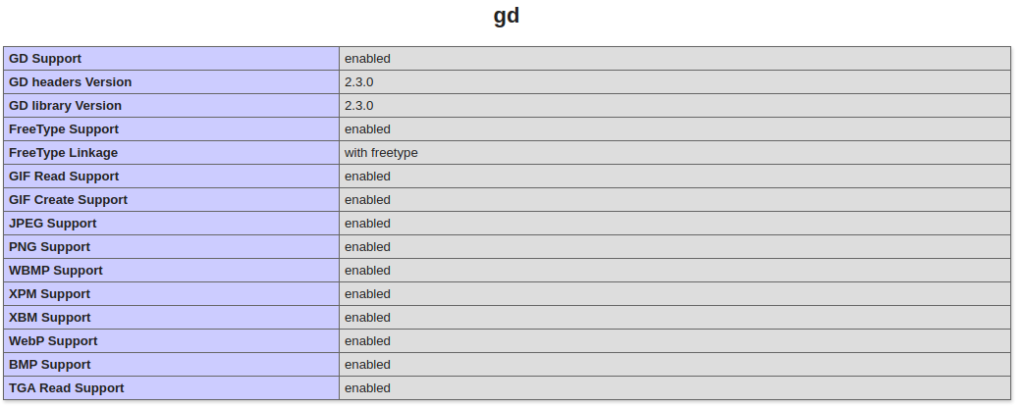
You should see these information into php information page.
GD Extension Enabled
Imagick Extension Enabled
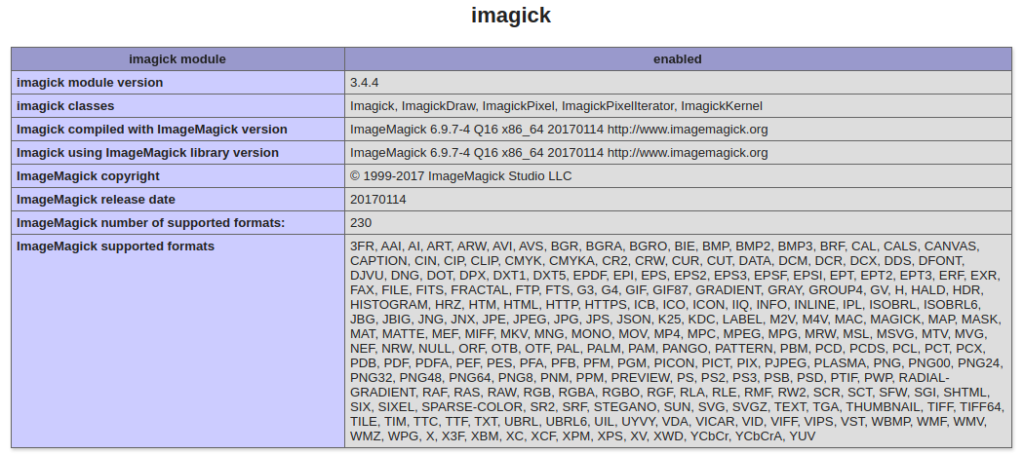
So, these two extensions we need, if you don’t have. Please install it first.
Add Package Settings to Application
Open app.php file from /config folder.
Search for providers, add this line into array.
//...

Intervention\Image\ImageServiceProvider::class
Search for aliases, add this line into array.
//...

'Image' => Intervention\Image\Facades\Image::class
Create Model & Migration
Open project into terminal and run this command to create migration file.
$ php artisan make:model Product -m
It will create two files –
- Model – Product.php at /app/Models folder
- Migration file – 2021_05_04_145928_create_products_table.php at /database/migrations folder.
Open Migration file and write this complete code into it.
<?php

use Illuminate\Database\Migrations\Migration;
use Illuminate\Database\Schema\Blueprint;
use Illuminate\Support\Facades\Schema;

class CreateProductsTable extends Migration
{
    /**
     * Run the migrations.
     *
     * @return void
     */
    public function up()
    {
        Schema::create('products', function (Blueprint $table) {
            $table->id();
            $table->string("name", 120);
            $table->text("description");
            $table->string("image");
            $table->string("thumbnail");
            $table->integer("cost");
        });
    }

    /**
     * Reverse the migrations.
     *
     * @return void
     */
    public function down()
    {
        Schema::dropIfExists('products');
    }
}
Open model file Product.php and write this complete code into it.
<?php

namespace App\Models;

use Illuminate\Database\Eloquent\Factories\HasFactory;
use Illuminate\Database\Eloquent\Model;

class Product extends Model
{
    use HasFactory;

    public $timestamps = false;

    protected $fillable = array('name', 'description', 'image', 'thumbnail', 'cost');
}
Run Migration
Next, we need to create tables inside database.
$ php artisan migrate
This command will create tables inside database.
Create Controller
Next, we need to create a controller file.
$ php artisan make:controller ProductController
It will create a file ProductController.php at /app/Http/Controllers folder.
Open ProductController.php and write this complete code into it.
<?php

namespace App\Http\Controllers;

use Illuminate\Http\Request;
use App\Http\Requests;
use Image;
use App\Models\Product;

class ProductController extends Controller
{
    /**
     * Layout view.
     */
    public function index()
    {
        return view('product-upload');
    }

    /**
     * Image resize & Save - Function
     */
    public function imgResize(Request $request)
    {
        $this->validate($request, [
            'name' => 'required',
            'description' => 'required',
            'image' => 'required|image|mimes:jpg,jpeg,png,svg,gif|max:2048',
            'cost' => 'required',
        ]);

        $image = $request->file('image');
        $input['product_image'] = time() . '.' . $image->extension();

        // Get path of thumbnails folder from /public
        $thumbnailFilePath = public_path('thumbnails');

        $img = Image::make($image->path());

        // Image resize to given aspect dimensions
        // Save this thumbnail image to /public/thumbnails folder
        $img->resize(110, 110, function ($const) {
            $const->aspectRatio();
        })->save($thumbnailFilePath . '/' . $input['product_image']);

        // Product images folder
        $ImageFilePath = public_path('images');

        // Store product original images
        $image->move($ImageFilePath, $input['product_image']);

        $product = new Product();

        $product->name = $request->name;
        $product->description = $request->description;
        $product->image = "/public/images/" . $input['product_image'];
        $product->thumbnail = "/public/thumbnails/" . $input['product_image'];
        $product->cost = $request->cost;

        $product->save();

        return back()
            ->with('success', 'Product uploaded');
    }
}- When we upload image, image resize code will convert image into it’s thumbnail as well.
- So we will get two different images. Original image inside /images folder and thumbnail image inside /thumbnails folder.
Create Blade Layout File
Go to /resources/views folder and create a file with name product-upload.blade.php
Open product-upload.blade.php and write this complete code into it.
<!DOCTYPE html>
<html lang="en">

<head>
    <title>Resize Images in Laravel 8 Before Uploading to Server</title>
    <meta charset="utf-8">
    <meta name="viewport" content="width=device-width, initial-scale=1">
    <link rel="stylesheet" href="https://maxcdn.bootstrapcdn.com/bootstrap/3.4.1/css/bootstrap.min.css">
    <script src="https://ajax.googleapis.com/ajax/libs/jquery/3.5.1/jquery.min.js"></script>
    <script src="https://maxcdn.bootstrapcdn.com/bootstrap/3.4.1/js/bootstrap.min.js"></script>
</head>

<body>

    <div class="container">
        <h2 style="text-align: center;">Resize Images in Laravel 8 Before Uploading to Server</h2>
        <div class="panel panel-primary">
            <div class="panel-heading">Resize Images in Laravel 8 Before Uploading to Server</div>
            <div class="panel-body">
                @if (count($errors) > 0)
                <div class="alert alert-danger">
                    Error occured.<br><br>
                    <ul>
                        @foreach ($errors->all() as $error)
                        <li>{{ $error }}</li>
                        @endforeach
                    </ul>
                </div>
                @endif

                @if ($message = Session::get('success'))
                <div class="alert alert-success">
                    <strong>{{ $message }}</strong>
                </div>
                @endif

                <form action="{{ route('img-resize') }}" enctype="multipart/form-data" method="post">
                    @csrf
                    <div class="form-group">
                        <input type="text" name="name" class="form-control" placeholder="Name">
                    </div>
                    <div class="form-group">
                        <textarea name="description" class="form-control" placeholder="Description"></textarea>
                    </div>
                    <div class="form-group">
                        <input type="file" name="image" class="form-control" class="image">
                    </div>
                    <div class="form-group">
                        <input type="number" min="0" name="cost" class="form-control" placeholder="Cost">
                    </div>
                    <div class="form-group">
                        <button type="submit" class="btn btn-success">Save</button>
                    </div>
                </form>
            </div>
        </div>
    </div>

</body>

</html>
Create Images Folders
We need to create two folders inside /public folder which is at root.
- images folder inside as /public/images – It will store original images
- thumbnails inside as /public/thumbnails – It will store thumbnail images.
Create Route
Open web.php from /routes folder and add this route into it.
# Add this to header
use App\Http\Controllers\ProductController;

//...

Route::get('product-upload', [ProductController::class, 'index']);
Route::post('submit-product', [ProductController::class, 'imgResize'])->name('img-resize');
Application Testing
Run this command into project terminal to start development server,
php artisan serveURL: http://127.0.0.1:8000/product-upload
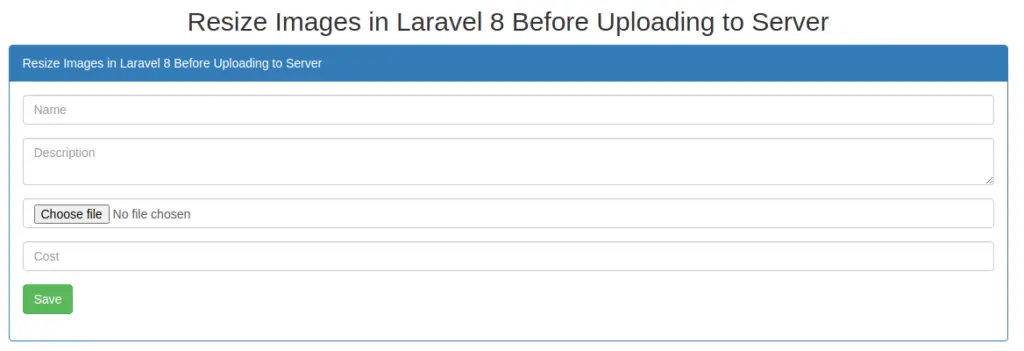
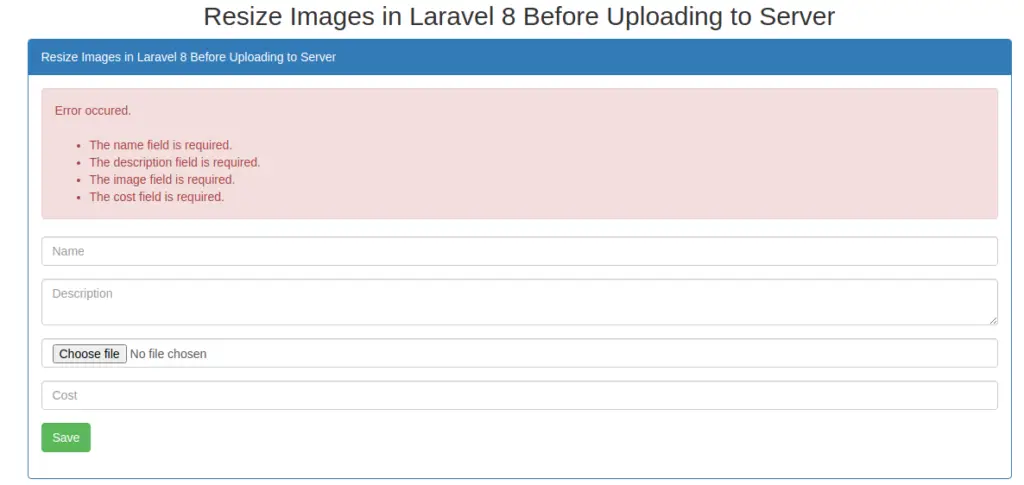
Form submit with no data in inputs fields.
After data save to database table

We hope this article helped you to learn Resize Images in Laravel 8 Before Uploading to Server Tutorial in a very detailed way.
If you liked this article, then please subscribe to our YouTube Channel for PHP & it’s framework, WordPress, Node Js video tutorials. You can also find us on Twitter and Facebook.
Read more