
Inside this article we will one more important concept of laravel i.e REST api development in laravel 8 with JWT authentication. This will be step by step guide to create restful services from scratch.
We will create a secure set of rest apis using laravel. JWT is a laravel composer package.
What we will do in this article –
- User Register API
- Login API
- User Profile API
- Refresh Token API
- Logout API
Above are the apis, we will create using json web token (jwt) authentication. This will be very interesting to learn.
- To Learn API development in Laravel 8 Using Passport, Click here.
- REST APIs in Laravel 8 Using Sanctum Authentication, Click here.
Let’s get started.
Laravel Installation
We will create laravel project using composer. So, please make sure your system should have composer installed. If not, may be this article will help you to Install composer in system.
Here is the command to create a laravel project-
composer create-project --prefer-dist laravel/laravel blog
To start the development server of Laravel –
php artisan serve
URL: http://127.0.0.1:8000
Assuming laravel already installed inside your system.
Create Database & Connect
To create a database, either we can create via Manual tool of PhpMyadmin or by means of a mysql command.
CREATE DATABASE laravel_app;
To connect database with application, Open .env file from application root. Search for DB_ and update your details.
DB_CONNECTION=mysql
DB_HOST=127.0.0.1
DB_PORT=3306
DB_DATABASE=laravel_app
DB_USERNAME=root
DB_PASSWORD=root
Install And Configure Laravel JWT Auth
JSON Web Token (JWT) is an open standard (RFC 7519), and it represents a compact and self-contained method for securely transmitting information between parties as a JSON object.
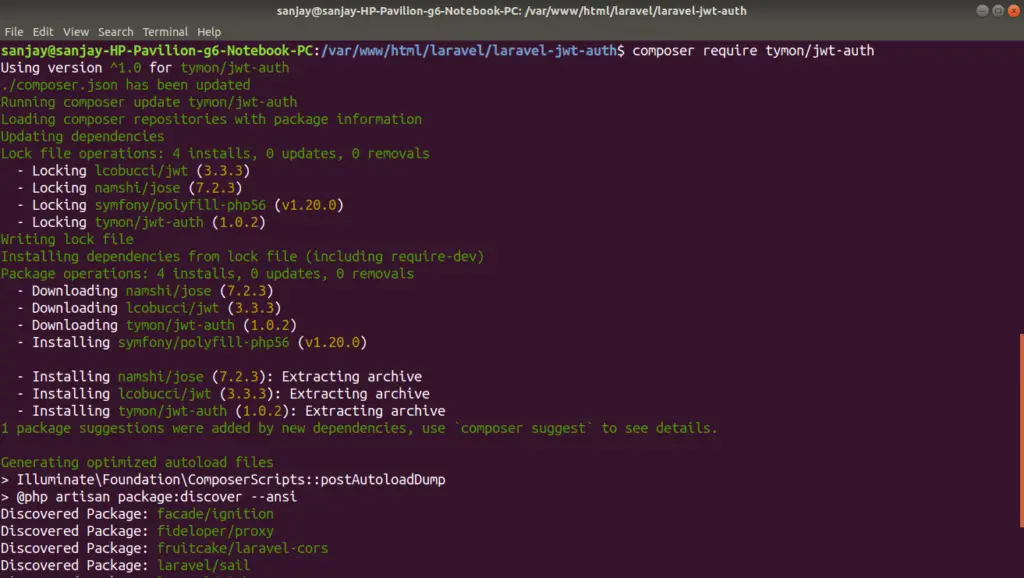
Open project into terminal and run this command.
$ <code>composer require tymon/jwt-auth
Next, we need to migrate file.
$ php artisan migrate
Update app.php File
Open app.php from /config folder.
Search for providers, add this line into array.
'providers' => [
   ...

    Tymon\JWTAuth\Providers\LaravelServiceProvider::class,

   ...
],
Search for aliases, add these lines into array.
'aliases' => [

    ...

    'JWTAuth' => Tymon\JWTAuth\Facades\JWTAuth::class,
   'JWTFactory' => Tymon\JWTAuth\Facades\JWTFactory::class,

    ...

],
Open project into terminal and run this command.
$ php artisan vendor:publish --provider="Tymon\JWTAuth\Providers\LaravelServiceProvider"
JWT Configuration
To generate secret key, back to terminal and run this command.
$ php artisan jwt:secret
When we run this command, it will generate secret key and add into .env file. It will be something like this –
JWT_SECRET=<JWT-SECRET-KEY>
Setup User Model
Open User.php from /app/Models and write this following code into it.
<?php

namespace App\Models;

use Illuminate\Contracts\Auth\MustVerifyEmail;
use Illuminate\Database\Eloquent\Factories\HasFactory;
use Illuminate\Foundation\Auth\User as Authenticatable;
use Illuminate\Notifications\Notifiable;

use Tymon\JWTAuth\Contracts\JWTSubject; // Add this line

class User extends Authenticatable implements JWTSubject // Added here
{
    use HasFactory, Notifiable;

    /**
     * The attributes that are mass assignable.
     *
     * @var array
     */
    protected $fillable = [
        'name',
        'email',
        'password',
    ];

    /**
     * The attributes that should be hidden for arrays.
     *
     * @var array
     */
    protected $hidden = [
        'password',
        'remember_token',
    ];

    /**
     * The attributes that should be cast to native types.
     *
     * @var array
     */
    protected $casts = [
        'email_verified_at' => 'datetime',
    ];

  	// Add this method
    public function getJWTIdentifier()
    {
        return $this->getKey();
    }

    // Add this method
    /**
     * Return a key value array, containing any custom claims to be added to the JWT.
     *
     * @return array
     */
    public function getJWTCustomClaims()
    {
        return [];
    }
}
Configure Auth guard
Open auth.php from /config folder. Update file according to this code.
//...

'defaults' => [
  'guard' => 'api', // update here
  'passwords' => 'users',
],


'guards' => [
  'web' => [
    'driver' => 'session',
    'provider' => 'users',
  ],

  'api' => [ // update here
    'driver' => 'jwt',
    'provider' => 'users',
    'hash' => false,
  ],
],

//...
Create Authentication Controller
Open project into terminal and run this artisan command.
$ php artisan make:controller AuthController
It will create a file AuthController.php at /app/Http/Controllers folder.
Open AuthController.php file and write this following code into it.
<?php

namespace App\Http\Controllers;

use Illuminate\Http\Request;

use App\Models\User;
use Illuminate\Support\Facades\Validator;

class AuthController extends Controller
{
    /**
     * Create a new AuthController instance.
     *
     * @return void
     */
    public function __construct()
    {
        $this->middleware('auth:api', ['except' => ['login', 'register']]);
    }

    /**
     * Get a JWT via given credentials.
     *
     * @return \Illuminate\Http\JsonResponse
     */
    public function login(Request $request)
    {
        $validator = Validator::make($request->all(), [
            'email' => 'required|email',
            'password' => 'required|string|min:6',
        ]);

        if ($validator->fails()) {
            return response()->json($validator->errors(), 422);
        }

        if (!$token = auth()->attempt($validator->validated())) {
            return response()->json(['error' => 'Unauthorized'], 401);
        }

        return $this->createNewToken($token);
    }

    /**
     * Register a User.
     *
     * @return \Illuminate\Http\JsonResponse
     */
    public function register(Request $request)
    {
        $validator = Validator::make($request->all(), [
            'name' => 'required|string|between:2,100',
            'email' => 'required|string|email|max:100|unique:users',
            'password' => 'required|string|confirmed|min:6',
        ]);

        if ($validator->fails()) {
            return response()->json(array(
                "status" => false,
                "errors" => $validator->errors()
            ), 400);
        }

        $user = User::create(array_merge(
            $validator->validated(),
            ['password' => bcrypt($request->password)]
        ));

        return response()->json([
            'status' => true,
            'message' => 'User successfully registered',
            'user' => $user
        ], 201);
    }


    /**
     * Log the user out (Invalidate the token).
     *
     * @return \Illuminate\Http\JsonResponse
     */
    public function logout()
    {
        auth()->logout();

        return response()->json(['message' => 'User successfully signed out']);
    }

    /**
     * Refresh a token.
     *
     * @return \Illuminate\Http\JsonResponse
     */
    public function refresh()
    {
        return $this->createNewToken(auth()->refresh());
    }

    /**
     * Get the authenticated User.
     *
     * @return \Illuminate\Http\JsonResponse
     */
    public function userProfile()
    {
        return response()->json(auth()->user());
    }

    /**
     * Get the token array structure.
     *
     * @param  string $token
     *
     * @return \Illuminate\Http\JsonResponse
     */
    protected function createNewToken($token)
    {
        return response()->json([
            'access_token' => $token,
            'token_type' => 'bearer',
            'expires_in' => auth()->factory()->getTTL() * 60,
            'user' => auth()->user()
        ]);
    }
}
Create Authentication Routes
Open api.php from /routes folder.
# Add to header
use App\Http\Controllers\AuthController;

Route::group([
    'middleware' => 'api',
    'prefix' => 'auth'

], function () {
    Route::post('login', [AuthController::class, 'login']);
    Route::post('register', [AuthController::class, 'register']);
    Route::post('logout', [AuthController::class, 'logout']);
    Route::post('refresh', [AuthController::class, 'refresh']);
    Route::get('user-profile', [AuthController::class, 'userProfile']);
});
Application Testing
Run this command into project terminal to start development server,
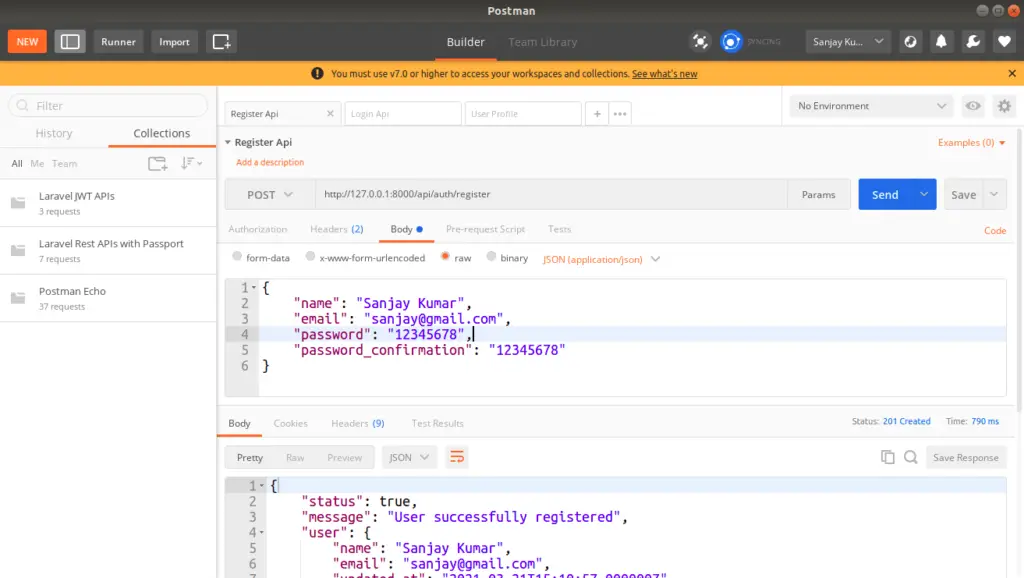
php artisan serveRegister API – http://127.0.0.1:8000/api/auth/register
Method – POST
Body
{
"name": "Sanjay Kumar",
"email": "sanjay@gmail.com",
"password": "12345678",
"password_confirmation": "12345678"
}
Header
Content-Type:application/json
Accept:application/json
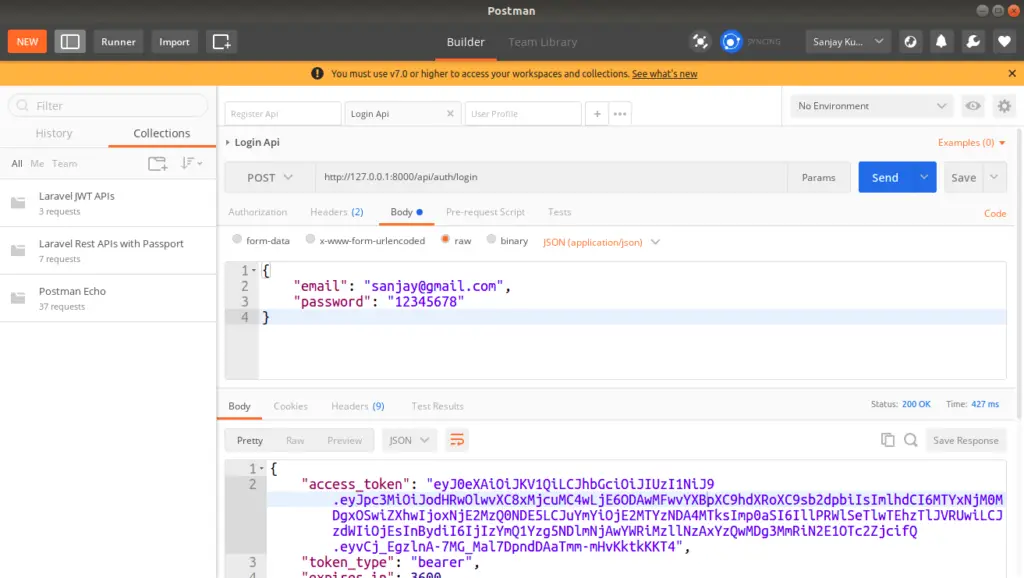
Login API – http://127.0.0.1:8000/api/auth/login
Method – POST
Body
{
"email": "sanjay@gmail.com",
"password": "12345678"
}
Header
Content-Type:application/json
Accept:application/json
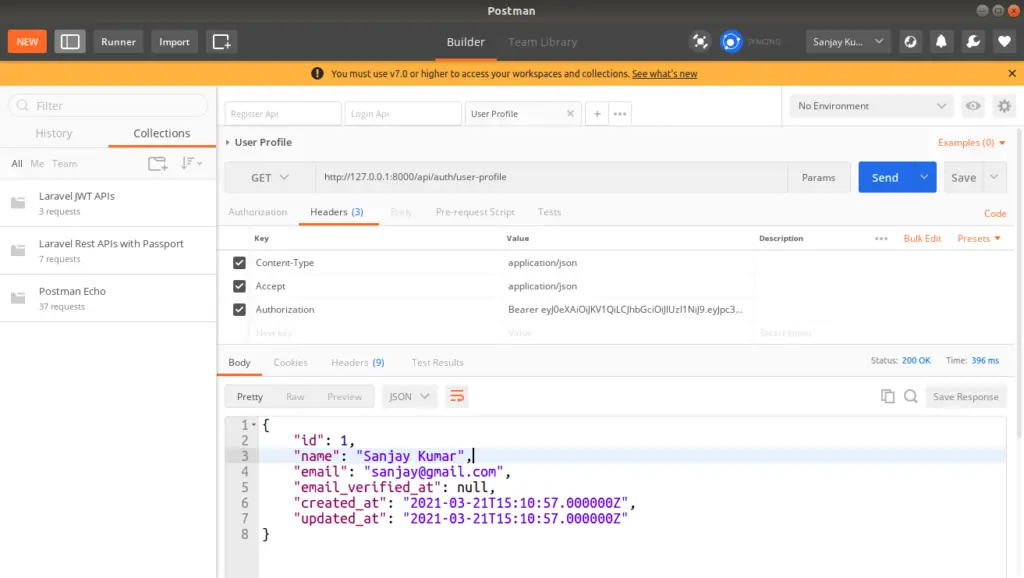
User Profile API – http://127.0.0.1:8000/api/auth/user-profile
Method – GET
Header
Content-Type:application/json
Accept:application/json
Authorization: Bearer <Token>
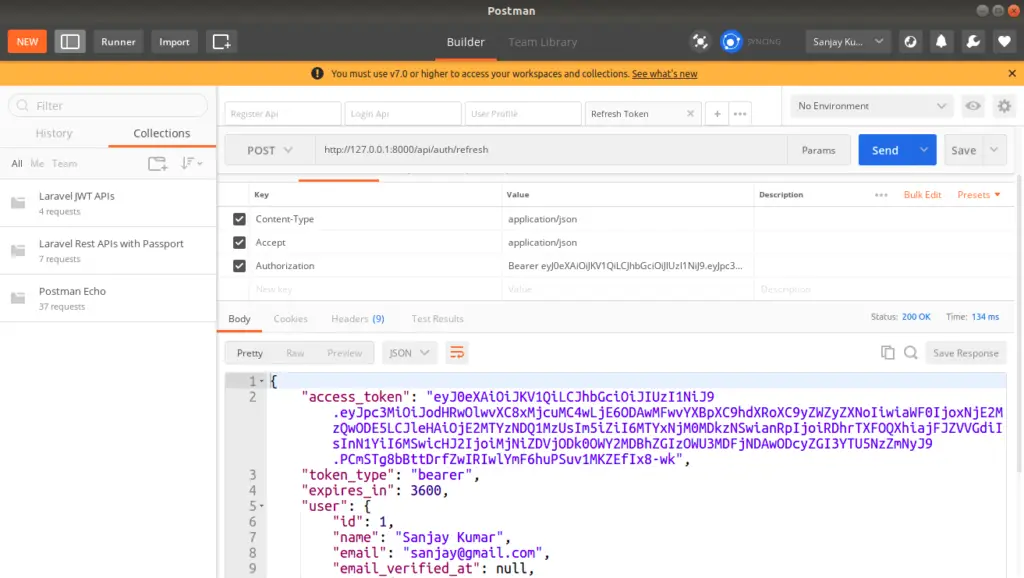
Refresh Token API – http://127.0.0.1:8000/api/auth/refresh
Method – POST
Header
Content-Type:application/json
Accept:application/json
Authorization: Bearer <Token>
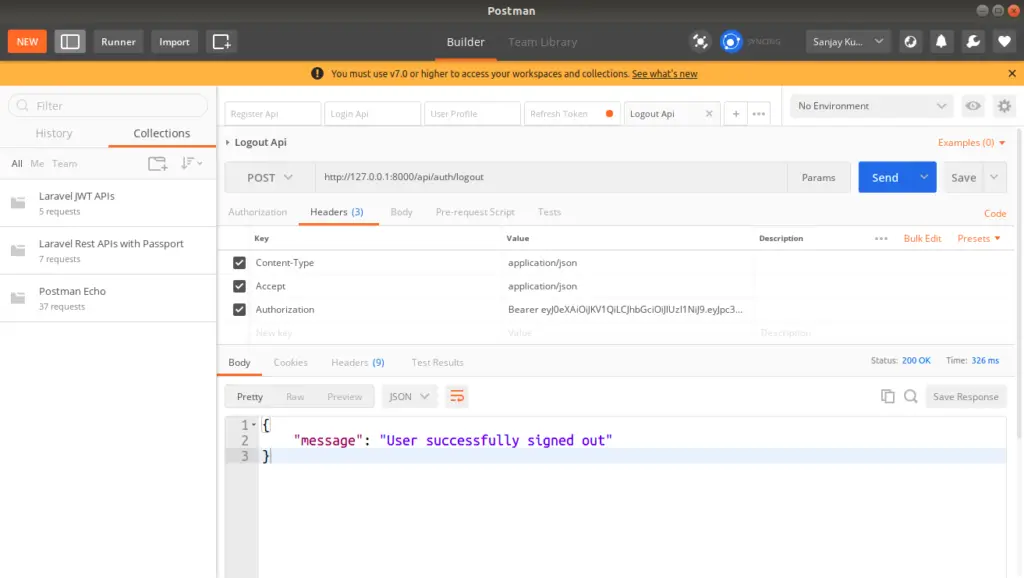
Logout API – http://127.0.0.1:8000/api/auth/logout
Method – POST
Header
Content-Type:application/json
Accept:application/json
Authorization: Bearer <Token>
We hope this article helped you to learn about REST Api Development in Laravel 8 with JWT authentication in a very detailed way.
If you liked this article, then please subscribe to our YouTube Channel for PHP & it’s framework, WordPress, Node Js video tutorials. You can also find us on Twitter and Facebook.
Read more
how to change an Unauthenticated message as a custom message?
{
“message”: “Unauthenticated.”
}