Enhancing user interaction with appealing and customizable alert messages is a valuable aspect of web application development. In Laravel 10, integrating SweetAlert, a sleek and customizable alert library, allows developers to create attractive and user-friendly message boxes effortlessly.
In this tutorial, we’ll see the comprehensive process of using SweetAlert message boxes in Laravel 10. This functionality empowers developers to replace standard browser alert dialogs with stylish and customizable alerts, enhancing the user experience within Laravel applications.
Read More: How To Read PDF File Contents in Laravel 10 Example
Let’s get started.
Laravel Installation
Open terminal and run this command to create a laravel project.
composer create-project laravel/laravel myblogIt will create a project folder with name myblog inside your local system.
To start the development server of laravel –
php artisan serveURL: http://127.0.0.1:8000
Assuming laravel already installed inside your system.
Installation of “uxweb/sweet-alert” Package
The “uxweb/sweet-alert” package refers to the SweetAlert library, which provides a customizable and visually appealing way to display alerts or pop-up messages in web applications. SweetAlert offers a more aesthetically pleasing alternative to the default JavaScript alert boxes.
composer require uxweb/sweet-alertIt will installs the sweetalert package into your application.
After Installation,
Update “config/app.php” file
Open config/app.php,
Add this provider and an alias into it.
Providers array
'providers' => ServiceProvider::defaultProviders()->merge([
    //...
    UxWeb\SweetAlert\SweetAlertServiceProvider::class,
])->toArray(),
Alias array,
'aliases' => Facade::defaultAliases()->merge([
    //...
    'Alert' => UxWeb\SweetAlert\SweetAlert::class,
])->toArray(),
Create Notification Controller
Open project terminal and run this command,
php artisan make:controller NotificationControllerIt will create a controller class with name NotificationController.php inside app/Http/Controllers folder.
Read More: Work with VUE 3 Axios Get Request in Laravel 10 Example
Open controller class and write this complete code into it,
<?php
namespace App\Http\Controllers;
use Illuminate\Http\Request;
class NotificationController extends Controller
{
public function myNotification($type)
{
switch ($type) {
case 'message':
alert()->message('Sweet Alert with message.');
break;
case 'basic':
alert()->basic('Sweet Alert with basic.','Basic');
break;
case 'info':
alert()->info('Sweet Alert with info.');
break;
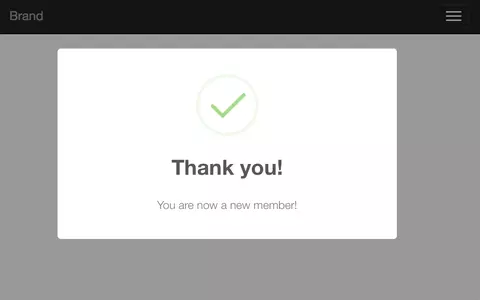
case 'success':
alert()->success('Sweet Alert with success.','Welcome to Online Web Tutor')->autoclose(3500);
break;
case 'error':
alert()->error('Sweet Alert with error.');
break;
case 'warning':
alert()->warning('Sweet Alert with warning.');
break;
default:
# code...
break;
}
return view('my-notification');
}
}
Blade Template Setup
Create a file my-notification.blade.php inside resources/views folder. Open file and write this complete code into it,
<!DOCTYPE html>
<html>
<head>
    <title>Laravel Sweet Alert Notification</title>
    <link rel="stylesheet" href="css/bootstrap-3.min.css">
    <script src="js/jquery.js"></script>

    <!-- Sweetalert plugin files -->
    <link rel="stylesheet" href="https://cdnjs.cloudflare.com/ajax/libs/sweetalert/1.1.3/sweetalert.min.css" />
    <script src="https://cdnjs.cloudflare.com/ajax/libs/sweetalert/1.1.3/sweetalert.min.js"></script>
</head>
<body>

    <h1 class="text-center">Laravel Sweet Alert Notification</h1>
    @include('sweet::alert')

</body>
</html>
Add Route
Open routes/web.php and add this route into it,
//...
use App\Http\Controllers\NotificationController;

//...
Route::get('my-notification/{type}', 'NotificationController@myNotification');
Application Testing
Run this command into project terminal to start development server,
php artisan serveExample URLs,
>> http://127.0.0.1:8000/my-notification/success
>> http://127.0.0.1:8000/my-notification/basic
>> http://127.0.0.1:8000/my-notification/message
That’s it.
We hope this article helped you to learn about How To Use SweetAlert Message Box in Laravel 10 Tutorial in a very detailed way.
If you liked this article, then please subscribe to our YouTube Channel for PHP & it’s framework, WordPress, Node Js video tutorials. You can also find us on Twitter and Facebook.
Read more