In many applications, you have been observed file upload process is bit attractive. Inside this article we will see the concept of CodeIgniter 4 drag and drop file upload using dropzone jquery plugin.
Dropzone.js is a jquery plugin, dropzone.js through we can select one by one image and also with preview.
Uploading files in application using dropzone plugin is super easy. This tutorial is very interesting and easy to learn.
We can upload any type of file using dropzone but for this tutorial we will use the feature to upload only images via dropzone jquery plugin.
Learn More –
- What are CSRF Functions in CodeIgniter 4 Tutorial
- Working with CodeIgniter 4 Model and Entity
- Working with Email Validation Rules in CodeIgniter 4
- Working with IFSC Code – CodeIgniter 4 Tutorial
Let’s get started.
CodeIgniter 4 Installation
To create a CodeIgniter 4 setup run this given command into your shell or terminal. Please make sure composer should be installed.
composer create-project codeigniter4/appstarter codeigniter-4Assuming you have successfully installed application into your local system.
Environment (.env) Setup
When we install CodeIgniter 4, we will have env file at root. To use the environment variables means using variables at global scope we need to do env to .env
Either we can do via renaming file as simple as that. Also we can do by terminal command.
Open project in terminal
cp env .envAbove command will create a copy of env file to .env file. Now we are ready to use environment variables.
Enable Development Mode
CodeIgniter starts up in production mode by default. You need to make it in development mode to see any error if you are working with application.
Open .env file from root.
# CI_ENVIRONMENT = production

 // Do it to

CI_ENVIRONMENT = development
Now application is in development mode.
Create Database
To create a database, either we can create via Manual tool of PhpMyadmin or by means of a mysql command.
We will use MySQL command to create database. Run this command into Sql tab of PhpMyAdmin.
CREATE DATABASE codeigniter4_app;Successfully, we have created a database.
Create Database Tables
Next, we need to create a table inside database.
CREATE TABLE image_uploads (
  id bigint(20) unsigned NOT NULL AUTO_INCREMENT,
  filename text COLLATE utf8mb4_unicode_ci NOT NULL,
  PRIMARY KEY (id)
 ) ENGINE=InnoDB DEFAULT CHARSET=utf8;
Database Connection
Open .env file from project root.
Search for DATABASE. You should see the connection environment variables into it. Put your updated details of database connection string values.
#--------------------------------------------------------------------
# DATABASE
#--------------------------------------------------------------------

database.default.hostname = localhost
database.default.database = codeigniter4_app
database.default.username = admin
database.default.password = admin
database.default.DBDriver = MySQLi
database.default.DBPrefix =
database.default.port = 3306
Now, database successfully connected with the application.
Create Model
Open project into terminal and run this spark command to create model file.
$ php spark make:model ImageUploadIt will create ImageUpload.php file at /app/Models folder.
Open ImageUpload.php and write this complete code into it.
<?php

namespace App\Models;

use CodeIgniter\Model;

class Imageupload extends Model
{
	protected $DBGroup              = 'default';
	protected $table                = 'image_uploads';
	protected $primaryKey           = 'id';
	protected $useAutoIncrement     = true;
	protected $insertID             = 0;
	protected $returnType           = 'array';
	protected $useSoftDelete        = false;
	protected $protectFields        = true;
	protected $allowedFields        = [
		'filename'
	];

	// Dates
	protected $useTimestamps        = false;
	protected $dateFormat           = 'datetime';
	protected $createdField         = 'created_at';
	protected $updatedField         = 'updated_at';
	protected $deletedField         = 'deleted_at';

	// Validation
	protected $validationRules      = [];
	protected $validationMessages   = [];
	protected $skipValidation       = false;
	protected $cleanValidationRules = true;

	// Callbacks
	protected $allowCallbacks       = true;
	protected $beforeInsert         = [];
	protected $afterInsert          = [];
	protected $beforeUpdate         = [];
	protected $afterUpdate          = [];
	protected $beforeFind           = [];
	protected $afterFind            = [];
	protected $beforeDelete         = [];
	protected $afterDelete          = [];
}
Create Controller
Next, we need to create a controller file.
$ php spark make:controller Dropzone --suffixIt will create a file DropzoneController.php at /app/Controllers folder.
Open controller file and write this complete code into it.
<?php

namespace App\Controllers;

use App\Controllers\BaseController;
use App\Models\Imageupload;

class DropzoneController extends BaseController
{
	public function dropzone()
    {
        return view('upload-view');
	}

	public function dropzoneStore()
    {
        $image = $this->request->getFile('file');

        $imageName = $image->getName();

        $image->move('images', $imageName);

		$imageUpload = new ImageUpload();

		$data = [
			"filename" => $imageName
		];

		$imageUpload->insert($data);

        return json_encode(array(
			"status" => 1,
			"filename" => $imageName
		));
    }
}
Create Routes
Open Routes.php from /app/Config folder.
//...

$routes->get("image-upload", "DropzoneController::dropzone");
$routes->post("dropzone/upload", "DropzoneController::dropzoneStore");

//...
Create Layout File
Next, need to create upload-view.php inside /app/Views folder.
Open this view file and write this updated code.
<!DOCTYPE html>
<html>

<head>
    <title>CodeIgniter 4 Drag And Drop File Upload Using Dropzone - Online Web Tutor</title>
    <link rel="stylesheet" href="https://maxcdn.bootstrapcdn.com/bootstrap/3.4.1/css/bootstrap.min.css">
    <script src="https://ajax.googleapis.com/ajax/libs/jquery/3.5.1/jquery.min.js"></script>
    <link href="https://cdnjs.cloudflare.com/ajax/libs/dropzone/4.0.1/min/dropzone.min.css" rel="stylesheet">
    <script src="https://cdnjs.cloudflare.com/ajax/libs/dropzone/4.2.0/min/dropzone.min.js"></script>
</head>

<body>

    <div class="container section">
        <div class="row">
            <div class="col-md-8 col-md-offset-2">
                <h3 class="text-center">CodeIgniter 4 Drag And Drop File Upload Using Dropzone</h3>
                <form action="<?= base_url('dropzone/upload') ?>" method="POST" enctype="multipart/form-data" class="dropzone" id='image-upload'>
                    <div>
                        <h3 class="text-center">Upload Multiple Image By Click On Box</h3>
                    </div>
                </form>
            </div>
        </div>
    </div>
    <script type="text/javascript">
        Dropzone.options.imageUpload = {
            maxFilesize: 1,
            acceptedFiles: ".jpeg,.jpg,.png,.gif",
        };
    </script>
</body>

</html>
Application Testing
Open project terminal and start development server via command:
php spark serveURL: http://localhost:8080/image-upload
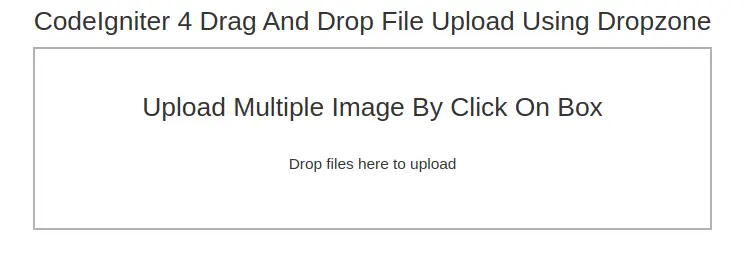
This is the view we will get before upload.

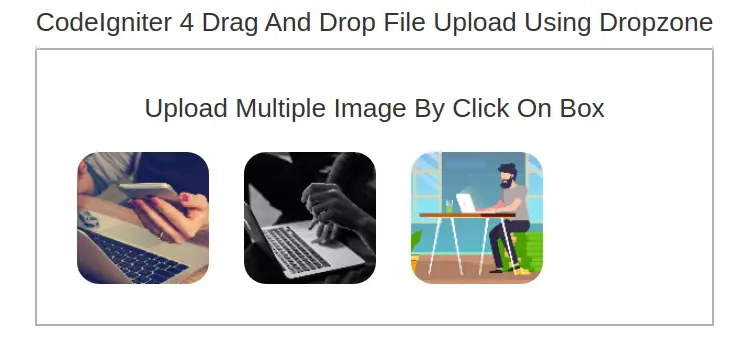
Let’s upload few images by dragging and dropping into area.

Data has been saved to database table as well.

We hope this article helped you to learn about CodeIgniter 4 Drag and Drop File Upload Using Dropzone Tutorial in a very detailed way.
If you liked this article, then please subscribe to our YouTube Channel for PHP & it’s framework, WordPress, Node Js video tutorials. You can also find us on Twitter and Facebook.
Read more