CodeIgniter lets you cache your pages in order to achieve maximum performance.
CodeIgniter is quite fast, the amount of dynamic information what we need to display in pages will correlate directly to the server resources, memory, and processing cycles utilized, which affect page load speeds. By caching pages, since they are saved in their fully rendered state, we can achieve performance much closer to that of static web pages.
Inside this article we will see the concept of Web Page caching in CodeIgniter 4. Additionally we will discuss How can we clear web cache as well. This article is quite interesting to learn page caching in CodeIgniter.
Learn More –
- Create Custom Spark Console Command in CodeIgniter 4
- Create Fake REST APIs Server in CodeIgniter 4
- Create Signature Pad & Save Using jQuery in CodeIgniter 4
- CRUD Operation in CodeIgniter 4 Tutorial
Let’s get started.
CodeIgniter 4 Installation
To create a CodeIgniter 4 setup run this given command into your shell or terminal. Please make sure composer should be installed.
composer create-project codeigniter4/appstarter codeigniter-4Assuming you have successfully installed application into your local system.
Environment (.env) Setup
When we install CodeIgniter 4, we will have env file at root. To use the environment variables means using variables at global scope we need to do env to .env
Either we can do via renaming file as simple as that. Also we can do by terminal command.
Open project in terminal
cp env .envAbove command will create a copy of env file to .env file. Now we are ready to use environment variables.
Enable Development Mode
CodeIgniter starts up in production mode by default. You need to make it in development mode to see any error if you are working with application.
Open .env file from root.
# CI_ENVIRONMENT = production

 // Do it to

CI_ENVIRONMENT = development
Now application is in development mode.
How does Page Caching Works?
Caching can be enabled on a per-page basis, and you can set the length of time that a page should remain cached before being refreshed. When a page is loaded for the first time, the file will be cached using the currently configured cache engine.
On subsequent page loads, the cache file will be retrieved and sent to the requesting user’s browser. If it has expired, it will be deleted and refreshed before being sent to the browser.
Cache Configuration in Application
To configure cache – means where cache files will be stored what permission should be assigned to created cache files. All these settings we will do in Cache.php file at /app/Config.
public $file = [
     'storePath' => WRITEPATH . 'cache/',
     'mode' => 0640,
];
By default it will be stored with 0640 file permission and at /writable/cache folder.
Caching Information by PHP Spark
In codeigniter 4.x we have provided a command line interface through which we can manage CodeIgniter 4 application i.e by php spark
To manage cache also we have a php spark command.
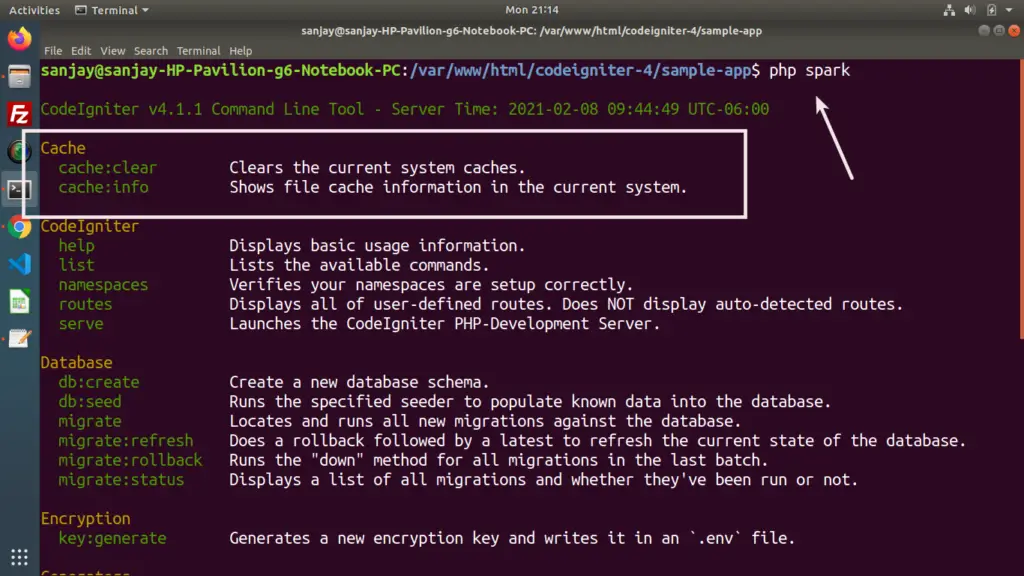
In the above commands list we have two command –
- cache:clear – To clear application caches
- cache:info – To display application cache information.
Clear CodeIgniter 4 Application Cache
Open project in terminal and type this command.
$ php spark cache:clearIt will clear all cache from application which is at /writable/cache folder.
Display Application Cache Information
$ php spark cache:info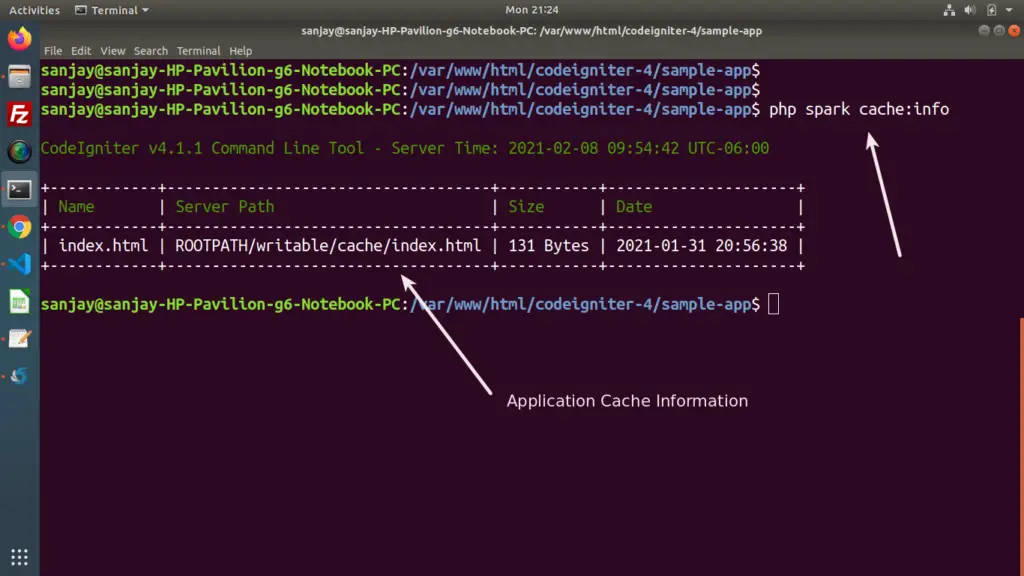
Application cache which will be stored inside /writable/cache folder will be displayed here inside this tabular format.
Caching a Web Page
To understand the page caching concept, let’s make a route, controller, it’s method and a view file.
Adding Route
Open Routes.php from /app/Config and add this route into it.
$routes->get("cache-this-page", "Site::index");Create a View file
Create a view file with name site_index.php at /app/Views.
<h2>Welcome to Site Controller "index"</h2>
Create a Controller
$ php spark make:controller SiteIt will creates a file with name Site.php inside /app/Controllers folder.
<?php

namespace App\Controllers;

use App\Controllers\BaseController;

class Site extends BaseController
{
	public function index()
	{
        $options = [
           "cache" => 60 // it is in seconds, means 60 seconds
        ];
		return view("site_index", [], $options);
	}
}
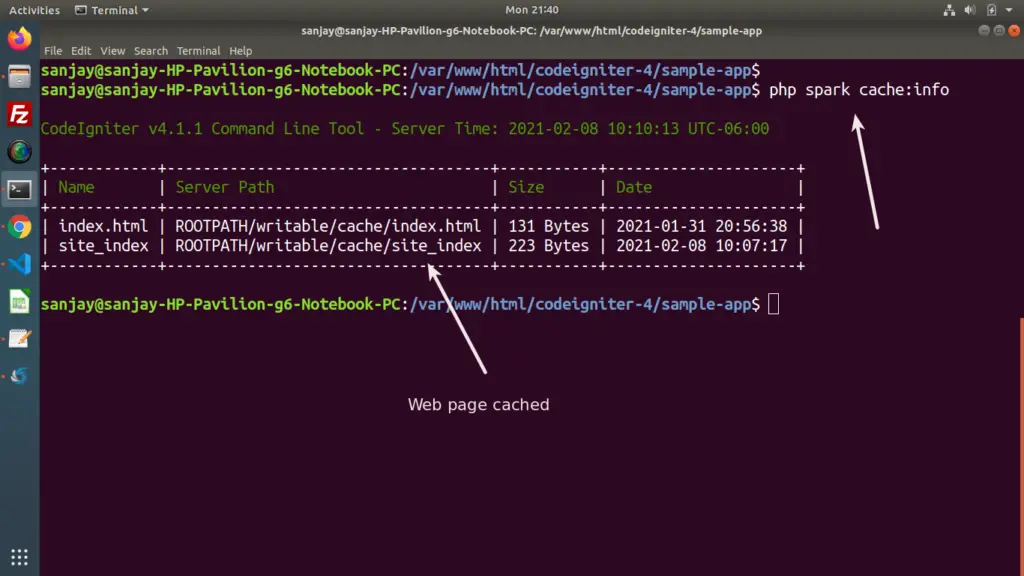
Here we are caching the page view site_index for 60 seconds. It means the site_index page content will be fix for this given time slot.
When any user view this page, page will have the fixed content what it contains before caching. When we add any other contents into a cached view file, it will be reflect any more.
Web Page Caching Analysis
view(“template-file”, $data, $options)
When we set cache = 60 means the view file will be cached in application for 60 seconds. Whenever we load the web page again and again in between 60 seconds then page will not be rendered from /app/Views instead it will be loaded from cache folder i.e /writable/cache.
Alternative Option to Cache Web Page
We don’t have the single approach to do this by adding $options into view(). We have a method in CodeIgniter 4 which will do the same what we achieved above.
Let’s modify the same controller code by this method –
<?php

namespace App\Controllers;

use App\Controllers\BaseController;

class Site extends BaseController
{
	public function index()
	{
		// $options = [
		// 	"cache" => 60 // it is in seconds, means 60 seconds
		// ];

		$this->cachePage(60); // 60 seconds

		return view("site_index");
	}
}
Deleting Application Caches
Caching multiple web pages some times not give the better presentation what we expect after doing a work effort over template files.
Templates render always from cache according to assigned time slots.
Page Cache will be removed from these ways –
- Automatically pages will be removed from cache when the cache time expires for that page.
- Manually delete page cache from /writable/cache folder.
- Use Spark command php spark cache:clear
Using Service to display Cache Information
We have a CodeIgniter 4 service by the help of which we can display cache information. The same cache information we have displayed above using php spark cache:info.
Cache Service
We are using service inside a controller to display cache information.
<?php

namespace App\Controllers;

use App\Controllers\BaseController;

class Site extends BaseController
{
	public function index()
	{
		$cache = \Config\Services::cache();
		echo "<pre>";
		print_r($cache->getCacheInfo());
	}
}
When we run this, here is the output of this method –
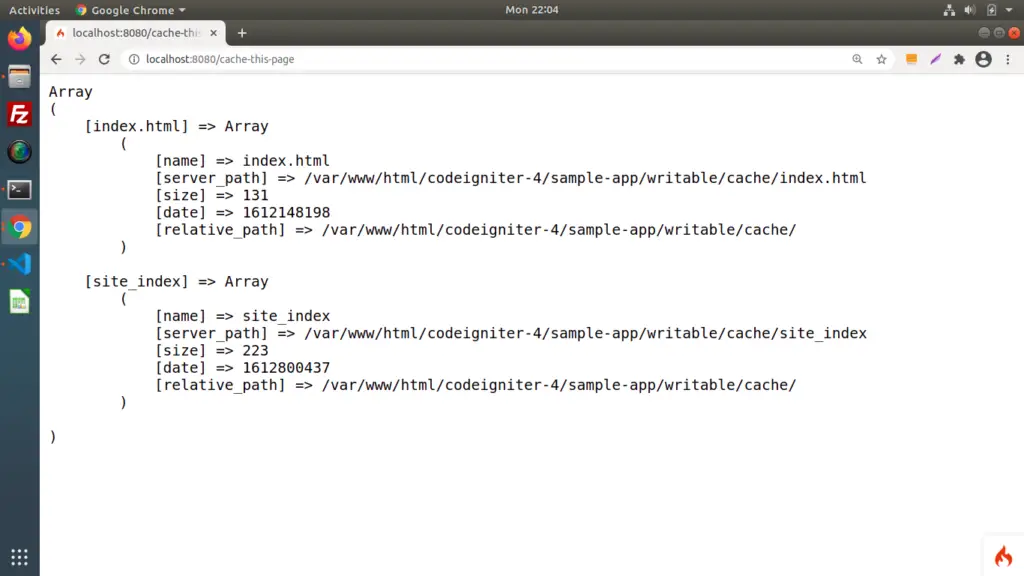
$cache = \Config\Services::cache();

print_r($cache->getCacheInfo());

OR

$cache = service("cache");

print_r($cache->getCacheInfo());
We hope this article helped you to learn Web Page Caching in CodeIgniter 4 in a very detailed way.
If you liked this article, then please subscribe to our YouTube Channel for PHP & it’s framework, WordPress, Node Js video tutorials. You can also find us on Twitter and Facebook.
Read more
It’s going to be ending of mine day, however before end I am reading this impressive post to increase my experience.