In CodeIgniter 4.x version there are several spark command line commands which helps to make application development faster. There are several other articles over this blogging site which helps you to learn more and more about the new features of CodeIgniter 4.x.
Inside this article, we will see the complete codeigniter 4 generators commands. These commands are useful to generate CodeIgniter 4 skeleton of a controller, model, scaffold files etc. Very effective feature of CodeIgniter 4 i.e spark command line tool.
Learn More –
- Custom Helper in CodeIgniter 4
- DataTable Excel Data Export in CodeIgniter 4 Tutorial
- Encryption Service in CodeIgniter 4 Tutorial
- Export Data Into Excel Report In CodeIgniter 4 Tutorial
Let’s get started to learn this interesting topic.
CodeIgniter 4 Installation
To create a CodeIgniter 4 setup run this given command into your shell or terminal. Please make sure composer should be installed.
composer create-project codeigniter4/appstarter codeigniter-4Assuming you have successfully installed application into your local system.
Environment (.env) Setup
When we install CodeIgniter 4, we will have env file at root. To use the environment variables means using variables at global scope we need to do env to .env
Either we can do via renaming file as simple as that. Also we can do by terminal command.
Open project in terminal
cp env .envAbove command will create a copy of env file to .env file. Now we are ready to use environment variables.
Enable Development Mode
CodeIgniter starts up in production mode by default. You need to make it in development mode to see any error if you are working with application.
Open .env file from root.
# CI_ENVIRONMENT = production

 // Do it to

CI_ENVIRONMENT = development
Now application is in development mode.
CodeIgniter 4 Generators
Open project in terminal and type the command.
$ php sparkWhen we type this, it will list all available spark commands list. One more thing, CodeIgniter 4.x is in development mode means not officially released as stable version.
Here, inside terminal after php spark, we can the available list.
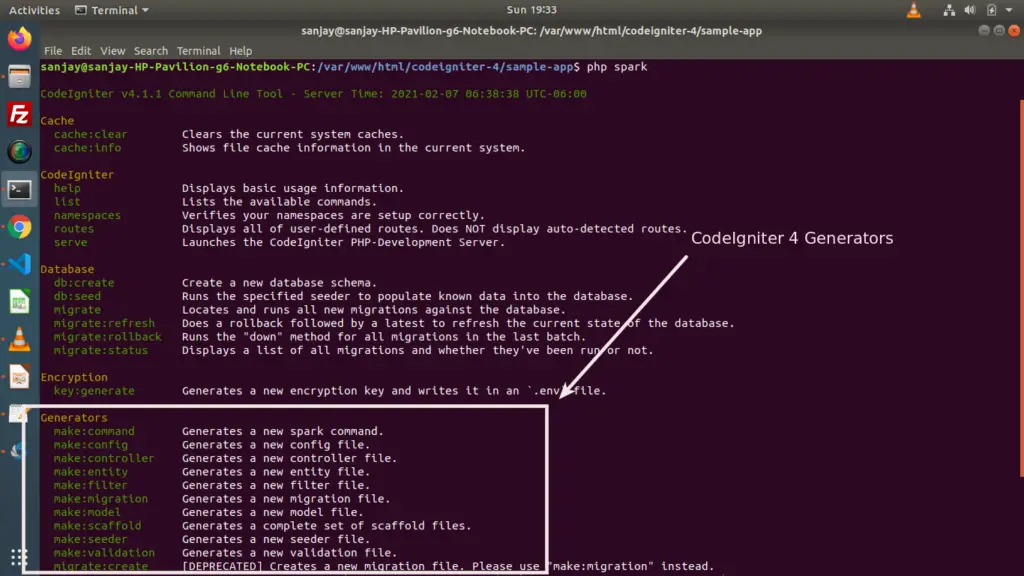
Inside command list we have several command sections. A section called “Generators“. This is used to generate a custom command file, config, controller etc.
It provides a default skeleton when we run make:<generator>
Examples
Create a Controller File
$ php spark make:controller DeviceIt will creates a normal controller file with name Device.php inside /app/Controllers
$ php spark make:controller Device --restfulIt will creates a resource restful controller file with name Device.php inside /app/Controllers. This file will contains by default several methods which handles restful requests.
Create a Model File
$ php spark make:model UserIt will creates a model file with name User.php inside /app/Models
Generators Skeleton Configuration
When we run any spark generator command, it will creates a file.
Do you know from where default skeleton of any files comes inside a CodeIgniter 4 application?
Open Generators.php file from /app/Config/Generators.php. Inside this file, we can see we have some piece of codes like this.
public $views = [
    'make:command' => 'CodeIgniter\Commands\Generators\Views\command.tpl.php',
    'make:controller' => 'CodeIgniter\Commands\Generators\Views\controller.tpl.php',
    'make:entity' => 'CodeIgniter\Commands\Generators\Views\entity.tpl.php',
    'make:filter' => 'CodeIgniter\Commands\Generators\Views\filter.tpl.php',
    'make:migration' => 'CodeIgniter\Commands\Generators\Views\migration.tpl.php',
    'make:model' => 'CodeIgniter\Commands\Generators\Views\model.tpl.php',
    'make:seeder' => 'CodeIgniter\Commands\Generators\Views\seeder.tpl.php',
     'make:validation' => 'CodeIgniter\Commands\Generators\Views\validation.tpl.php',
     'session:migration' => 'CodeIgniter\Commands\Generators\Views\migration.tpl.php',
];
Let’s understand it in a little bit clear way.
'make:seeder' => 'CodeIgniter\Commands\Generators\Views\seeder.tpl.php',Above make:seeder generator command will generates a seeder file. This command takes the seeder skeleton from seeder.tpl.php file.
Finding Default Skeleton Views for Generators
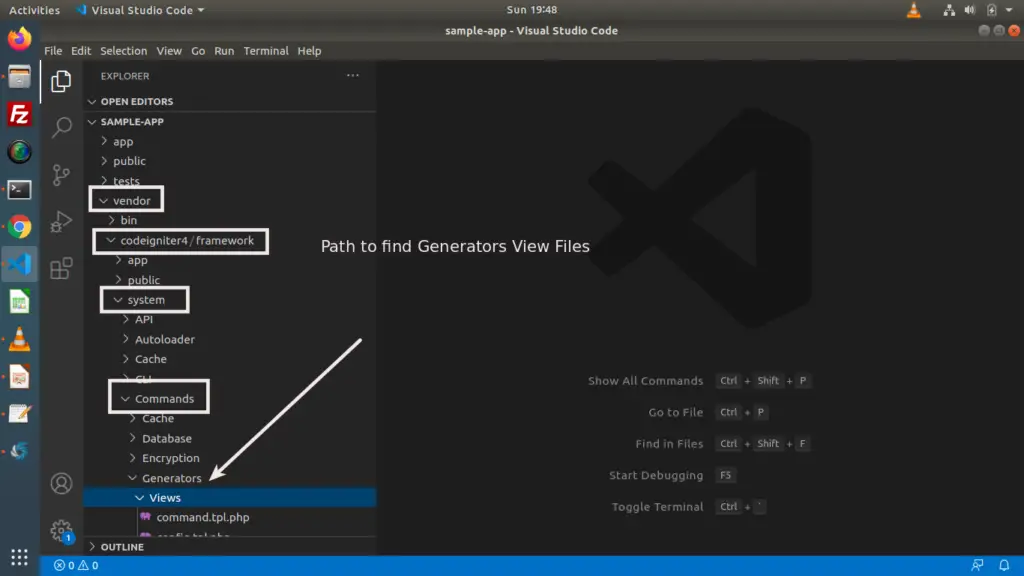
Path: /vendor/codeigniter4/framework/system/Commands/Generators/Views
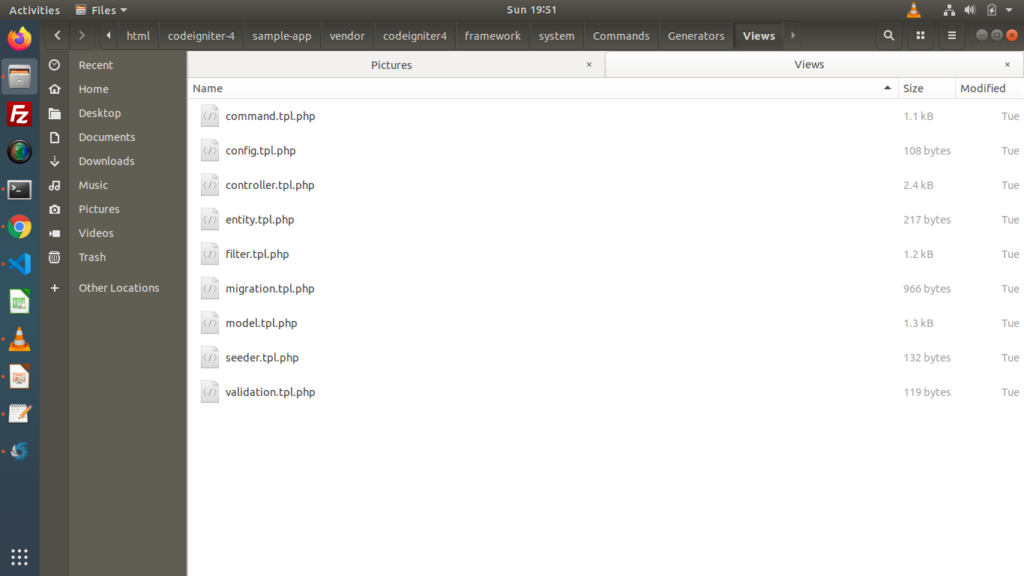
Let’s open any of this template view file for generator – seeder.tpl.php
<@php

namespace {namespace};

use CodeIgniter\Database\Seeder;

class {class} extends Seeder
{
	public function run()
	{
		//
	}
}
Spark Command to create a seeder file –
$ php spark make:seeder Createusers- {namespace} will be replaced by App\Database\Seeds. Because we are creating a seeder file, which will be stored inside /app/Database/Seeds/Createusers.php. This is default namespace will be generated, but in case if we want to change this. Simply we need to pass –namespace flag with command.
<?php

namespace App\Database\Seeds;

use CodeIgniter\Database\Seeder;

class Createusers extends Seeder
{
	public function run()
	{
		//
	}
}
$ php spark make:seeder CreateUsers --namespace "Some Path"- {class} will be replaced by Createusers what we have passed in command.
Help Manual of Generators
When we use generators commands, then we don’t know actually what parameters we have to pass in command line to generate it. So if any confusion while running, we have the help manual of CodeIgniter 4 generators provided.
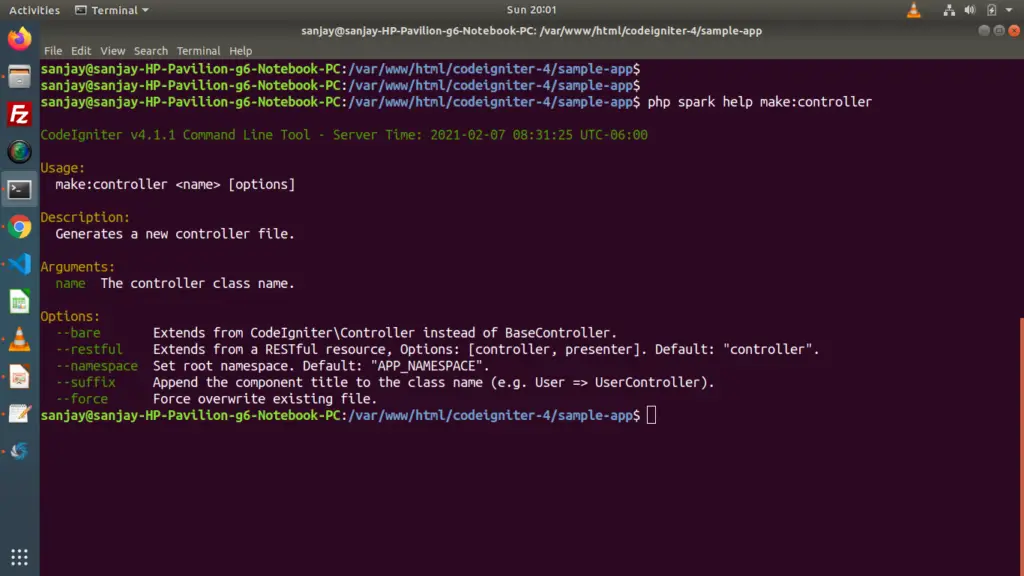
Let’s see the help manual for make:controller
$ php spark help make:controllerSimply add help before make.
Work with Generator Template Files
In some cases, just think for a second. If we need two default methods when we create a seeder file.
So for this, we need to work with seeder.tpl.php
<@php

namespace {namespace};

use CodeIgniter\Database\Seeder;

class {class} extends Seeder
{
	public function run()
	{
		//
	}

	// Method #1
	public function method1(){
		// code here
	}

	public function method2(){
		// code here
	}
}
Next, when we run command to create a config file like –
$ php spark make:seeder CreateproductsIt will creates a file with name Createproducts.php at /app/Database/Seeds folder. Inside this Createproducts.php file we should see the default methods what we have added inside tpl file will be default added to it.
Output
<?php

namespace App\Database\Seeds;

use CodeIgniter\Database\Seeder;

class Createproducts extends Seeder
{
	public function run()
	{
		//
	}

	// Method #1
	public function method1(){
		// code here
	}

	public function method2(){
		// code here
	}
}
By this way, we can update or change any of the default template file for CodeIgniter 4 generators.
Note*: Updating or modifying core files will crash the default working of CodeIgniter 4 generators. So while working with these files be careful.
We hope this article helped you to learn Complete CodeIgniter 4 Generators Tutorial in a very detailed way.
If you liked this article, then please subscribe to our YouTube Channel for PHP & it’s framework, WordPress, Node Js video tutorials. You can also find us on Twitter and Facebook.
Read more
Hello, please make a tutorial about social login in codeigniter 4 please, i cant find the tutorial about it