
Populating a database with realistic but fake data is a common need during the development and testing phases of a Node.js Express application. Sequelize, a powerful ORM for Node.js, simplifies database interactions.
In this tutorial, we’ll see how to efficiently generate fake data using tools like Faker and Sequelize to streamline the development and testing process.
Read More: Create HTTP Web Server in Node js Using Express js
Let’s get started.
Step-by-Step Project Plan
Here, these are the steps which you need to follow to create an application which seeds dummy data:
- Setup package.json file
- Installation of Node packages
- Project Initialization
- Database Connectivity
- Setup Migration (DB Table)
- Create Seeder
- Application Testing
Seed Fake Data with Node.js and Sequelize CLI
Follow all these steps very carefully to seed fake data.
Step #1: Setup “package.json” file
Open project into terminal and run this command,
npm init -yIt will create a basic file (first file) for your application.
{
    "name": "mysql",
    "version": "1.0.0",
    "description": "",
    "main": "index.js",
    "scripts": {
        "test": "echo \"Error: no test specified\" && exit 1"
    },
    "keywords": [],
    "author": "",
    "license": "ISC"
}
Step #2: Installation of “Node packages”
Back to project terminal and run this command,
npm install express mysql2 sequelize sequelize-cli @faker-js/fakerHere, you are installing 5 node packages in a single line command.
Once installed your package.json file will be updated as,
{
    "name": "mysql",
    "version": "1.0.0",
    "description": "",
    "main": "index.js",
    "scripts": {
        "test": "echo \"Error: no test specified\" && exit 1"
    },
    "keywords": [],
    "author": "",
    "license": "ISC",
    "dependencies": {
        "@faker-js/faker": "^8.3.1",
        "express": "^4.18.2",
        "mysql2": "^3.6.2",
        "sequelize": "^6.33.0",
        "sequelize-cli": "^6.6.1"
    }
}
After successful installation of sequelize-cli, you will get the command list of sequelize to work with application.
So, if you run this command
npx sequelize
Read More: Nodejs Express REST APIs with JWT Authentication Tutorial
Step #3: Project Initialization
Back to project terminal and run this command,
npx sequelize initAbove command will initializes your node project and create 4 important folders into it.
Folders are: config, migrations, models, seeders.
Additionally, you will get config.json file inside /config and index.js file inside /models folder.
Also, create this basic file app.js (main file) at project root.
Once you create these files, update main property of package.json file to app.js. Old value you will get as index.js.
{
    "name": "mysql",
    "version": "1.0.0",
    "description": "",
    <strong>"main": "app.js",</strong>
    ...
}
Step #4: Database Connectivity
Create a database with name “your_database_name“.
Go inside project editor and open config.json file and update development property. Add database connection string values.
Code of config.json file as,
{
    "development": {
        "username": "your_db_username",
        "password": "your_db_password",
        "database": "your_database_name",
        "host": "127.0.0.1",
        "dialect": "mysql"
    },
    "test": {
        "username": "root",
        "password": null,
        "database": "database_test",
        "host": "127.0.0.1",
        "dialect": "mysql"
    },
    "production": {
        "username": "root",
        "password": null,
        "database": "database_production",
        "host": "127.0.0.1",
        "dialect": "mysql"
    }
}
Step #5: Setup Migration (DB Table)
Back to project terminal and run this command,
npx sequelize migration:create --name create_employees_tableIt will create a file in your project folder.
- File 20231029153121-create-employee.js migration file inside /migrations folder.
Open migration file and write this complete code into it,
'use strict';
/** @type {import('sequelize-cli').Migration} */
module.exports = {
    async up(queryInterface, Sequelize) {
        await queryInterface.createTable('employees', {
            id: {
                allowNull: false,
                autoIncrement: true,
                primaryKey: true,
                type: Sequelize.INTEGER
            },
            name: {
                type: Sequelize.STRING(120),
                allowNull: false
            },
            email: {
                type: Sequelize.STRING(50),
                allowNull: false
            },
            gender: {
                type: Sequelize.ENUM("male", "female", "other"),
                defaultValue: "male"
            },
            mobile: {
                type: Sequelize.STRING(50),
                allowNull: true
            }
        });
    },
    async down(queryInterface, Sequelize) {
        await queryInterface.dropTable('employees');
    }
};
Back to project terminal and run this command,
npx sequelize db:migrateIt will create a table with name employees in your database.
Read More: Creating CRUD APIs with Node.js and Sequelize CLI
Step #5: Create Seeder (Seed Fake Data)
Run this command,
npx sequelize seed:generate --name EmployeeSeederIt will create a file in your project folder.
- File 20231128070944-EmployeeSeeder.js migration file inside /seeders folder.
Open file and write this complete code into it,
'use strict';

const { faker } = require("@faker-js/faker");

/** @type {import('sequelize-cli').Migration} */
module.exports = {
    async up(queryInterface, Sequelize) {
        /**
         * Add seed commands here.
         *
         * Example:
         * await queryInterface.bulkInsert('People', [{
         *   name: 'John Doe',
         *   isBetaMember: false
         * }], {});
         */
        var employees = generateFakeEmployees(200);

        await queryInterface.bulkInsert('employees', employees, {});
    },

    async down(queryInterface, Sequelize) {
        /**
         * Add commands to revert seed here.
         *
         * Example:
         * await queryInterface.bulkDelete('People', null, {});
         */
    }
};


function generateFakeEmployees(count) {

    let students = [];

    for (let i = 0; i < count; i++) {

        students.push({
            "name": faker.person.fullName(),
            "email": faker.internet.email(),
            "mobile": faker.phone.number(),
            "gender": faker.helpers.arrayElement(["male", "female", "other"])
        });
    }

    return students;
}
Back to project terminal and run this command,
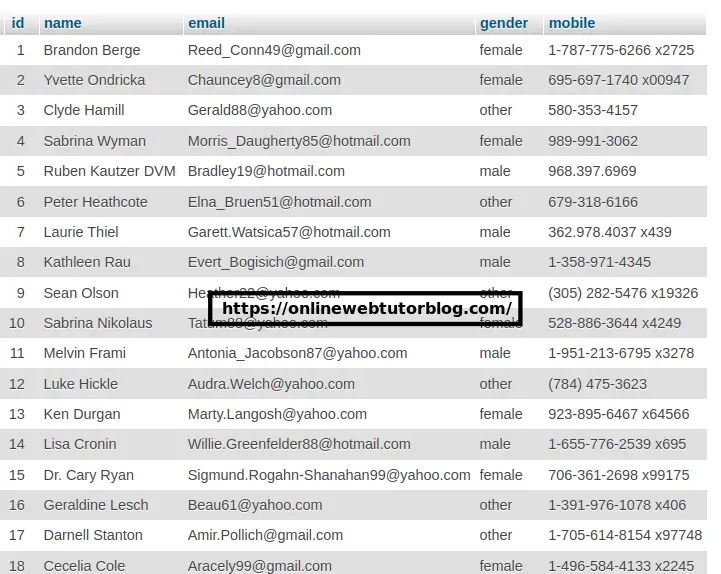
npx sequelize db:seed --seed 20231128070944-EmployeeSeederIt will generate 200 fake employees data for table.
That’s it.
We hope this article helped you to learn about How To Generate Fake Data in Node Js Express Sequelize Tutorial in a very detailed way.
If you liked this article, then please subscribe to our YouTube Channel for PHP & it’s framework, WordPress, Node Js video tutorials. You can also find us on Twitter and Facebook.
Read more