We create wordpress admin tables using WP_List_Table class to show data. In the last tutorial we displayed static data set to wordpress table.
Now, How to bind data from database we will discuss in this tutorial. We will fetch data from wp_users table, change table column name as per user data and display them.
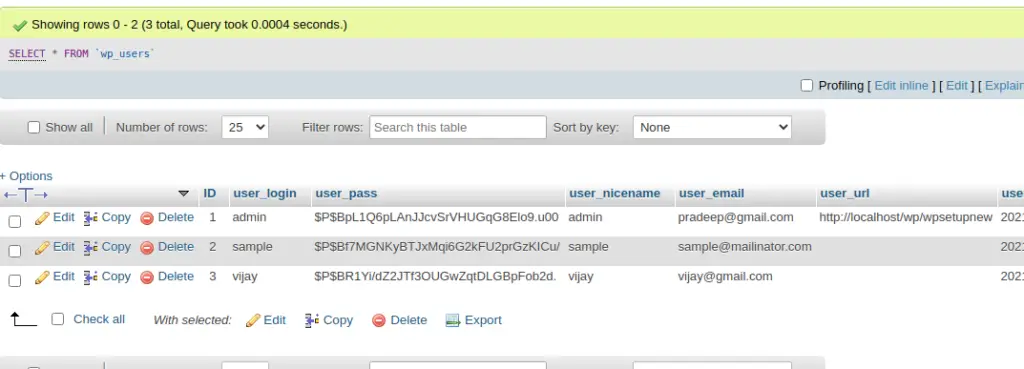
Here, is the columns of wp_users table.

We will show ID, user_login, user_nicename, user_email.
Fake User Data into Database Table
We have inserted few users data into table by adding from WordPress Admin.
To add new user you need to go Users >> Add New inside admin panel.
Get User Data From Database Table
We will use global $wpdb object to fetch data from wp_users table.
global $wpdb;

$wpdb->get_results(
    "SELECT ID,user_login,user_email,display_name from {$wpdb->prefix}users",
    ARRAY_A
);
{$wpdb->prefix} returns prefix of wordpress database. In this case it is wp_. In your case it may or may differ.
Above query will returns the user data from wp_users table. We will bind this users data to wordpress admin table.
Plugin Setup
Here, is the complete code of plugin.
<?php
/*
Plugin Name:  Simple Employees Table
Description: It displays a table with employee data
Author: Online Web Tutor
Author URI: https://onlinewebtutorblog.com/
License: GPLv2 or later
License URI: https://www.gnu.org/licenses/gpl-2.0.html
Text Domain: basic-wp-list-table
Version: 1.0
*/

// Loading table class
if (!class_exists('WP_List_Table')) {
      require_once(ABSPATH . 'wp-admin/includes/class-wp-list-table.php');
}

// Extending class
class Employees_List_Table extends WP_List_Table
{
      <strong>private function get_users_data()
      {
            global $wpdb;

            return $wpdb->get_results(
                  "SELECT ID,user_login,user_email,display_name from {$wpdb->prefix}users",
                  ARRAY_A
            );
      }</strong>

      // Define table columns
      function get_columns()
      {
            $columns = array(
                  'cb'            => '<input type="checkbox" />',
                  'ID' => 'ID',
                  'user_login' => 'Username',
                  'display_name'    => 'Name',
                  'user_email'      => 'Email'
            );
            return $columns;
      }

      // Bind table with columns, data and all
      function prepare_items()
      {
            $columns = $this->get_columns();
            $hidden = array();
            $sortable = array();
            $this->_column_headers = array($columns, $hidden, $sortable);

<strong>            $this->items = $this->get_users_data();</strong>
      }

      // bind data with column
      function column_default($item, $column_name)
      {
            switch ($column_name) {
                  case 'ID':
                  case 'user_login':
                  case 'user_email':
                        return $item[$column_name];
                  case 'display_name':
                        return ucwords($item[$column_name]);
                  default:
                        return print_r($item, true); //Show the whole array for troubleshooting purposes
            }
      }

      function column_cb($item)
      {
            return sprintf(
                  '<input type="checkbox" name="user[]" value="%s" />',
                  $item['ID']
            );
      }

      //...
}

// Adding menu
function my_add_menu_items()
{
      add_menu_page('Employees List Table', 'Employees List Table', 'activate_plugins', 'employees_list_table', 'employees_list_init');
}
add_action('admin_menu', 'my_add_menu_items');

// Plugin menu callback function
function employees_list_init()
{
      // Creating an instance
      $empTable = new Employees_List_Table();

      echo '<div class="wrap"><h2>Employees List Table</h2>';
      // Prepare table
      $empTable->prepare_items();
      // Display table
      $empTable->display();
      echo '</div>';
}
Plugin
Go to Plugins >> Installed Plugins

Click on Activate
It will create a admin menu. When we click on it.
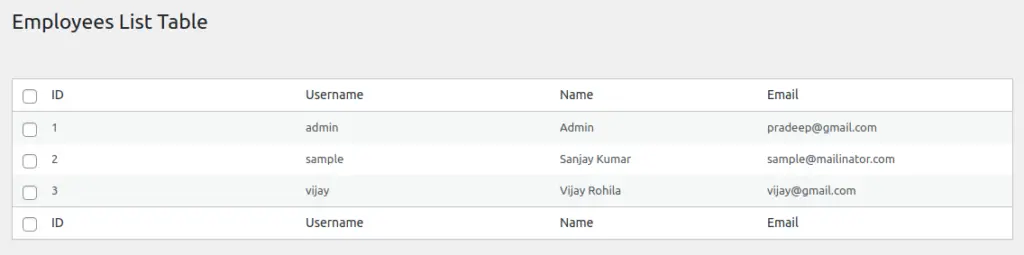
Now, successfully we have displayed the dynamic data means database table data to created wordpress admin table.
Read more